10 Essential Tips to Troubleshoot Your Air Conditioning System
Summer heat can be brutal, and a broken AC unit is the last thing you need. Knowing how to troubleshoot your air conditioning system can save you time and money. This DIY AC troubleshooting guide for your HVAC system will help you tackle common issues like weird noises, weak airflow, and strange smells related to your furnace repair.
Understanding these problems is crucial for any homeowner. Many folks have faced AC failures during sweltering days, leading to discomfort and costly repairs. With this guide, you’ll gain confidence in diagnosing issues yourself, including a broken air conditioner in your HVAC system. You’ll learn simple fixes that keep your cool air flowing smoothly. Get ready to take control of your comfort and ensure your home stays chill all summer long.
Key Takeaways
-
Always set your thermostat to the desired temperature to ensure your AC runs efficiently.
-
Make sure all windows and doors are closed to prevent cool air from escaping and to help your AC work better.
-
Regularly check circuit breakers to see if any have tripped, as this can stop your AC from functioning.
-
Clean or replace air filters every month to improve airflow and maintain air quality in your home.
-
Ensure that air vents are open and unobstructed for optimal cooling throughout your space.
-
Inspect outdoor units for debris or damage, and call a technician if you notice any issues that you can’t fix yourself.
Set Thermostat Correctly
Adjust Temperature
Adjust the thermostat to your desired cooling temperature. This setting is crucial for optimal performance. If the temperature is set too high, the AC may not cool effectively. A recommended setting is around 75°F during hot days.
Keep in mind that every degree can impact energy use. Lowering the temperature by just one degree can increase electricity costs. Monitor how the system responds after making adjustments.
Check Functionality
Ensure the thermostat is functioning properly. A malfunctioning thermostat can lead to poor cooling or heating. If you notice inconsistent temperatures, it might be time to check its operation.
Inspect the display for any error messages or unusual readings. Replace batteries if necessary, especially for battery-operated models. Sometimes, dust and debris can affect performance. Clean around the thermostat to ensure accurate readings.
Familiarize with Settings
Familiarize yourself with programmable settings for energy efficiency. Many modern thermostats offer features like scheduling and remote access. These options help maintain comfort while saving energy.
Set a schedule that aligns with your daily routine. For instance, program the thermostat to raise the temperature when you’re not home. This simple change can lead to significant savings on your utility bills.
Using these advanced settings can also help prevent overworking your HVAC system. An efficient system lasts longer and requires fewer repairs.
Steps to Reset Thermostat
-
Turn off your HVAC system.
-
Remove the thermostat cover.
-
Locate the reset button.
-
Press and hold it for a few seconds.
-
Replace the cover and turn the system back on.
Following these steps helps reset your thermostat to factory settings if needed.
Close Windows and Doors
Seal Windows
Sealing all windows is crucial for maintaining a comfortable indoor temperature. Open windows allow warm air to enter, making the air conditioner work harder. This can lead to higher energy bills and inefficient cooling.
Weather stripping is an effective way to seal windows. It comes in various materials like foam or rubber. Installing it is simple and can greatly reduce air leaks. Caulking also helps fill gaps around window frames. It creates a tight seal that prevents air from escaping or entering.
Check each window carefully for any signs of gaps or cracks. Even small openings can let in warm air. If you find any, apply caulk to close them off. This small step can make a big difference in energy efficiency.
Close Doors
Closing all doors helps keep cool air inside the rooms that need it most. Open doors can allow conditioned air to escape, leading to uneven cooling in your home.
Interior doors should be kept closed during hot weather, especially those leading to uncooled areas like garages or attics. This keeps the cool air contained where it’s needed.
If you have rooms that are not used often, consider closing those doors as well. This helps your AC focus on cooling the areas that people use the most.
Check for Gaps
Inspecting for gaps around both doors and windows is essential. Air leaks can occur in many places, including door frames and window sills. These gaps may seem minor but can significantly impact your home’s temperature.
Use your hand to feel for drafts around windows and doors. If you notice cold air coming in, it indicates a gap that needs attention.
You might also want to check the bottom of doors. A small gap there can let warm air flow into the room. Installing door sweeps can help eliminate this issue.
Energy Efficiency
By ensuring that all windows and doors are sealed properly, you enhance your home’s energy efficiency. An efficient AC unit will run less frequently, providing savings on utility bills.
Proper sealing also contributes to a more comfortable living environment. People will feel cooler without needing to lower the thermostat even further.
In summary, closing windows and doors is a straightforward yet effective method of improving AC performance. By sealing all openings, using weather stripping or caulking, and checking for gaps, you ensure that cool air stays inside where it belongs.
Check Circuit Breakers
Inspect Panel
Inspect the electrical panel first. Look for any tripped breakers related to your AC unit. A tripped breaker often indicates an overload or fault in the system.
If you notice a breaker that is in the “off” position, it needs attention. These breakers protect your AC from potential damage. They can trip due to various reasons such as power surges or short circuits.
Reset Breakers
Resetting a tripped breaker is straightforward. Flip the switch back to the “on” position. This action restores power to the air conditioning system.
After resetting, check if your AC starts working again. If it trips again immediately, there may be a deeper issue at play.
Rated Appropriately
Ensure that the circuit breaker is rated appropriately for your AC unit. Each air conditioner requires a specific amperage to operate correctly.
Using a breaker with too low an amperage can lead to frequent trips. Conversely, a breaker with too high an amperage might not trip when it should, risking damage to your unit.
Check the specifications of your AC model. The manufacturer usually provides this information in the user manual or on the unit itself.
Common Issues
Several common issues can lead to breaker breakdowns. Overloading occurs when too many devices draw power from the same circuit.
Faulty wiring can also cause problems. Damaged wires may lead to short circuits, triggering the breaker to trip.
In some cases, a malfunctioning compressor within the AC could cause excessive current draw. Regular maintenance can help prevent these issues from arising.
Troubleshooting Steps
Follow these steps if you encounter issues with your circuit breakers:
-
Inspect the electrical panel.
-
Identify any tripped breakers.
-
Reset the breakers.
-
Monitor for further trips.
-
Check if your breaker is rated correctly.
These steps help determine if the problem lies within the circuit breakers or elsewhere in the system.
Clean Air Filters
Filter Maintenance
Air filters play a crucial role in your AC system. A dirty air filter restricts airflow and reduces efficiency. This can lead to higher energy bills and poor cooling performance. Regular maintenance is key to keeping your AC running smoothly.
Remove and clean or replace air filters every three months. This simple task can significantly enhance airflow. If you notice that dust accumulates quickly, consider checking the filters more often. Some households may need to change filters monthly, especially if they have pets or live in dusty areas.
High-Efficiency Filters
Using high-efficiency air filters can improve indoor air quality. These filters capture smaller particles, including allergens and dust mites. They help create a healthier living environment. Many high-efficiency filters are rated with a MERV (Minimum Efficiency Reporting Value) score. A MERV rating of 8 to 13 is ideal for home use.
High-efficiency filters can last longer than standard ones. They may require less frequent replacements, saving you time and money in the long run. Always check the manufacturer’s guidelines for proper filter selection.
Symptoms of Clogged Filters
Clogged air filters can cause various issues in your AC system. You might notice reduced airflow from vents. Rooms may feel warmer than usual, even when the AC is running. Increased humidity levels indoors can also occur due to poor airflow.
Other signs include unusual noises coming from the unit or an increase in energy bills. If you experience any of these symptoms, inspect your air filters immediately. Addressing clogged filters early can prevent further damage to your AC system.
Steps for Cleaning Filters
Cleaning air filters is straightforward. Follow these steps:
-
Turn off the AC unit.
-
Remove the filter from its housing.
-
Use a vacuum cleaner to remove dust and debris.
-
Wash the filter with warm soapy water if it’s washable.
-
Allow the filter to dry completely before reinstalling it.
This process takes only a few minutes but makes a big difference in performance.
Importance of Clean Filters
Keeping air filters clean enhances overall system efficiency. It helps maintain consistent temperatures throughout your home. Clean filters also promote better indoor air quality by trapping harmful particles.
Neglecting this maintenance task can lead to costly repairs down the line. A well-maintained AC unit lasts longer and operates more efficiently.
Open Air Vents
Check Vents
Verify that all air conditioner vents are fully open. This step ensures proper airflow throughout your home. If any vents are closed, it can restrict cool air from reaching certain areas. Closed vents can lead to uneven cooling and increased energy costs.
Furniture or other objects can block vents. Avoid placing large items in front of them. This blockage can cause the unit to work harder, leading to overheating. Proper airflow is essential for efficient operation.
Adjust Airflow
Balance airflow by adjusting vents in different rooms as needed. Some rooms may receive more cool air than others. By closing some vents slightly, you can direct more air to the warmer areas. This adjustment helps maintain a consistent temperature throughout your home.
Use a vacuum to remove debris from around the vents. Dust and dirt can accumulate and block airflow. Keeping the area around the vents clean improves efficiency.
Monitor Efficiency
Low refrigerant levels can affect your air conditioner’s performance. If the unit overheats, check for potential issues with the refrigerant system. A professional should handle refrigerant replacement or repairs.
Regular maintenance of your AC unit increases its lifespan. Inspect fuses regularly to ensure they are functioning properly. A blown fuse can stop your unit from operating altogether.
Prevent Blockages
Look for weeds or other growths outside near the condenser unit. These can obstruct airflow and reduce efficiency. Keeping this area clear helps maintain proper function.
Debris like leaves or twigs can also block outdoor units. Regularly clean around the external parts of your air conditioner. This action prevents overheating and improves cooling performance.
Final Tips
Remember, proper airflow is critical for an efficient AC system. Ensure that all vents are open and unobstructed. Adjustments may be necessary based on room temperatures.
Clean Air Ducts
Inspect Ducts
Air ducts play a crucial role in your air conditioning system. They distribute cool air throughout your home. Inspecting these ducts is important for maintaining efficiency. Look for dust and debris buildup. A dirty duct can block airflow, leading to poor performance.
Check for signs of mold growth as well. Mold can affect indoor air quality and health. If you notice any discoloration or a musty smell, act quickly. This could indicate serious issues within your central air conditioning unit.
Hire Professionals
If the ducts look dirty or damaged, consider hiring a professional. Quality air conditioning repair services can clean your air ducts effectively. Professionals use specialized tools to remove dirt and debris. They ensure that your central air conditioning system operates at peak efficiency.
Cleaning ducts yourself can be challenging. It requires the right equipment and knowledge. Hiring experts saves time and ensures thorough cleaning. Regular maintenance by professionals helps prevent future problems.
Regular Maintenance
Regular duct cleaning should be part of your maintenance routine. Schedule cleaning every 3 to 5 years for best results. This helps keep your air conditioning unit running smoothly.
Clean ducts improve airflow and energy efficiency. They also reduce allergens in the air. This contributes to better indoor air quality. Families with allergies or respiratory issues benefit greatly from clean ducts.
Ignoring duct maintenance can lead to bigger problems. Dirty ducts can cause your central air conditioner to work harder. This increases energy bills and shortens the lifespan of the unit.
Benefits of Clean Ducts
-
Improved Airflow: Clean ducts enhance the airflow from your air conditioning system.
-
Energy Efficiency: Efficient airflow reduces energy consumption.
-
Better Indoor Air Quality: Clean ducts lower allergens and pollutants.
-
Extended Equipment Life: Proper maintenance prolongs the life of your air conditioner.
Inspect for Water Leaks
Check for Pooling
Look around the AC unit. Check for any signs of water pooling or leaks. Water should not be near the unit. If you see puddles, it indicates a problem. This could lead to serious issues if not addressed quickly.
Water pooling can cause damage to your home. It can weaken the structure and lead to mold growth. Mold can create health problems for your family. If you notice water, act fast to find the source.
Investigate Drain Line
Inspect the condensate drain line. This line removes moisture from your AC unit. Blockages in this line can cause leaks. Use a wet/dry vacuum or a plumber’s snake to clear any clogs.
If the drain line is blocked, water will back up into the unit. This can cause further damage and lead to costly repairs. Regular maintenance helps prevent these issues. Clean the drain line often to keep it clear.
Address Leaks Promptly
Addressing leaks promptly is crucial. Ignoring them can lead to larger problems over time. Water damage can affect walls, ceilings, and floors. It can also promote mold growth in hidden areas.
When you find a leak, determine its source. It might be due to a faulty seal or a broken part. Fixing these issues early can save time and money later on.
Consider hiring a professional if the problem seems complex. They have the tools and experience needed for effective repairs. A quick response can help protect your home from further damage.
Smell for Musty Odors
Pay attention to any strange smells coming from your AC unit. A musty odor often indicates mold or mildew growth inside the unit or ductwork. This can result from excess moisture due to leaks.
If you detect a smell, investigate immediately. Turn off the AC and check for visible signs of moisture or leaks. Clean any visible mold carefully using appropriate cleaning solutions.
Regular inspections help catch these issues early. Make it a habit to check your system periodically, especially during peak usage times.
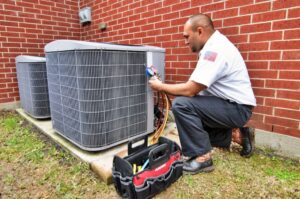
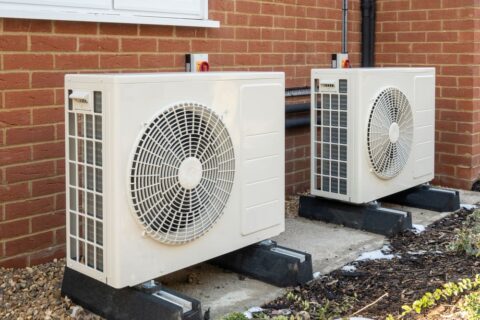
Examine Outdoor Unit
Clear Debris
Clear debris, leaves, and dirt from around the outdoor condenser unit. This step is crucial for maintaining proper airflow. If the area is cluttered, it can block air intake. Blocked airflow leads to reduced efficiency.
Regularly check the space around the unit. A clean area helps the system run smoothly. Make sure there are no plants or obstacles within at least two feet of the unit. This guideline ensures adequate ventilation.
Ensure Levelness
Ensure the unit is level and has proper airflow on all sides. An unlevel central air conditioner unit can cause operational issues. It may lead to refrigerant problems or compressor failure.
To check if the unit is level, use a carpenter’s level tool. Place it on top of the unit. Adjust the legs if necessary to achieve balance. Proper leveling helps prevent water pooling inside the unit.
Inspect Fins
Inspect the fins for damage and straighten them if necessary. The fins are essential for heat exchange in an air conditioning service unit. Damaged fins can restrict airflow and reduce cooling capacity.
Use a fin comb or a flathead screwdriver to straighten bent fins carefully. Avoid using excessive force to prevent further damage. Regular inspection of these components keeps your unit functioning properly.
Check Electrical Connections
Check electrical connections at the outdoor unit as well. Loose or corroded wires can affect performance. Tighten any loose connections you find during your inspection.
Look for signs of wear or fraying on electrical wires too. Damaged wires pose safety risks and should be replaced immediately.
Monitor Temperature
Monitor temperature differences between the return and supply vents inside your home. A significant difference indicates that your outdoor unit might not be working efficiently. Ideally, this difference should be around 15-20 degrees Fahrenheit.
If you notice less than expected cooling, it may signal issues with your outdoor unit or ductwork.
Call for Help
If problems persist after these checks, consider calling a professional technician for help. They can provide a thorough assessment of your air conditioning system. Professional service can identify hidden issues that may not be visible during basic inspections.
Call a Technician
Recognize Issues
e problems remain despite your best troubleshooting efforts. If your AC unit continues to underperform, it may indicate a deeper issue. Strange noises, persistent leaks, or inconsistent cooling can signal serious problems. These signs often require professional attention.
Seek Professional Help
Complex issues demand the expertise of a licensed technician. For example, refrigerant leaks need specific tools and knowledge to repair safely. Attempting these fixes without proper training can lead to further damage or safety risks. If you feel uncertain about the problem, it’s best to call an expert.
Regular Check-Ups
Regular maintenance from a professional ensures reliable performance. Technicians can spot potential issues before they escalate into costly repairs. Scheduling check-ups at least once a year is wise. During these visits, the technician will clean components and check for wear and tear.
Closing Thoughts
Your DIY AC troubleshooting journey can lead to a cooler, more comfortable space. By following these steps—setting the thermostat, checking circuit breakers, and cleaning filters—you can tackle common issues effectively. Regular maintenance not only enhances performance but also extends your unit’s lifespan.
Don’t let AC troubles ruin your day. If you’ve tried everything and still face issues, it’s time to call in the pros. They bring expertise that ensures your system runs smoothly. Stay cool and take action now!
Frequently Asked Questions
What should I set my thermostat to for optimal cooling?
Set your thermostat between 72°F and 78°F for comfort and efficiency. This range helps maintain a cool environment without overworking your AC unit.
How can I prevent air leaks in my home?
Ensure all windows and doors are closed tightly. Use weather stripping or caulk to seal any gaps, preventing cool air from escaping and reducing energy costs.
What do I do if my circuit breaker trips?
If your circuit breaker trips, check for overloaded circuits. Reset it only once; if it trips again, there may be a deeper electrical issue needing professional attention.
How often should I clean my air filters?
Clean or replace your air filters every 1-3 months. This improves airflow, enhances efficiency, and prolongs the life of your AC system.
Why are my air vents closed?
Closed air vents restrict airflow, causing uneven cooling. Always keep vents open to ensure proper circulation and efficient operation of your AC system.
How can I check for water leaks in my AC?
Inspect around the indoor unit for puddles or moisture. Check drain lines for clogs. Address leaks promptly to prevent water damage and mold growth.
When should I call a technician for AC issues?
Call a technician if you experience persistent problems like unusual noises, poor cooling, or frequent breakdowns. Professional help ensures safety and effective repairs.
Key Takeaways
High-altitude locations like Colorado come with their own set of HVAC challenges. Understanding these challenges is imperative…
Key Takeaways
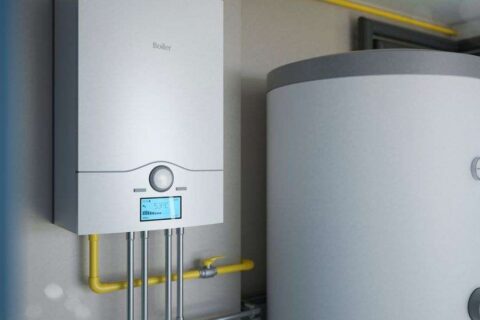
Boilers are essential for heating homes, and they come in two main types: steam and hot water. Understanding the key…