
DIY Plumbing Repairs You Can Handle in Parker, CO
Many plumbing repairs are well within reach for Parker, CO homeowners. A dripping faucet, a constantly running toilet, a slow sink drain, a worn showerhead, or a jammed garbage disposal can usually be fixed in an afternoon with a few basic tools. Knowing which jobs are safe to DIY – and which ones need a licensed plumber – protects both your home and your budget across Colorado’s Front Range.
Some jobs, though, carry real risk. Major leaks, burst pipes, sewer backups, gas line work, and water heater replacement should always go to a licensed professional who can make safe, code-compliant repairs. This guide walks through the fixes you can confidently handle, the tools worth keeping on hand, and the warning signs that mean it’s time to call 1st Choice Pro Services.
Key Takeaways
-
You can handle simple plumbing tasks like fixing leaky faucets, unclogging drains, and replacing showerheads, which saves money and builds confidence.
-
Find out where your main water shutoff valve is, and know how to use it. This can save your home from catastrophic water damage in an emergency.
-
Parker’s unique challenges can put a strain on your plumbing system. Shifting clay soil, freezing winters, and hard water create conditions that make routine maintenance a must!
-
With proper tools, safety equipment, and a DIY plumbing toolbox full of the right repair materials, you’ll be ready to tackle these common fixes on your own.
-
Some jobs like big leaks, sewer line back-ups and plumbing for renovations should always be left to a licensed pro who can make safe, code-compliant repairs.
-
Prevent common errors such as overtightening connections or applying the wrong sealant. Learn the fixes you can tackle, and when to turn to a pro to avoid more costly problems later!
DIY Plumbing Wins: What You Can Conquer
There’s a lot more you can do with DIY plumbing than just simple repairs. Understanding the fundamentals of home plumbing and being familiar with a few essential tools will get you pretty far. Most common issues – such as a leaky faucet, clogged drain, or toilet that won’t stop running – are fixable with a little time and TLC.
Taking on the easy repairs not only saves time and money, it empowers homeowners and renters to tackle tougher challenges. It’s just as crucial to understand when to retreat and ring up a plumber. When it comes to these jobs, most homeowners can roll up their sleeves and tackle.
1. Silencing That Annoying Dripping Faucet
Repairing a dripping faucet begins with turning off the water supply. This prevents water from leaking out during the repair process. Wear and tear on washers or O-rings is one of the top causes of drips.
Replacing these components with new parts can stop the leak. After you assemble your new faucet, turn the water back on and inspect it for leaks. Having a simple toolkit with pliers, screwdrivers, and a set of washers goes a long way to making the job go smoothly.
You don’t want to over-tighten parts to the cracking point, so only tighten them as far as necessary to make a good fit.
2. Fixing a Constantly Running Toilet
A constantly running toilet not only is annoying, but wastes water and increases utility bills. Before doing any repairs, shut off the water and empty the tank. For most toilets, a bad flapper is the culprit.
Replacing it is easy and inexpensive. Make sure to go back and inspect all connections so leaks don’t rear their ugly heads in the future. Write down DIY steps you’ve completed to reference later or for simple troubleshooting.
3. Clearing Minor Sink or Tub Drains
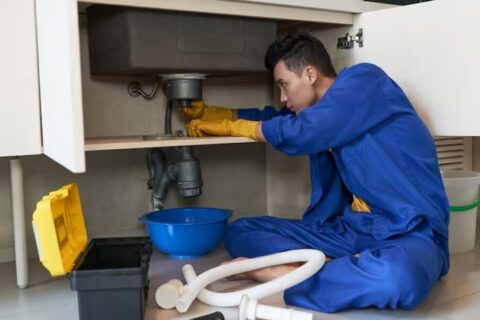
Begin with a pair of gloves and remove hair or other debris resting in the drain. A cup plunger is ideal for clearing small clogs. For tougher clogs, a drain snake will get the job done.
Vinegar, baking soda, and hot water can help dissolve clogging substances. Grease, hair, and little pieces of food are the usual suspects – keeping them out from the start avoids them clogging down the road.
4. Replacing an Old Showerhead
To avoid being blasted with water, turn off the water supply before unscrewing the old head. A few layers of plumber’s tape tightly wrapped around the threads can prevent leaks.
Simply screw on the new showerhead by hand, run the water, and check for drips. There are options from low-flow to rainfall, so choose what suits your preferences and wallet.
5. Resetting or Unjamming Garbage Disposals
Be sure to switch power off to the unit before sticking your hand in there. For cleared jams, use an Allen wrench to manually move the blades.
Baking soda and vinegar can do a lot to freshen and clean. Coffee grounds, bones, fruit pits are never meant to go down the drain.
Before You DIY: Smart Checks
Doing some plumbing repairs on your own will save you a lot of time and money. It’s worth going through a few smart checks before you DIY! Consider your skills realistically. Repair work and DIY projects can require highly specialized skills.
If you’re handy with a wrench, you can do the basic work yourself. Replacing a faucet washer or unclogging a drain are DIY jobs that are possible if you are up to following a DIY guide! For the more complicated repairs, like dealing with gas lines or main drains, understanding your limits saves you from larger migraines.
Keep in mind that knowing where your main shutoff valve is located – and showing others in your home – could save you from costly water damage. Most Parker homes have the shutoff where the water line enters the house, often in the basement or where the main line comes in from the street. Be sure you know how to shut it down.
A brightly colored, laminated reminder sign or sticker does wonders to keep the idea top of mind for everyone. Before you grab any tools, take stock of the problem. We often think of dripping faucets and running toilets as simple DIY repairs.
Things like strange noises, stains on ceilings, or ongoing leaks indicate much bigger issues. Write down all of these symptoms to have a record of them. If you do notice indications of main line issues, look up your local codes – many repairs require a licensed plumber.
Prepare your tools beforehand. Essential basic plumbing repair tools require a set of wrenches, pliers, and screwdrivers. Stock up on routine parts like washers and O-rings. Organizing your toolbox will allow you to find tools quickly.
If you need to solder, make sure to use a flame-resistant cloth. Finger-tighten joints, then follow up with pliers for a bit of extra grip. Overtightening will crack seals.
Don’t forget about insurance. Check that your homeowner’s insurance will cover plumbing repairs. Understand your policy, learn the claims process, and document everything meticulously.
Take careful stock of what’s on the table – emergencies, leaks, or water damage – and prepare yourself in advance if the floodgates open.
Your Parker DIY Plumbing Kit
Parker homes have their own unique plumbing challenges, whether it’s hard water scale or the effects of freezing winter temperatures. With a well-stocked DIY plumbing kit, you’ll be able to easily and quickly make the most common repairs before they become expensive emergencies. Local climate conditions and transit infrastructure are unique so being prepared with the right tools and understanding is critical.
Essential Tools for Basic Repairs
A reliable DIY plumbing kit will address leaks and clogs easily and quickly. Begin with a pipe wrench, basin wrench, and adjustable pliers – these tools will cover just about any nut or fitting.
Include a plunger and a drain snake to unclog sinks and tubs. A utility knife, tape measure, and plumber’s tape help ensure that repairs are clean and watertight.
Screwdrivers, tubing cutter, and caulking gun give you the maneuverability and versatility you need to complete the job. They’re great for swapping out faucets or repairing threaded pipe joints!
Flashlights, with a sturdy bucket for storage, gloves, and safety goggles complete the kit, ensuring you’re well-equipped and protected. You may even want to keep some kind of checklist so you can restock before your next DIY project.
Safety First: Gear Up Properly
Safety is always first on the job site, especially in tight crawl spaces. Be sure to wear gloves and goggles at all times to protect from sharp edges, hot water, and any cleaning agents used.
A first aid kit should be on hand in case of any cuts or scrapes. Avoiding hazards is crucial, so ensure that your work area is dry and well-lit to reduce the chances of slips and falls.
Understand where the shut-off valve is before you start, and shut the water off to prevent larger messes. Over-tightening fittings can lead to leaks, so don’t go beyond hand tight with moderate pressure.
Parker-Specific Parts to Consider
Parker-specific climate impacts on pipes and fixtures should be taken into account. Local suppliers should have parts better adapted for a hard water, freeze-prone environment – corrosion-resistant fittings, flexible supply lines, etc.
Copper and PEX pipes are common in the area. Consult plumbing message boards to find reviews of plumbing supply houses, and inquire with your neighbors for brand recommendations from their own Parker-area homes.
Clean up any water damage and store all tools and parts in a dry, accessible spot to assure quick response when disaster sinks in.
Parker’s Unique Plumbing Challenges
Parker presents a unique set of plumbing challenges that call for regular attention. The area’s expansive clay soil, big seasonal temperature swings, and mineral-rich hard water all contribute to the way pipes age and fail. Local building codes and older infrastructure add another layer, so plumbing in Parker calls for a local touch.
Here’s what you should look for and know before you attempt a repair or hire a professional.
Our Shifting Clay Soil Impact
Our expanding clay soil causes severe neighborhood shifting and misalignment. This movement can misalign pipes, displace sewer lines, and lead to painful leaks or catastrophic pipe breaks. Are you noticing wet areas in your yard, sluggish drains, or cracks in your concrete driveway?
Soil movement could be the culprit. Monitor your progress over time by keeping a detailed yet easy-to-understand log. Setting a calendar reminder to conduct regular inspections will keep you on track and allow you to catch problems earlier.
Photos of repairs or quirky areas help identify deviations in the future.
Battling Hard Water and Pipe Corrosion
Hard water and freeze-thaw cycles are the main drivers of pipe corrosion here. Mineral scale buildup and repeated cold snaps accelerate wear, particularly on older galvanized fittings. The best remedy here is to install rust-free pipes and joints – such as PEX or copper – when replacing anything.
Insulating pipes in crawl spaces and other unheated areas helps protect them from freezing and slows corrosion. Keep an eye out for green or white marks on your pipes and take quick action when you notice them.
The city is working on raising awareness about the importance of checking pipes every few months.
Hard Water Woes in Parker
Because Parker’s water is very hard, mineral deposits accumulate quickly. This can clog faucets, damage water heaters, or discolor sinks. Home test kits are easy to use and give a quick answer on how hard your water is.
If you notice white crust build up on shower heads, it’s time to descale. Water softeners do the job, but quality filtration systems do as well if you’re looking for less maintenance. Have a preventative maintenance routine – regularly wipe off fixtures and flush water heaters.
Understanding Local Building Codes
Parker and Douglas County codes can be strict, particularly for larger jobs. So when preparing for repairs, make sure to look up the most recent rules. Omitting this phase comes with penalties or dangerous operations.
Local city inspectors and online step-by-step guides can assist you in finding what’s important. Outline the main code regulations for your residence, such as venting, shut-off location, or pipe materials. This makes jobs safer and less stressful.
When to Absolutely Call Parker Pros
Some plumbing projects require much more than a wrench and a YouTube tutorial. In Parker, freezing winters and expansive clay soil can easily leave pipes over-stressed. We all want homes that are safe and dry – knowing when to call in a local pro helps!
The risk of DIYing major repairs is extremely high. Otherwise, you might be looking at broken pipes, leaks in your walls, or toxic threats from contaminated water. When it comes to more than just a slight drip or simple clog, it’s best to leave it to the professionals and hire a licensed plumber.
An experienced professional will make code-compliant repairs and help you maintain the overall plumbing layout of your Parker home.
Major Leaks or Burst Pipes
If you’re seeing water stains on your ceiling, don’t wait! If your water bill suddenly increases with no explanation, you probably have a serious hidden leak or burst pipe.
Turn off the main water valve ASAP to prevent further damage. Document with photographs. Take detailed photos of the leak and affected wet areas for your own personal records and insurance claims.
Parker has reliable 24/7 emergency plumbers. Keep a trusted local number like 1st Choice Pro Services saved in your phone so help is one call away.
Sewer Line Smells or Backups
Detecting sewer-like, putrid egg smells inside your home typically indicates a sewer line issue. Immediately cease operation of all water fixtures and toilets.
Make a note of symptoms such as slow drains or gurgling noises. Schedule a camera inspection by a licensed plumber immediately. If you notice pooled water in your yard or sluggish drains throughout your house, this indicates a more serious problem.
No Hot Water Mysteries
If you’ve lost hot water suddenly, check the thermostat and the breaker. If that doesn’t work, it’s time to get professional help, so call a plumber.
Common causes here are sediment buildup, faulty heating elements, or broken thermostats.
Remodels or Moving Fixtures
Whenever you’re moving sinks, toilets, or plumbing, just call a pro. Local Parker and Douglas County regulations mandate permits for this type of work.
Keep all plans and permits for the future, should you sell your home.
Recurring Issues You Can’t Pinpoint
Document any leaks or backups that recur, even if fixed already. If you aren’t able to remedy it through basic troubleshooting, it’s time to call a master plumber.
Probe for root causes, underlying pipe issues, and long term solutions.
Common DIY Plumbing Blunders (And How to Avoid Them)
Taking on home plumbing projects can truly be rewarding, but the most frequent DIY mistakes are sometimes the most preventable and most regrettable. Familiarizing yourself with these danger zones and learning how to avoid them will enhance your know-how and self-assurance.
A project checklist, lessons learned from previous projects and a commitment to continue learning all create a recipe for effective repairs.
Overtightening Fittings: A Costly Mistake
Using excess pressure on plastic fittings, like on toilet or faucet supply tubes, will cause them to break or shatter. This can create leaks that might not be immediately detectable.
Begin by tightening the fitting by hand until it no longer turns. After that, take a wrench and tighten it at least a half turn – maximum. With metal fittings, consult the specifications for the proper torque.
Taking notes when overtightening has been a problem will help you remember what you want to avoid in the future. Distributing these notes to other homeowners, DIY-ers, and contractors can prevent others from making the same mistakes.
Make a simple rule: tight, not forced.
Using the Wrong Sealant or Tape
Regular duct tape is not waterproof and will eventually fail on any plumbing task. Instead, save yourself the headache and use plumber’s tape (PTFE/Teflon tape) or the appropriate pipe dope for the task at hand.
When wrapping threads, wrap three times around, finishing on the left to secure. Note which sealants are appropriate for which tasks – PVC glue for pipes, silicone for gaps, and PTFE tape for threads.
Keep a quick-reference list of which tape or glue to shoot for each fix.
Ignoring Underlying Systemic Problems
If drains frequently back up or pipes bang, it can indicate more serious problems. A 90-degree vent elbow or the 135-degree drain line rule detour leads to a major clog.
Keep a list of these issues for your plumber – frequent clogs, strange noises, or sluggish draining. Look for signs of ongoing water pressure loss or leaking after the repair has been made.
When you’re unsure, put it in writing and pay a pro.
Underestimating Parker Water Pressure
Many Parker homes experience dynamic water pressure. You can use a gauge at an outdoor spigot to test your levels – most homes should be hovering around 60 psi.
Unless you live in a high-rise, the main regulator should be located outside your residence. Take note when the pressure changes – this can indicate failing valves or a problem with the city supply.
Typical causes are local construction or aging pipes. Identify all sources of pressure fluctuation and test for leaks after eliminating each one.
Conclusion
Save time and money with minor repairs you can master! Replace a washer, stop a drip, or open a shower drain. It’s nothing that a lot of people around Parker aren’t doing every day with a handful of tools and a good bit of determination. Major leaks, broken pipes, or gas line issues? Leave those to the professionals. Parker’s aging infrastructure, mineral-heavy hard water, and big seasonal temperature swings can pose challenges for the most skilled do-it-yourselfer! Never hesitate to consult local codes, and always listen to your instinct if something doesn’t seem right. When in doubt, play it safe and understand what you’re capable of. For a majority of repairs, intelligent preparation and a careful approach will take the crown. When it starts to get odd or crazy, call in a licensed plumber. You never know what you might encounter, so better safe than sorry, right?
Frequently Asked Questions
What plumbing repairs can I safely do myself in Parker?
Plumbing repairs that are safe to do yourself include unclogging drains, repairing a running toilet and replacing the washer in a faucet. As a rule of thumb, always turn off the water supply before starting.
What tools should I have in my Parker DIY plumbing kit?
Gather a basic DIY tool kit with a plunger, adjustable wrench, pipe wrench, plumber’s tape, pipe cutter, and a small drain snake. That’s because these basics will take care of the majority of small repairs you’ll encounter in Parker homes.
What plumbing issues are common in Parker?
Parker’s expansive clay soil and freeze-thaw temperature swings can lead to shifting pipes that are prone to leaking and pipes clogged by tree roots or debris. Look out for your drains draining unusually slowly or changes to water pressure.
When is it time to call a professional plumber in Parker?
Call an emergency plumber in Parker for major leaks, sewer line issues, water heater emergencies, or any time you smell gas or suspect a gas leak. These repairs carry safety risks and are not DIY jobs.
How can I avoid common DIY plumbing mistakes?
Never attempt plumbing repairs without first shutting off the main water supply. Always use the proper tools and inspect all fittings for leaks. Here’s the reality, folks – don’t jam pipes together – this will create unnecessary breakage.
Are there any plumbing regulations specific to Parker homeowners?
Any time you plan a larger-scale project, look up local Parker and Douglas County codes before proceeding.
Why do pipes burst more often in Parker’s winter?
Our cold Colorado winters pose a real risk for uninsulated pipes. Insulate pipes in advance of the winter and allow faucets to drip during cold snaps to avoid freezing.
Key Takeaways
Moving your sink to an island increases your kitchen’s workflow by centralizing prep and clean-up, diminishing perimeter…
Key Takeaways
Understand typical issues such as drain clogs, incorrect installation, and pump or hose malfunctions to target fixes where…