Englewood Basement Dehumidifier Installation & Sizing Guide
Key Takeaways
-
Englewood basements — There are moisture issues here from seasonal high humidity, local soil types, and poor drainage. Focus on waterproofing and dependable dehumidification to avoid mold and structural defects.
-
Prior to installing a dehumidifier, conduct a comprehensive evaluation to locate moisture sources, evaluate current drainage and waterproofing, and seek advice from a basement pro when necessary.
-
Make sure to size and place your dehumidifier according to square footage, ceiling height, moisture severity, and airflow mapping to achieve even coverage and prevent undersized units.
-
INSTALL YOUR BASEMENT DEHUMIDIFIER IN 4 EASY STEPS Step 1 – Select Location. Step 2 – Prepare Drainage. Step 3 – Connect Power. Step 4 – Test Operation. Use proper tools and follow manufacturer instructions or hire professionals for complex setups.
-
Factor installation costs, unit price, labor, and energy use into your budget and get free estimates from local contractors to compare portable versus whole house systems.
-
Keep it running strong for years with regular cleaning, seasonal setting tweaks and servicing. Pair basement dehumidification with foundation repairs, air sealing and landscaping for all-around protection.
A basement dehumidifier install Englewood would be installing something that reduces moisture in subterranean rooms. Homeowners typically want unit size, energy consumption, and drainage options before they select a system.
Local installers observe building codes and match capacity to basement volume in cubic meters. Proper placement, noise level, and maintenance access impact its long-term performance.
Below we discuss price ranges, installation step by step, and common problems.
Englewood’s Climate Challenge
Englewood’s basements confront a triple threat of climate, soil, and building elements that combine to make moisture control paramount for homeowners. A precise balance of waterproofing, drainage, and dehumidification protects stored belongings, finishes, and indoor air quality. Below is a summary of basement moisture’s main competitors in Englewood.
-
Seasonal humidity swings and extended warm, moist periods
-
Local soil types retain or drain water differently, such as clay and sand.
-
Inadequate exterior drainage and poor grading around foundations
-
Hydrostatic pressure from saturated ground following heavy rain or snow melt.
-
Basement type and age, specifying poured and concrete or masonry block walls.
-
Indoor sources: laundry, cooking, unvented appliances, and occupant habits
-
Old or absent sump pumps, drains, and exterior membranes
Basement waterproofing is not a choice in Englewood. Water intrusion destroys surface finishes, destroys valuables, and promotes mold that degrades indoor air quality. Good moisture control reduces repair expenses and helps maintain home value. A properly sized dehumidifier reduces relative humidity, limits condensation on cold surfaces, and helps building materials dry following wet events.
Seasonal Humidity
Humidity fluctuates seasonally and transforms the sensation and behavior of a basement. Summer can have high outdoor relative humidity. Warm, moist air flooding a cool basement will condense on walls and pipes, which feeds mold and dank smells.
Control indoor humidity with a humidistat and you’ll know exactly when to act. Stay somewhere in a steady range of 40 to 50 percent, usually, to minimize mold and keep people comfortable. Adjust dehumidifier settings between seasons: higher run-times in summer, lower or intermittent in drier months.
Employ the dehumidifier and occasional ventilation when outdoor air is drier to reduce indoor moisture without abusing appliances.
Soil Composition
Soil counts. Clay soils retain water and swell. Sandy soils drain rapidly but may permit easy percolation to footings. Both raise risks. Clay increases hydrostatic pressure against foundation walls while saturated soil near the foundation leads to seepage through tiny cracks and porous concrete.
If soil remains moist around the foundation, basements will remain wet. Grade the outside, divert water, and implement a French drain if necessary to intercept groundwater before it hits the foundation.
Test soil percolation and moisture when designing waterproofing so solutions are fitted to site conditions and not a band-aid fix.
Foundation Types
Poured concrete and concrete block are a staple in Englewood. Poured walls tend to be more consistent but crack with settlement. Block walls have mortar joints that can allow water to slip in. Both require periodic examinations.
Check for hairline cracks, bulges or mortar loss and fix quickly. Pair foundation repairs with a dehumidifier and interior drainage or sump pump to combat both leaks and airborne moisture.
A foundation specialist and a reliable HVAC or dehumidifier installer provide layered protection and lower the risk of issues resurfacing.
Pre-Installation Assessment
A pre-installation assessment establishes the baseline facts needed to choose and place a basement dehumidifier that will work reliably. It documents current humidity, moisture sources, structural features, and HVAC compatibility. It lets a licensed HVAC contractor estimate installation complexity and cost.
The assessment informs size selection, locational choices near existing ductwork or the air conditioning unit, and whether additional waterproofing or drainage work is required before a unit goes in.
Moisture Source
Locate all points where water enters or collects: visible plumbing leaks, hairline foundation cracks, window wells that back up, floor drains and sump pit condition. With a handheld moisture meter, test walls, wood joists and subfloor to detect concealed damp spots. Meters frequently indicate high percent levels in areas that appear dry.
Active leaks and recent floods must be sealed up first since a dehumidifier cannot out-run consistent liquid flow. Check crawl spaces for indications of ground moisture. This is a huge source of indoor vapor and a vapor barrier or full crawl encapsulation can dramatically reduce vapor load.
Examples: a wall with efflorescence usually points to a foundation seep. A musty smell near carpet edges often means trapped moisture under padding.
Sizing Calculation
Determine needed capacity based on basement size in square metres, measured humidity, and average seasonal condensation. Manufacturers and pros employ tables that translate area and relative humidity into litres per day removal rates.
For whole-house setups, those charts factor in ceiling height and number of rooms. Ceiling height greater than standard 2.4 m, lots of open bays, or serious mold growth all push sizing upwards. Undersized units will run constantly and never reach target setpoints, typically about 35% RH for comfort and mold control.
Oversized units cycle excessively and waste energy. A licensed contractor can calculate a heat-and-moisture load and provide a detailed recommendation, which informs the $1,300–$2,800 price range based on complexity.
Airflow Mapping
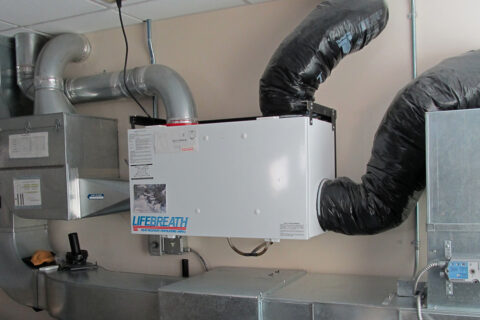
Plan airflow so the unit serves the whole basement instead of one corner. Put the dehumidifier near central locations or close to return ductwork when integrating with HVAC for whole-house coverage. This reduces duct runs and improves efficiency.
Keep at least 30–60 cm clearance on intake and discharge faces and avoid stacks of stored goods that block flow. Map paths with simple tests: run a fan and feel for draft in corners, or use a smoke stick to watch currents.
Include crawl spaces and alcoves in the map. During the assessment, check existing ductwork for leaks and size mismatches. Sealing ducts and confirming HVAC compatibility prevents short cycling and ensures the installed unit runs as intended.
Installation Guide
Installation guide 3, A for our basement dehumidifier in Englewood – site selection, drainage, power connection and testing operation and whole-house systems and code compliance.
1. Select Location
Select a dry, even location near a power source and drain to minimize hose lengths and electrical work. Position the unit a minimum of 20 to 30 cm from walls or large objects to ensure clear air flow and improved performance. Blocked intakes increase run time and noise.
Place the dehumidifier close to the moisture source, such as laundry areas, sump pumps, or exterior walls that look damp, so it is attacking the problem directly. Don’t install in areas that accumulate standing water or that could be reached by flood water. Units are not intended for use while submerged and may be damaged.
2. Prepare Drainage
Attach the drain hose to a floor drain, the sump pump discharge, or a condensate trap for uninterrupted, hands-free draining. Contour the hose on a downward slope with no kinks so gravity helps flow. An uphill run of hose will trap water and cause backups.
A trustworthy drainage line avoids overflow catastrophes that ruin finishes and stored goods. If you can, run that hose to a visible drain so you will notice a leak faster. Know your local plumbing codes and waterproofing alternatives. Local building codes may require a condensate pump or otherwise a secondary drain for some installations. Whole house systems often tie into HVAC condensate management.
3. Connect Power
Install on a dedicated outlet with the appropriate voltage and amperage for your specific model. Many units are 120 V, whereas the larger whole-house units need 240 V and a dedicated breaker. Avoid using extension cords or standard multiple outlet strips to prevent heat build-up and circuit trips.
A GFCI outlet in damp basements will lessen the chance of shock. After power-up, test that the fan, compressor, and humidistat run properly. For whole-house units, licensed HVAC contractors must make electrical and duct connections.
4. Test Operation
Turn on the dehumidifier for a few hours and test humidity with a hygrometer, starting somewhere near 35% as a typical setpoint. Listen for smooth fan and compressor operation and observe the evaporator coil for heavy frost or abnormal vibration.
Check the drain pan and hose for leaks or clogs in the initial cycle. Verify the unit cycles off and on to meet humidity; a properly sized system will not short cycle. Swap your filters out every 2 to 3 months, or more frequently if you have any furry friends.
Whole-house installs can take as long as six hours and cost around $1,300 to $2,800, and they need annual HVAC technician maintenance, with refrigerant checks and humidistat calibration.
Cost Breakdown
With a cost map, Englewood basement dehumidifier install homeowners can balance upfront costs against long-term value. Here’s a handy cost breakdown table of common elements and ranges to use for initial budgeting before receiving your local estimate.
|
Component |
Unit price (USD) |
Typical installation labor |
Ongoing energy use (monthly) |
|---|---|---|---|
|
Portable dehumidifier |
150–400 |
DIY or minimal |
10–25 USD |
|
Standalone basement unit |
1,000–2,500 |
100–400 USD |
15–30 USD |
|
Crawl space dehumidifier |
1,200–2,000 |
200–600 USD |
12–28 USD |
|
Whole-house dehumidifier (unit) |
1,200–2,000 |
500–2,000 USD |
20–35 USD |
|
Total installed system (central) |
1,300–2,800 (typ) up to 3,000+ |
500–2,000+ |
20–35 USD |
Unit Price
|
Brand / Model type |
Price range (USD) |
|---|---|
|
Lower-end portable |
150–300 |
|
Mid portable / high-capacity |
300–400 |
|
Standalone basement unit |
1,000–2,500 |
|
Crawl space-specific units |
1,200–2,000 |
|
Whole-house central units |
1,200–2,000 |
Capacity (liters/day or pints/day), integrated humidistat, and intelligent controls increase cost. A 45-pint (around 21 L/day) portable costs a lot less than the 70-pint basement model with pump and digital control.
Crawl-space units include corrosion resistant cabinets and condensate pumps. Central dehumidifiers have duct adapters and need more robust control boards, so unit price overlaps with high-end standalone models.
Create a side-by-side table as you shop to compare capacity, noise, pump/no-pump, and warranties.
Installation Labor
Average labor in Englewood for bare wall or floor-mounted freestanding units is low to mid hundreds of dollars. Whole-house installations typically increase complexity and drive labor closer to 500 to 2,000 USD based on ductwork, furnace connections, and access.
Electrical upgrades, dedicated 240V circuits, condensate pumps, or routed drainage lines incur additional fees. Crawl space installs tend to require access prep, insulation correction, or platform builds, which raises both time and cost.
Always check installer liability coverage, licensing, and a transparent satisfaction guarantee. Request itemized labor lines so you can easily compare bids.
Energy Use
We figure operating costs of 10 to 30 USD per month for most units. Central systems might be a bit more, but they spread the load a little more evenly.
ENERGY STAR or variable-speed fan units reduce consumption and tend to trim monthly bills by a perceivable margin versus older single-speed models. Follow energy use for a month post-install to tune setpoints and schedules.
A slight dip in relative humidity can reduce runtime and save money. Include estimated utility costs in a multi-year ownership plan when deciding between portable or central systems.
Long-Term Performance
A whole-home basement dehumidifier provides years of consistent moisture management once properly installed and maintained on a routine basis. These next subtopics deconstruct what owners need to do, why it matters, and how regular care keeps efficiency, indoor air quality, and the unit’s typical 8 to 15 year lifespan intact.
Routine Cleaning
Vacuum the air filter every 1 to 3 months, since a clogged filter restricts airflow and forces the unit to work overtime. Swap out disposable filters or clean reusable ones according to the manufacturer’s instructions.
Clean coils lightly every few months with a soft brush or low-pressure air to prevent fins from being bent, as dirty coils impede heat exchange and increase energy consumption. Vacuum intake vents and exterior surfaces to eliminate dust and debris which settles in basements.
Inspect the drain pan, empty, and disinfect the water reservoir. If your system has a drain hose, check for kinks or blockages and flush the line to avoid backups. Ignoring these chores results in musty odors, mildew, and reduced drying capacities.
It’s these regular fixes, such as filter changes and coil cleaning, that stop breakdowns and keep the unit humming throughout the year.
Seasonal Adjustments
Adjust humidity setpoints by season. Target 40-60% RH year-round. Measure actual humidity with a humidistat or digital hygrometer. Increase dehumidifier output in wet or humid seasons to minimize the chance of flooded basements and to keep mold in check.
During the typically cold and dry months, turn down the setpoint to prevent excessively dry indoor air that makes you uncomfortable or creates static. Monitor internal humidity sources—laundry, showers, and cooking—to optimize.
These small adjustments every season decrease wear on the unit and on your HVAC system, as a dehumidifier that keeps humidity in range means your air conditioner doesn’t run as often.
Professional Servicing
-
Inspect humidity sensors for drift or failure.
-
Test fan motors and tighten or replace loose components.
-
Check refrigerant charge and look for leaks.
-
Clean internal coils and condensate drains deeply.
-
Verify electrical connections and safety controls.
-
Update firmware or controllers if applicable.
-
Coordinate with mold or water damage specialists when needed.
Plan yearly tune-ups to maintain warranty coverage and to spot issues while they’re still minor. If there is water damage or mold, request a complete restoration plan with moisture mapping and coordinated drying.
Poor setup or missed service can reduce lifespan and cause expensive breakdowns, while a properly installed, well-maintained unit returns its investment in the form of improved air quality and reduced HVAC wear.
Beyond The Box
Basement dehumidifier installation is an important procedure. It has to be part of a comprehensive basement waterproofing strategy that involves foundation, air circulation, and land drainage for dependable, permanent basement defense.
Structural Integrity
Check foundation walls and floors for cracks, gaps, or settlement. Left alone, hairline cracks can spread. Prompt repair stops water seepage and the gradual erosion that creates bigger issues.
Pier installation can stop active settlement by shifting loads to more stable soil. Repairing wall cracks, be it epoxy injection or hydraulic cement, reestablishes the barrier and lowers moisture breach points.
Think about bringing in a structural engineer for cracks that exhibit horizontal displacement or when doors and windows stick. Those things are indicators of more than cosmetic damage.
A firm base restricts hydrostatic pressure on walls, decreases the burden on a dehumidifier, and minimizes the risk of flooding down the line.
Air Sealing
Stop moist air from entering the basement envelope by sealing gaps, joints, and penetrations in walls and ceilings. Tiny holes around pipes, wires, and dryer vents let moist air circumvent dehumidification and condense on cold surfaces.
Caulk for skinny cracks and low-expansion spray foam for larger voids both increase your home’s airtightness. Rigid foam board or a polyethylene liner creates an indisruptable vapor barrier that cuts down diffusion through masonry and insulation cavities.
Around windows and doors, add weatherstripping and sealant to avoid drafts. Air sealing not only reduces moisture penetration, it reduces heat loss, which decreases energy consumption while improving indoor air quality by limiting mold culturing spaces.
Landscaping Impact
Grade soil to slope away from the foundation at least 5% within the first metre to channel rain and meltwater downslope. Without this, water ponds near the foundation and increases lateral pressure on basement walls.
Install gutter extensions and downspout diverters to direct roof runoff several metres away from the house. Integrate these with surface swales or a buried French drain to convey water to a safe discharge location.
In heavy clay soils or on tight lots, an exterior yard drainage system is needed to maintain a low water table in the vicinity of the foundation. Along with the structural waterproofing, keep these in check: clear gutters, clear outfalls, and repair settled swales so they continue to alleviate waterproofing from the interior and mechanical systems like sump pumps and dehumidifiers.
Conclusion
A properly adjusted dehumidifier saves an Englewood basement, reduces mold potential and safeguards its contents. Select a unit sized for your square meters and moisture load. Put it close to the primary moisture source, leave the intake unobstructed and operate the unit with a timer or humidistat. Anticipate a significant reduction in relative humidity in a few days and reduced energy consumption with regular filter and coil maintenance. Relatively easy patches like sealing cracks or installing a drain or pump are also beneficial. These affordable fixes produce immediate results and save on future expenses. For lean budgets, mid-range units combined with strategic insulation perform well. Schedule your install or get a quote. Contact us for a site inspection and a quote for your space!
Frequently Asked Questions
What size dehumidifier do I need for an Englewood basement?
Select capacity according to basement dimensions and moisture. For mild dampness, 10 to 20 liters per day per 50 square meters. For very damp or musty basements, select 20 to 30 liters per day. That’s why it’s important to measure your basement and the amount of humidity it experiences to select an appropriately sized unit.
Do I need a professional for basement dehumidifier installation?
You can DIY-install if handy with basic plumbing and electrical work. For Englewood basement dehumidifier installation, hire a licensed pro for hardwired units, condensate pump setup, or complex drainage. Specialists provide safe wiring, proper slope for drain lines, and warranty protection.
Where should I place the dehumidifier in my basement?
Set it in the middle and up on an even platform. Maintain free space of approximately 30 cm around the unit for air circulation. Steer clear of corners and direct obstruction from furniture or storage for optimal performance.
How do I drain a basement dehumidifier in Englewood’s climate?
Gravity drain to a floor drain or install a condensate pump for uphill routing. For long runs, use insulated PVC and keep a slight slope. During cold months, shield piping against freezing if unheated areas are present.
What are the typical installation costs in Englewood?
Anticipate a cost of $150 to $500 for simple self-install materials. Professional installs run between $300 and $1,000 depending on electrical work, condensate pump, and drainage complexity. High-capacity or commercial systems are more expensive. Receive local quotes.
How much will a dehumidifier reduce energy bills and humidity?
An appropriately sized, energy-efficient unit lowers relative humidity to the advised 45 to 50 percent and keeps HVAC stress-free. It might contribute some modest power consumption, but it minimizes mold damage and HVAC burden. It typically comes out ahead economically in the long run.
How do I maintain a basement dehumidifier for long-term performance?
Clean filters monthly and coils yearly. Examine drainage, leaks, and compressor service as per manufacturer intervals. Maintenance keeps it efficient, extends its life, and maintains warranties as well.
Key Takeaways
Ductless mini splits in Parker, CO are even more efficient than traditional HVAC in Parker’s high-altitude, dry climate,…
Key Takeaways
Due to Centennial’s high altitude and arid climate, the indoor air can be very dry. Keep an eye on humidity with a…