
How to Fix a Leaky Pipe Joint – Plumbing
Key Takeaways
-
Pinpoint the leak and joint type prior to selecting a repair method so you apply matching materials and tools.
-
Match repair actions to leak severity. Tightening or resealing is for minor drips, while patching or replacement is for active or structural leaks.
-
Set up your toolbox and safety equipment before starting. Use wrenches, tape, epoxy putty, gloves, and eye protection to stay efficient and protected.
-
Sealants, when applied properly, are superb. Clean your threads, wrap Teflon tape clockwise, use a little pipe dope, and you have an extremely hard, durable, watertight seal.
-
Opt for DIY for small, accessible leaks if you’re well equipped and confident. Go pro for stubborn, high-pressure, or system problems.
-
Keep the system in check by periodically checking pressure and water chemistry, inspecting joints, and routine tightening and seal refreshes.
Stop water loss and prevent damage with these step-by-step instructions.
Begin by identifying the leak, turning off the water, and drying the surface. Typical repairs might involve tightening connections, swapping out washers, using plumber’s tape, or applying epoxy putty for narrow cracks.
For corroded or cracked joints, either replace the fitting or call a pro. Below are tools, materials, and straightforward repair steps.
Leak Diagnosis
Begin by identifying the source of the moisture. Examine joints, fittings, and pipe walls visually and by feel for moisture, mineral deposits, or active leaks. If you see water stains on ceilings, walls, or under sinks, trace it back to the nearest fitting. Inspect both the exposed joint faces and the adjacent pipe body.
Some cracks appear as hairline lines while others present as corrosion flaking. Hand-tighten all accessible joints first to see if it stops the leak. Most leaks respond to bare-hand snugging.
Joint Type
Distinguish joint styles: threaded, compression, soldered (sweat), and push-fit. Threaded joints are male/female threads and usually require a layer of Teflon tape or pipe dope. Three wraps of tape is usually enough, but there are always those tight corners that appreciate four or even five.
Compression fittings have a nut and ferrule, so use two wrenches to hold the fitting and tighten the nut, which crimps the ferrule onto the pipe. Soldered copper joints make a gorgeous smooth bead, and you have to cut it out and re-solder if it leaks. Push-fit connections disconnect by pulling a retaining ring and can require replacement if seals fail.
Check pipe material: copper, PVC, PEX, chrome supply tubes, and pair sealants and parts. Flexible supply lines typically use rubber gaskets and require only hand-tightening plus a half-turn with a wrench. Over-tightening will crush gaskets.
Other mechanical parts such as ferrules, nuts, or joint pliers should be there and in good shape before reassembly. Make sure to check pipe diameter and fitting style so replacement parts actually fit. Mismatched sizes create leaks!
Leak Severity
This will tell you if the leak is a slow drip, a steady minor leak, or an active high-volume leak. Slow drips can be controlled in the short term, if not in the long term, with pipe wraps or epoxy putty as you plot a fix.
Active leaks typically require immediate shutoff and reassembly or part replacement to prevent water damage. Factor in pressure. High system pressure increases leak flow and shortens the life of temporary fixes.
Repair Speed, Downtime, Cost
Balance A tape or putty quick fix buys time, but under pressure it can fail. In zones with sensitive finishes or electronics, though, opt for a complete repair. List influencing factors: local pressure, age and condition of pipes, accessibility, and proximity to finishes that water can damage.
Root Cause
Check for improper tightening, worn washers or old sealant as common culprits. Chemical corrosion, heat, or blows can wear away metal and distort seals. Inspect for installation mistakes, such as cross-threaded nuts, misaligned fittings, or pipes that are cut too short.
Skinny copper or chrome supply tubes that have to be cut, bent, and aligned perfectly can create a leak path if bent incorrectly. If tightening and a quarter turn after the water is on breaks down, take apart and put back together the connection or swap out the bad component.
Essential Toolkit
A must-have toolkit for repairing a leaking pipe joint gathers the equipment and supplies you’ll require in advance. Stock for basic assignments and backups for hard problems so you can work without hitting new stalls. Think basic hand tools, measuring equipment, inspection lights, sealing compounds, and a build-a-bear temporary flow isolation solution.
Safety Gear
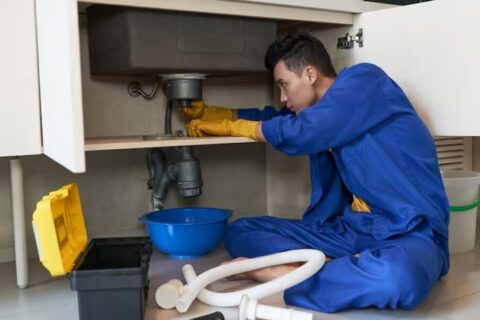
Wear gloves and eye protection to prevent cuts from sharp metal and sealant splashes. Wear protective clothing such as a long-sleeve shirt and strong jeans to protect you from hot water or chemical splatter. Use adequate ventilation when applying epoxy resin, solvent-based compounds, or heavy glues.
Have a towel, bucket, or small pump on hand to manage surprise surges and save your footing.
Repair Tools
Adjustable wrenches, joint pliers and pipe cutters take care of most loosening, tightening and removal operations on both threaded and smooth pipes. A flashlight or inspection mirror is useful in viewing concealed joints, behind cabinets or in crawlspaces. Measuring tape assures pipe diameter and length to select the correct fittings, sleeves or replacement sections.
Pack these in a convenient kit or bag. Having a small kit to bring to the worksite saves you time and frustration. Fundamental hand tools—screwdrivers, mini hammers and tape measures—make up the essential toolkit and enable you to take care of valve covers, clamps and minor fasteners without delay.
Sealing Materials
Keep supply plumbers tape (Teflon tape), pipe joint compound, and silicone sealants on hand for threaded joints and flexible seals. Self-fusing silicone tape is the ultimate quick fix product, wrapping and bonding right around the leak point for temporary containment. Pipe wraps and rubber gasket sheets come in handy when you require a larger contact patch.
Mechanical pipe plugs and inflatable pipe plugs enable pipeline isolation and repairs without complete system downtime. Epoxy putty or resin patches cracks and holes in pipe walls and works on metal, PVC, and copper when selected to suit the material. Select sealing solutions according to pipe type and leak severity.
For instance, plumber’s compound is for brass threads, silicone is for plastic unions, and epoxy is for structural cracks.
Checklist
Checklist (brief): adjustable wrench, joint pliers, pipe cutter, tape measure, flashlight/inspection mirror, screwdrivers, plumbers tape, joint compound, silicone sealant, self-fusing tape, epoxy putty, pipe wrap, rubber gaskets, mechanical/inflatable plugs, gloves, eye protection, towel/bucket.
Check your tools so they are ready. Tailor the kit to your environment. Include specialty cutters for PEX or a tubing bender for copper.
Repairing the Joint
Repairing a leaky pipe joint requires a clear plan. First, prepare the work area. Next, try simple tightening. Reseal threaded joints. Apply patches for small cracks. Replace parts when damage is severe. Repair the joint with proper tools and sealants. Then test under normal pressure for success.
1. Preparation
Turn off the valve and release pressure by opening taps downstream. Squeeze out the impacted area and mop up any excess water so the joint is dry. Wire-brush clean metal threads, compression ferules, and adjoining pipe faces, and wipe with rags to remove corrosion, old compound, and grease.
I’ve got the tools — adjustable wrench, joint pliers, tubing cutter, emery cloth — and sealing supplies — Teflon tape, pipe dope, epoxy putty, and replacement coupling if necessary — laid out. Photograph the joint and adjacent fittings; it aids reassembly and purchasing parts.
2. Tightening
If the leak is at a threaded fitting or compression nut, attempt tightening first. Utilize joint pliers or an adjustable wrench and twist just half to three-quarters of a turn past finger-tight for a firm, snug fit. Cease if resistance surges.
Over-tightening can strip threads, crush a ferrule, or crack a fitting, especially on brass or PVC. Make certain pipes are aligned so the joint sits flat, as any misalignment puts uneven stress on the seals. Once tight, dry and observe for slow seepage for a few minutes before continuing.
3. Resealing
Scrape off any old tape or compound with a rag and brush so new sealant touches clean metal or plastic. For male threads, wrap Teflon tape clockwise, overlapping about half the width, for two to three layers depending on thread size.
Apply compatible pipe joint compound over tape on metal threaded joints for added insurance. Just don’t use solvent-based dopes on plastic. Reassemble by hand then torque to spec or to feel. After reassembly, turn on water gradually and check for leaks under regular pressure.
4. Patching
For tiny cracks or pinholes in pipes, a rubber patch with hose clamps, a commercial pipe wrap, or epoxy putty may do the trick. Clean the dry surface, press putty into and around the leak, smooth edges, and let it cure fully, usually taking 15 minutes to a few hours depending on the product.
Wrap cures necessitate several centimeters of overlap on each side of the wound. Once cured, test at normal pressure and retest in 24 hours.
5. Replacement
Cut out corroded or cracked sections and replace fittings or washers if damaged. Take your time and find the right repair. Assemble with proper sealant and snug it down, not too much.
Test the new joint under full system pressure and verify no leaks prior to finishing.
Sealant Mastery
Sealants are key to repairing a leaky pipe joint. This section details how different products work, why surface prep matters, and how to apply and store sealants so you get a durable, watertight joint.
Plumber’s Tape
Teflon tape (PTFE tape) is appropriate for threaded pipe joints because it fills in small voids and lubricates the threads as they’re tightened. Wrap the tape in the direction of the thread spiral so it lays flat when you torque the joint, not unraveling and trapping wrinkles that cause leaks.

Apply tape widths corresponding to pipe diameter: narrow tape for small-bore fittings, wider tape for larger threads, and select heavier grades for coarse or aged threads. Chamfer the leading edge of male threads a bit so the tape seats evenly and the fitting engages smoothly.
For even better results, tape first, then lay down a thin smear of Teflon paste on top of the tape. This combo minimizes squeeze-out and increases chemical resistance. If you’re replacing a joint, pull off all the old tape and clean threads.
Don’t rewrap with damaged tape; wrap with fresh tape. After assembly, give the pipes a moment to hold together to allow tape and threads to calm before final torque.
Pipe Dope
Pipe joint compound, or “pipe dope,” functions where additional lubrication and a more malleable seal is desired. Use a thin, even layer on male threads only. Paste squeezing into the bore can clog or contaminate downstream systems.
For systems dealing with aggressive chemicals or elevated temperatures, select a compound rated as chemical resistant for the pipe material. Let the compound set per manufacturer instructions before pressurizing the system.
Too little curing is a frequent culprit. For most sealants, allowing the joint to settle for approximately half an hour helps prevent instant leaks, but with industrial-strength compounds, it can take much more time.
For threaded joints, nothing beats Teflon tape supplemented with a thin pipe-dope overlay to make the seal stout in high-pressure situations. Clear mating surfaces, sand and chamfer the leading edge as necessary, and make sure no old cement or bad pasting remains.
Badly applied cement or compound is the Achilles heel of a repair.
Storage and Handling
Store and handle sealant life. Store tape and paste in a cool, dry place, avoiding direct sunlight and excessive heat. Seal containers tightly after use to avoid skinning or contamination.
Proper shelf storage keeps workability and predictable cure times when you need it next.
The Pro Decision
Deciding whether to fix a leaky pipe joint yourself or hire a professional hinges on a few clear factors: time, cost, skill, safety, future risk, and any local rules or warranty limits. Here’s a quick glance at the key factors to consider before you do.
|
Factor |
DIY |
Call a Plumber |
|---|---|---|
|
Time to fix |
Fast for small leaks and accessible joints |
May be slower to schedule but faster for complex jobs |
|
Cost |
Low materials cost; risk of added expense if done poorly |
Higher upfront but reduces risk of repeat repairs |
|
Skill/tools |
Basic hand tools, pipe wrench(s), Teflon tape |
Specialized tools, experience, access to parts |
|
Future risk |
Higher if misdiagnosed; possible water damage |
Lower; pros diagnose hidden damage and code issues |
|
Safety/regulations |
OK for simple repairs; check local rules |
Required for some systems and permit work |
|
Warranty/insurance |
May void equipment warranties or insurer claims |
Keeps warranties intact; provides documentation |
Weigh comfort with tools and safety. Hand-tighten joints first to seat fittings and check alignment, then complete with the appropriate wrench action. For compression fittings, use two wrenches: one to hold the body steady and the other to crimp the ferrule onto the pipe. If a fitting drips when water is on, tighten the nut another quarter turn. Do not over-tighten thin sections!
Material wise. Flexible supply lines with rubber gaskets typically require nothing more than hand-tightening and a half turn with a wrench for a reliable seal. When it comes to Teflon tape on threaded connections, three wraps are usually enough. Thin-walled copper pipes are especially susceptible to damage from eddy currents and mechanical stress over time. Be extra careful when working near bends or clamps.
When to DIY
Try DIY when the leak is minor, the joint is accessible and the issue fits tried-and-true fixes. Tightening loose nuts, replacing a worn gasket, swapping a short length of tubing or applying pipe wrap are all manageable with basic tools. Hand-tighten all the joints first, test with water, then finish with appropriate wrench turns.
Quick fixes such as plumbing putty, rubber patch clamps or tape-type wraps serve as temporary control measures. Save service calls by doing unbaked repairs yourself when you have sticky fingers and a hammer.
Specific DIY-suitable circumstances:
-
Visible hairline leak at a threaded connector
-
Accessible compression fitting on a sink supply line
-
Flexible hose replacement under a basin
-
Minor sob at a freshly cooled soldered joint
When to Call
Call a plumber for leaks that don’t go away with a simple fix, or if you’re noticing structural water damage, or if the system is complicated. The Pro Decision – Get pros to help with solid copper mainlines, industrial or high-pressure systems, leaking hidden pipe runs or when permits and code compliance count.
Skip the DIY if you don’t have the tools, you’re not confident, or the repair is a warranty or insurance risk.
|
Scenarios to call |
Reason |
|---|---|
|
Hidden leaks in walls or floors |
Risk of unseen damage and mold |
|
Main supply or hot-water lines |
Higher pressure and heat risks |
|
Recurrent leaks after repair |
Incorrect diagnosis likely |
|
Work needing permits |
Must meet local codes |
Beyond the Fix
A well-maintained plumbing system guards your investments and minimizes emergency repairs. The steps below address pressure, water chemistry, and simple routine checks that keep joints strong and decrease the likelihood that a quick patch turns into a recurring issue.
System Pressure
Excessive or inconsistent water pressure places direct pressure on joints and fittings and can cause patches to fail. Verify pressure with a gauge on a convenient hose bib or appliance connection. Safe household pressures are commonly between 300 and 500 kPa, though local standards differ.
Add a pressure-reducing valve when levels are above the safe limit to safeguard fittings and seals. Following any repair, test pressure for a few days. A spike following your efforts can expose a missed weak spot or a valve left half open.
Maintain a basic log of readings, including date, time, and value, to identify trends that precede joint failure. Recall that higher pressures can cause hardening compounds or tapes to crack, so verify pressure is regulated before depending on a seal.
Water Chemistry
Water that is acid, highly alkaline, or has a high level of dissolved minerals accelerates corrosion and deteriorates certain sealants. Test your water for pH, hardness, and chloride content via standard kits or at a lab.
Treat water with a softener or neutralizing filter where necessary to minimize mineral deposits that pry joints apart eventually. Choose sealants, tapes, and pipe materials that complement your water profile. Certain epoxies do not do well in very alkaline water, for example.
Monitor any alteration in water quality, particularly following municipal supply adjustments or new well usage, since a variation can reduce the lifespan of fittings and compound selections.
Routine Checks
Regularly look over any exposed pipes, joints, and fittings to identify little issues before they become big ones. Secure loose nuts, swap out worn washers, and renew sealants before a small drip becomes a consistent leak.
Just clean the area with a wire brush and soap and water prior to applying a hardening compound. Getting rid of the rust and grime helps it stick. Beyond the Fix Self-fusing silicone tape is a quick temporary seal when access is tight.
It provides simple, effective short-term sealing. Epoxy putty or hardening compounds can seal leaks but usually require disassembly for trusted results and should be allowed to cure, generally around an hour, before pressurizing the line. Pipe dope or Teflon tape may be okay for putting together fittings, but they are not great for repairing on-the-fly leaks.
-
Ongoing maintenance tips:
-
Take pressure readings every week.
-
Flush lines to minimize sediment.
-
Replace sacrificial anodes if fitted.
-
Inspect and clean traps and vents.
-
Keep a small kit: tape, putty, brushes, gauge.
-
Conclusion
Fixing a leaky pipe joint can seem difficult. The steps here break it down into clear and achievable chunks. Begin by identifying the leak, choosing appropriate tools, and aligning the repair technique with the pipe variety. Small cracks seal with tape, paste, or a clamp. Really bad damage needs a cut-out and a new fitting or a professional. Sealants work best on clean, dry metal or plastic. Test each repair under normal pressure and observe for slow drips over 24 hours.
An easy example is a loose compression nut on a sink pipe. Tighten it a bit, use thread tape, and test. For a corroded elbow, cut it out and fit a compression repair sleeve.
If in doubt, call a licensed plumber! They save hassle and prevent greater destruction. Go one step at a time and trust clear checks.
Frequently Asked Questions
What are the first signs that a pipe joint is leaking?
Watch for moisture, fungus, mineral deposits, or constant dripping around joints. Look beneath sinks and appliances. This is the first step in preventing larger water damage.
Can I fix a leaky joint without shutting off the water?
Turn off the water supply before most repairs. While rubber and hose-clamp patches can minimize leaks in a pinch, they are not permanent.
Which tools are essential for fixing a leaky pipe joint?
Be sure to have an adjustable wrench, pipe cutter or hacksaw, plumber’s tape (PTFE), joint compound, sandpaper or emery cloth, and replacement fittings. These address frequent repair necessities.
When should I use plumber’s tape versus joint compound?
Plumber’s tape is for threaded metal or plastic fittings. Employ joint compound for a more robust seal on metal threads or if directed by the fitting’s manufacturer.
How long does a typical pipe joint repair last?
A quality repair using the right stuff and the right approach can endure for years. Temporary patches survive from days to months. The longevity varies based on water pressure and the condition of the pipe itself.
When is it time to call a professional plumber?
Call a pro if the leak is large, pipes are corroded, multiple joints leak, or if you’re not comfortable soldering, cutting, or working on pressurized systems.
Can I prevent future leaks at pipe joints?
Yes. Put in proper fittings, don’t over tighten, replace old ones, lower the water pressure, and check your joints. These preventive measures save you money and damage down the road.
Key Takeaways
Moving your sink to an island increases your kitchen’s workflow by centralizing prep and clean-up, diminishing perimeter…
Key Takeaways
Understand typical issues such as drain clogs, incorrect installation, and pump or hose malfunctions to target fixes where…