How to Fix Common Toilet Running Issues: A Step-by-Step DIY Guide
Key Takeaways
-
I can save water and reduce my utility bills by addressing running toilet issues early, preventing unnecessary waste and expenses.
-
Learning a bit about each toilet tank component and which parts most often fail makes it much easier to diagnose and fix toilet running problems quickly.
-
So I’m always checking and cleaning the tank components, particularly in hard water areas. Never ignore small toilet problems. This routine doesn’t just make my toilet last longer, though.
-
Having a quality—and well-stocked—DIY repair kit Having the right tools and replacement parts on hand makes you prepared.
-
After every repair, I should always test each toilet, tibet thoroughly and listen closely for any leaks or unusual sounds.
-
If I encounter persistent issues, visible damage, or feel uncertain about repairs, calling a professional plumber is the safest option.
So fixing common toilet running issues usually just takes a couple of easy steps, with some simple tools you might already have at home. From my experience, the leading culprits are flappers that are worn out, handles that are stuck or float arms that are misaligned.
Perhaps you hear water running, you get a shocking water bill, or your toilet tank never fills up. By following the proper procedure you address every component, starting with inspecting the flapper seal through adjusting the float height. No magical tools or exotic parts required.
Your most common repairs can be completed with a basic adjustable wrench, channel lock pliers and new flapper or fill valve as required. In the next parts, I break down each step, show what to check, and help you get your toilet working smooth again without much fuss.
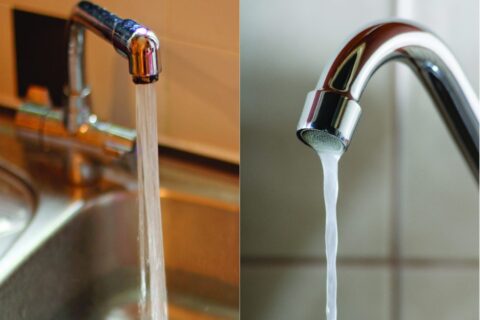
Why Does My Toilet Keep Running?
A running toilet usually indicates that one or more internal components have failed or need adjustment. While these issues may appear trivial at face value, their cumulative impact lands a heavy financial blow to your wallet and to the planet.
One small leak can waste hundreds of gallons of water a day. This increases their water bills and puts even greater strain on our water supplies. Repeatedly ignoring these issues can really beat up the interior of your tank. Therefore, they have the potential to majorly reduce the lifespan of your toilet.
Whether at home or in public spaces, when toilets misbehave, life is interrupted, and those impacts can escalate quickly. Repairing the issue immediately reduces the cost in addition to preventing the waste from increasing.
The Silent Water Waster Explained
A leaky toilet is sometimes the hardest leak to catch. It can discreetly flush away over a third of your home’s daily water use!
Over the course of a year, this adds up to thousands gallons and a painful poke to your wallet. Water leaks like this are not only expensive, they put a severe burden on local water systems. Unfortunately, too many people learn about it only when their bill suddenly increases.
Catching leaks before they become too disruptive saves water and money.
Understand Your Toilet Tank Mechanics
Inside that tank, you’ll have a fill valve, float, and flapper—all essential components that are responsible for getting the job done. The fill valve is responsible for letting water in, the float indicates how much water is desired, and the flapper keeps the seal.
When anything fails, or becomes corroded or stuck, water continuously runs. This means the standard plastic or rubber flappers often turn brittle and break down in five to eight years.
Identify Common Running Culprits
Flapper leaks, fill valve jams or a refill tube that’s the wrong size are the most common issues. The best way to diagnose the issue is by lifting the tank lid and checking each component.
Understanding your toilet’s configuration gets you on the fast track to easy repairs. Some simple maintenance, such as replacing old flappers, goes a long way in preventing problems and helping it all operate efficiently.
How Water Quality Affects Parts
Mineral deposits from hard water erode the interior hardware. Flappers and flush valves can become hard or befoul with debris.
Keeping a clean water softener and cleaning the components periodically will ensure that they operate for an extended period.
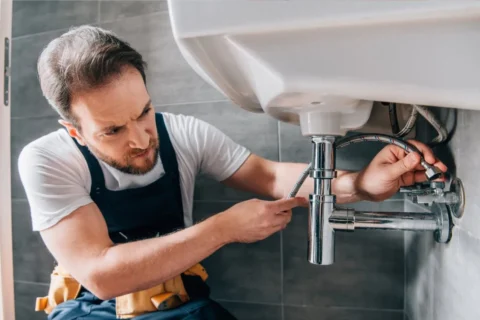
Essential Tools for Toilet Repair
Repairing a running toilet is easy when you have the right tools on hand. Having everything you need right at your fingertips, every step is faster and easier. A tiny investment in a basic fix-it kit brings huge dividends in time and anxiety when unexpected leaks or breakdowns come calling.
Before jumping in to any repair, it’s good to understand precisely what you should be applying your efforts toward on the most frequent problems.
Gather Your Basic Repair Kit
My essential toolkit would definitely begin with an adjustable wrench and a flat-head screwdriver. These two tools should take care of pretty much any nut, bolt, or screw that comes with a toilet. Always have a set of channel lock pliers available.
A small hacksaw goes a long way in handling those corroded down bolts, while a utility knife makes quick work of wounding flappers or supply lines. I keep a few replacement flappers on hand, averaging $20–$50 each.
I carry float assemblies at $10–$30 each, spare supple lines, and a roll of plumber’s tape. Food coloring is an excellent method of checking for leaks in your tank. Stocking up on these parts means you’ll be ready for leaks or parts that wear out—which can happen every few years.
I store all these together in an old leaky toolbox to keep track of them and so I can find what I need quickly.
Safety First: Shut Off Water
No matter what repair I’m doing, the first thing I do is turn off the shutoff valve behind the toilet. This easy addition prevents water from leaking in, significantly reducing the possibility of water damage.
After turning it off, I go flush the toilet to drain/dry the tank and bowl. I put towels down all around the base to try to soak up the drips. This step is important because it prevents the work area from becoming slippery and unsafe.
My Personal Go-To Extra Tool
A basin wrench can really save the day and make hard jobs super easy. Its long handle fits behind the tank where a normal tool won’t work.
With this tool, you can get in behind supply lines to loosen or tighten them with little risk of scraping your knuckles. Since it’s not limited to repairing toilets, it’s a great tool to have in any tool kit.
Diagnose Your Running Toilet Issue
When a toilet continually runs, it not only wastes an unnecessary amount of water but takes a toll on your bank account. Even a slow leak can waste more than 2,880 gallons of water per day. That can tacked more than $1,500 onto your bill each month!
I always begin with a very detailed system to identify where the failure occurs. Here’s a simple checklist you can use:
-
Listen for hissing or trickling water sounds.
-
Remove the lid to the tank and check all components for signs of deterioration or dislocation.
-
Check the water level—needs to be at a height of about 1 inch below the overflow tube.
-
Test for leaks with food coloring.
-
Record everything you see/hear/smell/interpret in each stage.
Listen Closely for Leak Clues
In our new home, I now listen for any hissing or trickling sounds coming from the bathroom. These noises usually are the result of the fill valve or the flapper.
Whenever I hear something interesting or new, I’ll capture it on my phone or write it down, keep track of it. When the house is still, the source is readily apparent. Following these sounds allows us to repair the correct component on a future date.
Perform the Food Coloring Test
Just a few drops of food coloring in the tank can reveal these sneaky leaks. If you notice any color running into the bowl after around 20 minutes, then it’s safe to assume your flapper is at fault.
This one step makes it super easy to catch all the leaks I can’t visually detect. Once your toilet is in good shape, I recommend repeating this test every few months just to stay on top of things!
Check Tank Water Level Height
First, I check to see that the water level is right under the overflow tube. Too little water equals a pathetic flush.
Too low and the toilet runs constantly, wasting hundreds of gallons. The solution is just raising the float—turn the screw or raise the float arm.
Inspect Internal Tank Components
I start with the flapper, fill valve, float, and supply line. If I see cracks or wear we take pictures of the surface and measure the wear profile.
If the supply line appears old, corroded or otherwise decrepit, I’m going to replace it. I try to continue with the same brand on replacement parts, so everything matches up and will cause fewer headaches.
Fix Common Running Toilet Problems
A running toilet is a major water waster—and money waster, too. Even a minor leak can raise your bill by $XX—and waste XXX gallons per day! Most people think of it as an annoying little inconvenience. A mere moderate leak can waste 2,880 gallons of clean water each day, at great expense.
All of these common running toilet problems are simple enough that you can fix them yourself. Here are the most common fixes to keep your water use and costs in check:
-
Adjust the float mechanism
-
Check and clean the flapper seal
-
Replace a worn or damaged flapper
-
Examine and adjust the flapper chain
-
Adjust or replace a faulty fill valve
-
Inspect the overflow tube
-
Address flush valve leaks
-
Fix a sticky handle or lever
1. Adjust the Float Mechanism Correctly
Depending on your flush system, you may need to adjust the water level by raising or lowering the float.
In modern toilets, you’ll find one of two common toilet float types. The float ball is mounted on the end of a rod. That cup travels vertically as it slides up and down over the fill valve.
Check to ensure the float can move up and down without scraping the side of the tank. If it gets stuck, water continues to run. A float set too high results in constant filling and water waste.
2. Check and Clean the Flapper Seal
Inspect the flapper for muck or degradation. Remove any deposit buildup on the flapper and the seat. A clean flapper seals nice and tight eliminating troublesome leaks.
If cleaning doesn’t work, replace with a new flapper—most cost $20–$50.
3. Replace a Worn or Damaged Flapper
To do this, first remove the defective flapper. Next, install a new one by clipping it in place and make sure it’s thoroughly seated and flat.
Flush to see test results. Your toilet will stop running immediately.
4. Examine and Adjust Flapper Chain
Check for tangles or excessive slack. If your toilet keeps running, it’s possible that the flapper chain is too long.
Run a test by flushing to check on all of the above. If it flushes tight, the leak is eliminated.
5. Adjust or Replace Faulty Fill Valve
Then turn the adjustment screw or knob to adjust water to the correct level. If it continues to run, replace the fill valve.
Most are $10 to $30. Screw it to a snug level to eliminate any drips.
6. Inspect the Overflow Tube Condition
Look for any cracks or that the refill tube is not too high or low. If it’s cracked, replace it.
If it’s off-level, shim to correct the height.
7. Address Potential Flush Valve Leaks
Check for water seeping around the flush valve. Either tighten the flush valve assembly or replace the flush valve altogether.
Always test for leaks afterward.
8. Fix Sticky Handle or Lever
If your handle sticks, look for rust, dirt or a bent toilet lift rod. Lubricate it or simply realign it by hand.
Then get everything put back together and test to ensure it glides freely.
Have any kind of record of the work done for future reference. If issues persist, a trained plumber will be able to get to the bottom of it.
To help prevent this problem from occurring, replace your supply line every 3–5 years.
Advanced Troubleshooting Insights
The next time you run into a toilet that keeps running, use these few additional steps to help identify the problem. These steps will make sure you’re diving deep to find the real issue. Here are some solid techniques you can use when basic fixes do not cut it:
-
Ensure the float height and chain length are correct for the flush valve.
-
Check for hairline fractures in the fill valve or flapper.
-
Check your water pressure beforehand if it exceeds the tank’s capacity.
-
Inspect the flush lever for loose or worn parts.
-
Check each washer and seal to make sure they’re tight and not out of socket.
-
Conduct a dye test to identify leaks not visible from the outside of the tank.
Often a mistake made in haste can have permanent repercussions. Installing a flapper that’s the wrong seal type/size can lead to a continuously running toilet. If the flush valve is misaligned, it can cause the same issue even post repair.
It’s your guide for proofreading, ensuring everything is tightly assembled, and using the assembly plans to train your blueprint. Patience is key at this stage, as a rushed process will result in important steps being left behind. A repair checklist or post-repair notes can go a long way to ensuring that something doesn’t get overlooked.
When Simple Fixes Are Not Enough
A toilet that continues to run even after replacing parts can indicate more serious problems. Watch for symptoms such as water accumulating at the base, unusual sounds or a wobbly tank. It only makes sense then to consider the entire toilet as a system—rather than just one component.
Old toilets—particularly those older than 15 years—probably require a complete replacement. When chronic issues indicate that a more comprehensive solution or perhaps even a completely different division entirely is warranted.
With HOROW toilets, easily accessible parts and straightforward service steps are designed to keep your toilet operating flawlessly with no trial and error.
Spotting Subtle Installation Mistakes
Small errors during installation, like a tilted tank, loose bolts, or a crooked fill valve, often cause leaks and running water. Make sure to thoroughly check that each piece matches up, and read the instructions included with the toilet.
With HOROW toilets, intuitive design helps you identify and correct these errors before installation. A good fit and proper placement equal fewer troubleshooting woes.
Double-Check Your Repair Steps
Review every step you took in the course of making the repair. Have a running list of what you’ve repaired, and keep notes about what worked to repair it. This practice avoids the snowball effect of errors accumulating and evens out the difficulty level of the next correction.
With HOROW’s design, parts are simple to access and replace, so extensive hard work pays off. Following a pre-departure checklist reduces anxiety and preparation time.
Test Your Toilet Repair Thoroughly
Once you’ve successfully repaired your running toilet, testing your work thoroughly allows you to detect minor issues before they become major annoyances. A simple test prevents deeper damage, saves you money on your utility bill, and stops water waste.
Here’s a quick list of steps for a full check:
-
Turn the water supply back on slowly.
-
Watch all connections for leaks right away.
-
Flush the toilet a few times.
-
Water level in the tank should be roughly 1 inch below the overflow tube.
-
Listen for odd sounds, like hissing or trickling.
-
Put some food coloring in the tank, wait 30 minutes, and check for leaks.
-
Go back and make whatever adjustments with the flapper chain or the float as necessary.
Turn Water Supply Back On
Begin with the shutoff valve located at the bottom of the toilet, turning it clockwise gradually. A gentle trickle gives you an early warning for leaks that haven’t developed into big problems yet.
Check all connections and the bottom of the toilet tank for any leaking or signs of drops of water. In fact, even a minor leak can waste upwards of 2,800 gallons per day.
Flush several times to ensure the water fills and drains properly. If you notice water leaking, first try tightening the connections or look for an O-ring washer.
Conduct Multiple Test Flushes
Flush the repaired toilet at least three times. Repeated flushes should indicate if the flapper is sealing properly or if water continues to run.
Keep an eye on the water level. If it goes up too high or too low, bend the float arm. Check the chain to be sure it’s not too tight, preventing the flapper from closing fully.
Replace your flapper every one to two years to ensure trouble-free operation.
Listen Carefully for Silent Leaks
Remain nearby initially after each flush. Keep an ear out for any quiet hissing or trickling which could indicate a silent leak.
Give it a few minutes—if you notice anything, write it down to address later. A recently introduced, hidden leak can end up costing you more than $3,000 in just 30 days.
Add food coloring to the tank, and after waiting a bit, if you see color in the bowl, you may have a leak that you can’t hear.
Prevent Future Toilet Running Issues
Maintaining your toilet will help save water and prevent costly repairs down the line, especially when addressing common toilet problems. It’s not just about the big things; even small issues like a bad flapper or sluggish flush can affect overall toilet function. Simple habits can prevent toilet leaks and ensure your toilet works efficiently.
-
Check your toilet tank monthly for leaks, worn parts, and excessive water level.
-
Soak non-electrical tank components in warm soapy water and scrub with a soft brush every few months.
-
Check the water level and change it so the water is approximately 1 to 1.5 inches below the overflow tube.
-
Ensure the chain allows the flapper to close tightly. Move the hook down a link or two if necessary.
-
Avoid future running toilet issues. Replace your old flappers every 5–8 years to prevent leaks.
-
It is important to educate yourself about your local water quality and the effects it has on rubber and plastic parts.
-
Mark the results of each inspection so you notice signs of wear before it becomes a problem.
Schedule Regular Tank Inspections
Making a regular reminder for a simple monthly check can catch issues before they escalate. Open up your tank and take a look at your water level. If the water level is too high or too low, tighten the screws or adjust the float accordingly.
That little drip or worn rubber can waste 10,000 gallons or more each month. If you do notice a leak, document what you find. These notes allow you to identify trends and address issues with repairs before the repairs become expensive.
Clean Tank Components Periodically
With a soft brush and mild cleaner, scrub any sediment off the flapper, float and other easily removable parts in your toilet tank. This prevents buildup from eventually eroding your toilet.
To extend the life of seals and gaskets, avoid using harsh chemicals or oversaturating the seals. A few minutes of cleaning a few times per year prevents messier and more expensive breakdowns and keeps your flushes flowing.
Understand Your Water’s Long-Term Impact
Hard water can corrode parts more quickly. Determine what type of toilet water you have by reviewing city reports or consulting a plumber.
If your water is hard (high mineral content), a reverse osmosis unit or softener will keep those minerals from accumulating. Change the frequency flappers or other components are replaced or cleaned based on your water quality.
Know When to Call a Plumber
While DIY fixes can handle many common toilet problems, there comes a time when you need a pro. Knowing how to identify plumbing issues, such as toilet leaks or a sluggish flush, can save you money and unnecessary stress when you call a plumber for essential repairs.
-
Water keeps running after you tried basic fixes.
-
There are cracks or chips in your toilet or tank.
-
The supply line is more than five years old or visibly worn.
-
You feel lost or uneasy about the repair steps.
-
The toilet has an unusual flush mechanism or a complicated design.
-
Leaks, ghost flushing, or strange noises keep popping up.
-
DIY repairs haven’t solved the problem.
Persistent Running After DIY Attempts
Once you have replaced the flapper or flush valve seal, monitor the toilet to see if it is still running. The fill valve might just be the problem. You’ll want to try tightening bolts, washers, or inspecting the overflow tube.
Only a licensed plumber can identify and repair these in short order. If you’ve tried fixing it several times and the sound of water running doesn’t go away, call an expert!
When in doubt, call for back-up! Keep a detailed account of every solution you attempted, note which parts were utilized and what went wrong. This ensures maximum efficiency both for you and for your plumber.
Notice Visible Cracks or Damage
Cracks in the toilet itself or the tank can cause leaking that may damage bathroom or kitchen floors. If you note any imperfections or you notice that the supply line is outdated or frayed, have it repaired immediately.
Initially small fissures deteriorate and repairs are more expensive in the future. Check for pooling water at the base or under the tank.
Feel Uncomfortable with Repairs
When in doubt, that’s not the right time to push yourself. Plumbing isn’t just about having the right tools, it’s about having the experience.
Bringing in a pro protects your health and prevents little issues from turning into bigger ones.
Dealing with Complex Toilet Designs
Most of the new toilets have dual flush systems. Sure, manuals or step-by-step guides found on the web are useful, certain repairs require the judgment of a seasoned plumber.
Understanding your toilet’s specific make and model allows you to get the right fix.
Conclusion
Repairing a running toilet doesn’t have to be an ordeal. With a few simple tools and some quick checks, I save water, dodge a big bill, and keep my home in shape. Usually a new flapper or an adjustment with the fill valve solves the problem. When I do eventually run into weird leaks, I certainly won’t feel ashamed calling a plumber. Afterward, she said, “They can fix that right away for me!” Clean hands, a dry bathroom floor, and no more irritating endless running water wake-up noise are instant improvements. Being well informed and aware of potential issues helps ensure that my toilet is always operating in tip top shape. Have a toilet with a mind of its own? Try these steps and find out just how quickly you can get things running right again.
Frequently Asked Questions
What causes a toilet to keep running?
A running toilet is often caused by common toilet problems such as a faulty flapper or a stuck float, which can lead to costly mistakes in your plumbing system if not addressed promptly.
How can I quickly stop my toilet from running?
Shut off the water supply valve located behind the toilet to prevent water waste and overflowing while you address common toilet problems or diagnose plumbing issues.
Is it safe to fix a running toilet myself?
Fortunately, most running toilet problems, such as clogged toilets or toilet leaks, are not only harmless but also simple to resolve with common tools and a little know-how. Always read your manufacturer’s instructions and turn off the water supply before attempting any plumbing repairs.
How do I know if the flapper needs replacing?
If your flapper valve is warped, cracked, or otherwise fails to seal after a flush, it may be time to replace it. A worn flapper is a common toilet problem and the most frequent culprit for running toilets.
What tools do I need for a DIY toilet repair?
The tools you’ll need include an adjustable wrench, pliers, sponge, bucket, and a replacement flapper or toilet fill valve depending on your issue. These simple tools will handle 90% of your common toilet problems.
How can I prevent my toilet from running again?
Make it a habit to check and clean essential toilet parts, replace worn components like the toilet fill valve, and avoid strong chemicals in your toilet tank. Smart preventative maintenance helps prevent common toilet problems, conserving water and saving money.
When should I call a plumber for a running toilet?
If your DIY tasks do not do the trick, check for toilet leaks or water pooling around the toilet’s base. If you’re still uncertain about the repair, make sure to contact a licensed plumber for efficient plumbing services.
Key Takeaways
Today, I have to put in a water pressure regulator. It will prevent damage to my plumbing system and appliances resulted from…
Key Takeaways
By regularly checking and replacing your anode rod, you can greatly prolong your water heater’s lifespan. This easy piece of…