How to Flush a Water Heater – Your Complete Guide
Key Takeaways
-
Here’s how to flush a water heater.
-
As you monitor for anything odd or off, like strange noises, inconsistent temperatures or discolored water, you will know when maintenance is needed.
-
Tank and tankless water heaters still require periodic flushing, but it’s a bit different. Always refer to your model’s user manual.
-
Taking safety and the right tools before you begin the flush can help you avoid accidents and achieve results.
-
Scheduling routine maintenance prevents expensive repairs and promotes energy efficiency and eco-consciousness.
-
If you are faced with thorny matters or recurring concerns, a professional is the best way to go in maintaining your water heater.
Flushing a water heater means clearing out mineral and debris build up by draining old water from the tank. Flushing keeps your hot water flowing well and can extend the life of the heater.
Most models require this task annually, but certain households may require it more frequently. Regular flushing assists with water quality and keeps energy use lower.
Next, clear steps and tips to make this job with simple tools and easy steps.
The Silent Saboteur
One silent saboteur that lurks inside a water heater is sediment buildup. As time goes on, hard water minerals such as calcium and magnesium deposit on the bottom of the tank. This sediment acts as an insulating layer between the element and the water, making it difficult for the heater to perform its function.
The effects can be initially insidious and become more grave the longer the problem is neglected. If left unchecked, sediment can be a silent saboteur that results in excess energy consumption, premature part failures, and even early unit replacement. Periodic flushing is an easy, pragmatic action that can mean everything.
Efficiency Loss
Sediment buildup isn’t just gross. It affects the heater’s efficiency in heating water. When minerals settle to the bottom, the heating element has to labor and consume more energy to heat the same volume of water. In homes with hard water, this effect is even greater.
It’s everyday for homeowners to see their energy bills sneaking up somewhere. This increase typically indicates a decrease in water heater efficiency. Extended hot water wait times, tepid showers, or even temperature fluctuations can indicate distress.
Other times, the water may look discolored or the pressure may be low. Periodic flushing prevents the tank from filling with sediment and allows the heater to do its job. This yearly upkeep step will help make sure you have hot water when you want it and keep bills low.
Lifespan Reduction
Permitting sediment to accumulate can shave years from a water heater’s service life. The extra stress from heating through a mineral barrier causes components to wear out more quickly, including the anode rod. About this rod, it prevents the tank’s rust, and when that’s breached, corrosion is a very real fear.
Flushing your heater isn’t just for efficiency; it’s for long-term value. A well-maintained heater can go years longer than one that’s neglected. That’s the difference the humble flush can make between a cell that lasts 10 years and one that fails in a couple.
Costly Repairs
Not addressing sediment build-up can cause costly repairs or even replacement. Mineral buildup can make your water heater leak, ruin your heating element, or even become a safety hazard such as gas leaks or scalding. Fixing or replacing these parts is not cheap, and emergency service can be pricier still.
Being vigilant for warning signs, such as odd sounds or rusty water, is crucial. Routine flushing can help avoid these problems. Turning the thermostat down to 48C (120F) conserves energy and minimizes exposure.
The Flushing Process
How to Flush a Water Heater | A Complete DIY Guide | Ultimate Handyman It’s really the process of shutting off power and water, flushing the tank and flushing sediment. Be careful with each step to prevent any cracks or bruises. This phase takes around 20 to 60 minutes. Larger tanks tend to require more time.
1. Essential Preparations
Equip yourself with a flathead screwdriver, a normal garden hose and a massive bucket. Be certain you have free access to the drain valve and cold water valves. These are typically at the bottom and top of the unit.
Again, check the manual for your specific model. Some may need additional steps or have additional safety mechanisms. Orient yourself to position the bucket or hose so that water would drain safely out, either out in the open or into a drain it can flow into.
2. Power Shutdown
Shut off the water heater’s power. For electric units, shut off at the breaker panel. For gas units, shut off the gas and ensure the pilot is out. This is needed to avoid electrical shocks or gas leaks.
Verify all controls and ensure the unit is cool to the touch to prevent burns. Save your steps for maintenance down the line. Recording this will streamline the process next time.
3. Water Connection
Disconnect the cold water inlet and the tank will drain freely. Connect your garden hose to the drain valve, being careful the connection is tight to prevent leaks.
Open a hot water tap in your house to let the pressure off internally. Inspect all hoses and junctions for leaking prior to flushing as unnoticed leaks could result in water damage.
4. The Draining
Open the drain valve to drain the tank. Water will start flowing through the hose. Be on the lookout for sediment and debris, which can sometimes turn the water cloudy or discolored.
Allow the tank to empty. This can take a few minutes, depending on the size of the tanks. For optimal efficacy, open and close the cold water valve three times and then open and close the drain valve.
This aids in breaking up and flushing out residual sediment. Continue until you see clear water running from the hose. Anytime you drain water, route it to an outside drain or safe location.
5. The Final Flush
After the tank is drained and free of sediment, close the drain valve. Reconnect and open the cold water supply so the tank starts to refill.
Flush clean water through the hot water faucet for a few minutes; it will assist in pushing any final debris out. Give it one last leak check around all of the connections.
Only turn the electricity back on or relight the gas once everything is dry and safe. You’ll know the flushing is done when the water runs clear from the hose.
Heater Type Differences
Not all water heaters are created equal when it comes to flushing. The primary distinction is between tank and tankless models, which can both be fueled by gas or electricity. Understanding these differences allows you to tweak your maintenance scheme and keep your system humming.
As a quick refresher, the table below displays some fundamental differences in flushing requirements and processes for tank and tankless water heaters.
|
Heater Type |
Flushing Frequency |
Flushing Complexity |
Downtime |
Key Steps |
|---|---|---|---|---|
|
Tank |
Every 6–12 months |
Simple |
~20 minutes |
Drain tank, flush, refill |
|
Tankless |
Every 6–12 months |
More complex, time-intensive |
Hours or more |
Use pump, flush with solution, rinse |
Tank Heaters
Tank type water heaters must be flushed periodically to remove sediment that falls to the base. This sediment, composed primarily of minerals from the water supply, can damage the heater, reduce heating speed, and reduce energy efficiency.
They recommend flushing the tank every 6 to 12 months, although some homes in hard water areas may need to flush more often. When skipped, sediment can accumulate, clogging the drain valve and causing popping sounds or uneven heating.
Over time, it can reduce the lifespan of the heater or even cause leaks. If you set a schedule for flushing, such as putting it on your calendar, it’s a great way to keep your tank humming and avoid major headaches.
A quick flush of a tank heater is simply attaching a hose to the drain valve and opening it for a little bit, then closing it. For a more thorough cleaning, the tank should be completely drained and cleaned. Always turn off the heater a few hours before flushing so the water cools down and lowers the risk of burns.
Tankless Heaters
Tankless water heaters use a different method. These units require flushing on a regular basis in order to remain efficient. The steps are a bit more involved.
Flushes are still generally performed every six to twelve months, as with tank models, but could be required more frequently in hard water locations. The flushing job for tankless systems requires additional time and tools.
You typically need a pump and a vinegar solution to clean mineral deposits out from the heat exchanger. This can take hours or, in stubborn instances, more than a day. Missing this step can delay heating and even harm the system. Always refer to your model’s manual for the correct procedure, as each unit can vary.
Neglecting to flush a tankless heater can lead to mineral buildup that clogs and slows water flow, thus reducing heating efficiency. This may result in error codes, cold water, or even a complete breakdown.
Gas Versus Electric
|
Fuel Source |
Flushing Steps |
Maintenance Notes |
Energy Efficiency Considerations |
|---|---|---|---|
|
Gas |
Shut gas, cool, flush, relight |
Venting and ignition safety |
Heats faster, but needs vent check |
|
Electric |
Switch off, cool, flush, power |
Element scaling a concern |
Simpler, but slower to recover |
Heater type differences Both gas and electric heaters require separate safety measures. On gas models, the gas supply must be shut off and the burner re-lit after flushing. Electric heaters need to be unplugged or have the breaker switched off prior to starting.
Scaling around heating elements is more of a concern in electric units, so be sure to inspect for deposits when flushing. If sediment or minerals accumulate, energy efficiency can dip in both types.
The gas heaters might start slower or make noise and the electric units might lose additional speed. Your device’s manual provides the best flushing plan. It informs you what needs to be done for your particular model and fuel.
Flushing Frequency
Flushing a water heater is an important maintenance activity that keeps it running efficiently and extends its lifespan. The appropriate schedule is based on water hardness, hot water consumption, and the type of heater. Keeping a flushing schedule and monitoring fluctuations will keep you ahead of the stuff and save you some repair cash.
Checklist for Setting and Keeping a Flushing Schedule:
-
Check your water hardness and heater type.
-
Watch for changes in water quality.
-
Read the manufacturer’s maintenance guide.
-
Set up a maintenance calendar and stick to it.
-
Record each flush and note any issues found.
Water Quality
Water hardness is a big factor in how fast sediment builds up. If water has a lot of minerals, like calcium and magnesium, sediment can pile up in your heater in just a few months. In places with hard water, flushing every 6 months is smart.
If you have a water softener, it can slow down buildup, but you still need to check for signs of trouble. Cloudy or rusty water, strange odors or popping from the heater are all indications of bad water. These indicate that it is time to flush, even if it is premature.
Routine water tests identify shifts early, allowing you to intervene before issues escalate. Home water test kits are an easy way to monitor hardness and other problems. If you don’t know, consult a local water professional or your water provider.
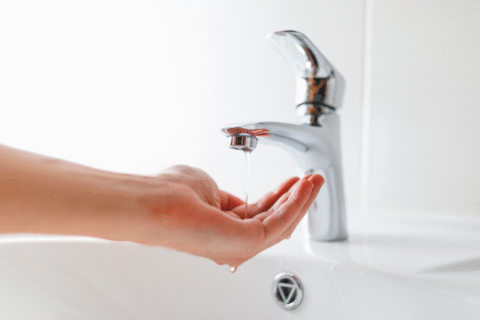
A few places, such as Chicago, mail you water quality reports that help you make that decision.
![]()
Usage Patterns
How much hot water a household consumes influences flush frequency. If you have a large family or use multiple appliances, sediment accumulates quicker. When demand increases, say during the holidays or with visitors, keep an eye on heater performance.
Others find their heater gets sluggish at different points during the year, particularly in the winter when hot water usage is at its peak. Follow these patterns and modify your schedule accordingly.
Make sure to discuss hot water habits with everyone in your household so you can schedule repairs when they’ll be most convenient. If your routine shifts or you catch more frequent problems, return to your calendar and adjust.
Sometimes it needs more than one flush to clean out a neglected heater!
Manufacturer Advice
That said, read your water heater’s manual! Most brands recommend flushing gas and electric tank heaters every 12 months and tankless units every 18 to 24 months. Adhering to these instructions will maintain the warranty and the heater’s good condition.
Manufacturers can change their recommendations, so verify on their site or contact their support for the most current guidance. Some provide online tools or videos to guide you through.
With these tools, you can service your heater with confidence and skip the errors!
Telltale Signs
A water heater will usually give you some pretty obvious telltale signs when it’s time to get it serviced. Heeding these telltale signs can go a long way toward averting potential problems and maintaining hot water in good, safe, and steady condition.
Watch for these signals:
-
Loud popping or rumbling noises from the tank
-
Water that appears rusty, cloudy, or carries a metallic odor
-
Foul or unusual smells in hot water
-
Hot water that is lukewarm or inconsistent
-
Energy bills that suddenly jump up or water that is slow to heat
-
Your water heater has been there for years unserviced
-
Residing in a hard water region accelerates sediment accumulation.
Strange Noises
Odd noises are one of the most telltale signs. A loud popping or rumbling noise usually signifies that sediment has accumulated at the base of the tank. These noises occur when water becomes hot and bubbles force their way through the thick crust of sediment.
Some may experience banging, ticking, or hissing when the heater is on. If these noises persist, it’s a telltale sign the tank needs to be flushed in the near future. Overlooking these sounds can cause decreased performance and even physical harm to the unit.
Recording when the noises occur or if they intensify can aid a specialist in diagnosing the issue more quickly. In hard water areas, weird noises can be more prevalent. Monitoring these trends is wise.
Temperature Issues
It’s definitely a good telltale sign that something’s wrong if the water temperature is inconsistent. If the hot water runs out faster than usual or suddenly shifts from hot to lukewarm, sediment might be obstructing the heating element.
This causes the heater to work extra hard, consuming extra energy and wearing out over time. Don’t forget to see if the thermostat is set right and working. Sudden hot water temperature fluctuations can indicate that the heating system is having a hard time.
Don’t dismiss these transformations. Tank flushing can usually resolve the problem before it worsens. Immediate attention keeps showers pleasant and secure.
Discolored Water
Discolored water, such as rusty or cloudy water, typically indicates corrosion or sediment in the tank. Occasionally, water can have a metallic odor or appear brownish in color. This can occur more in older tanks or where water is hard.
Telltale signs foul smells, particularly a rotten egg odor, can indicate bacteria are developing inside and require expert assistance. If the water looks or smells off, test it to discover if it’s a rust or sediment problem.
Flushing the heater as soon as discoloration appears is crucial to halting damage. It’s wise to observe any changes in water quality for subsequent monitoring. Maintaining these records assists when scheduling maintenance or consulting with a technician.
A Deeper Perspective
Flushing a water heater may seem like standard maintenance, but there’s more on the line than just crisp water and consistent warmth. Fine tuning is an intricate process. Knowing its wider implications can save you expensive errors and prolong the life of your gear, regardless of your location.
Common Pitfalls
A lot of them bypass safety measures, assuming a fast flush will be time-saving. This frequently results in burns, leaks, or even unit damage. Don’t forget to shut off your water heater a couple of hours in advance and allow the water to cool!
Rushing can imply missing sediment, which settles to the bottom and damages efficiency. So many of us overlook the need for a full flush. They may hook up a hose and siphon a little, but not enough to eliminate all residue.
In hard water areas, sediment deposits accumulate at a greater rate and require more regular servicing, even as often as once every six months. The other, more common mistake is to forget to check the anode rod. While flushing removes sediment, the anode rod replacement every 3 to 5 years is what really counts for long term reliability.
By studying these slip-ups, you can help anyone refine their own maintenance regimen.
Environmental Impact
Sediment and minerals flushed out can transport tiny impurities. If this isn’t discarded correctly, it can find its way into local watersheds, impacting the environment. Always take your drainage to a safe spot, never to storm drains or loose soil where it can infiltrate to groundwater.
A clean and efficient water heater consumes less energy. Less energy consumption translates to less pollution and less expensive bills. Responsible flushing cuts down on waste as well.
A well-maintained heater lasts longer, which means fewer units in landfills. By paying attention to proper disposal and routine maintenance, communities can do a lot to minimize pollution and reduce waste. These tiny, daily decisions impact a larger stage.
Professional Judgment
Not everyone is straightforward. Tankless water heaters, for instance, require more intricate maintenance and flushing. If you notice rust or leaks or that the water doesn’t heat up even post-flush, it’s time for a plumber to be called.
Professional help guarantees you get it done correctly, particularly with stubborn or murky issues. Depending on expert advice will save you time and money over the course of your heater’s life.
When in doubt, a pro can detect problems early and keep your system functioning safely. This is particularly valuable in packed cities or locations with strict water codes.
Conclusion
Flushing a water heater keeps hot water steady and extends the life of the unit. Flushing clears out stuff that weighs the heater down, like rust or grit, and prevents minor issues from escalating. Most heaters—tank or tankless—require this attention, though each operates slightly differently. With routine inspections, heaters deliver fewer shocks and are more economical to operate. Watch for cloudy water, weird noises or sluggish heat as flushing indicators. Those who maintain this task regularly usually save themselves money and stress in the long run. To maximize the life of your heater, mark your calendar and schedule a flush before issues arise. Contact a trusted local pro if you need assistance or have questions.
Frequently Asked Questions
What is the main reason to flush a water heater?
Flushing gets rid of sediment buildup, which damages the heater and drops efficiency. Routine flushing makes your water heater last longer and perform better.
How often should I flush my water heater?
For most experts, they recommend flushing your water heater every 6 to 12 months. Consult your manufacturer’s recommendations for ideal timing.
Can I flush my water heater myself?
Yes, a lot of folks can flush their own water heaters with easy instructions. Note: Always turn off your power and water supply before beginning.
Does the type of water heater affect the flushing process?
Yes, tankless and storage-tank water heaters have different flushing procedures. We recommend you always refer to your heater’s manual for the proper procedure.
What are signs that my water heater needs flushing?
Typical symptoms are rumbling sounds, cloudy water, or decreased hot water. These often indicate that sediment has accumulated within.
What happens if I do not flush my water heater?
If you skip flushing, your heater will develop sediment that makes it less efficient, drives your energy bills up, and can even cause it to fail.
Is it safe to flush a water heater in any region?
Indeed, the flush is secure worldwide. Be sure to always heed safety instructions and local water disposal guidelines.

Key Takeaways
Recognize gurgling as the canary in the coal mine for trapped air, partial blockages, or venting problems and get them fixed…
Key Takeaways
Match your heater size to household needs by comparing tank capacity or tankless flow rate to simultaneous use and upgrade if…