The Complete Guide to Gas Water Heater Installation in Parker, CO
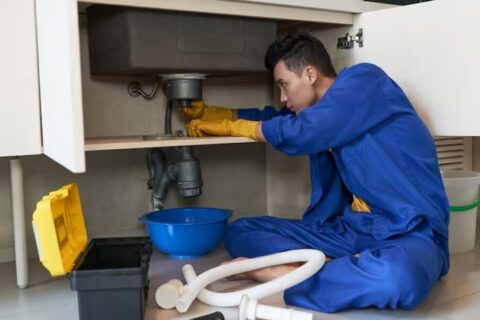
Gas water heater installation sets a natural gas or propane unit in place, connects it to your home’s gas and water lines, and vents combustion gases safely outside. Done right, it delivers fast, low-cost hot water for showers, dishes, and laundry. For Parker, CO homeowners, correct venting and clearances matter year-round, especially through Front Range winters when hot water demand peaks.
This guide walks through location rules, system checks, essential components, real-world costs, and the full step-by-step process, so you know what a safe install actually involves. Gas work carries genuine risk from leaks and carbon monoxide, and most Colorado jurisdictions require permits and inspection. That is why many homeowners hand the job to a licensed plumber rather than tackle it alone.
Key Takeaways
-
Keep adequate clearance and ventilation around the gas water heater for safe operation and easy maintenance access.
-
Check gas lines, water lines and exhaust vents for compatibility and safety prior to installation and remediate or update if necessary.
-
Know your relief valves, expansion tanks and shut off valves to maintain safe and efficient heater operation.
-
Think carefully about DIY vs. professional installation – including local codes, skills, and hidden expenses.
-
Take it step-by-step during installation, checking all connections twice and making notes of your work for future reference.
-
Schedule maintenance, watch for leaks or odd behavior, and refer to your user manual for troubleshooting to extend your water heater’s life.
Location Guidelines
Selecting the appropriate location for a gas water heater is important for safety, efficiency and future maintenance. It’s not simply a matter of placing it where there’s space – clearances, airflow, venting, codes they all factor in.
1. Clearance
Clearances safeguard both safety and service requirements. Local codes typically require a minimum of 4 inches on the sides and back of the water heater and at least 24 inches in the front for convenient repairs. You don’t want to trap heat or block air, which can cut the heater’s life or make it dangerous. For garages, the heater should remain at least 18 inches above the floor, maintaining ignition sources above potential fuel vapors.
Keep flammable materials – paint cans, cleaning products – far from the heater. The front and sides require vacancy. Not just for ventilation but to access shut-off valves or replace parts. Some locations could require even more clearance, particularly in cramped rooms.
2. Combustion Air
Gas water heaters require lots of air so the burner functions properly. Without sufficient, the heater can operate inefficiently or create hazards. Allow a minimum of 50 cubic feet of air for every 1,000 Btu of heater input. That means rooms need to have open vents/grills, not sealed closed.
Never block vents or shut doors that allow air to reach the heater. Codes might specify specific opening sizes, or vent locations depending on heater size. If the heater’s in a small closet, louvered doors or additional wall vents might be necessary to satisfy regulations.
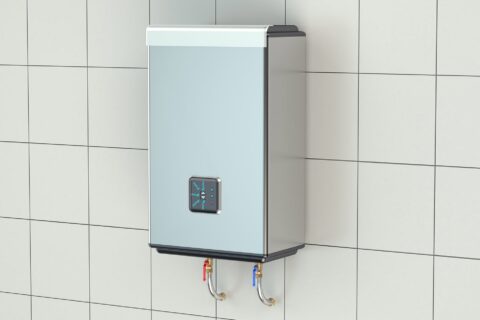
3. Venting
Proper venting keeps combustion gases out of your living spaces. Install the vent pipe kind suggested by the manufacturer – single-wall metal pipes require 6 inches of clearance from combustible materials, whereas double-wall B-vent pipes only require 1 inch.
Check pipes for holes or rust, as leaks are hazardous. For attic or upper-floor installations, provide a drip pan at least 1.5 inches deep with a 3/4-inch drain. Expansion tanks need to extend a minimum of 1 foot above the heater.
4. Accessibility
Place the heater within reach without having to crawl through tight spaces. Quick entry assists with later maintenance or inspections. Don’t stack boxes or equipment in the vicinity.
Allow space for equipment, and ensure that the discharge pipe from the relief valve terminates approximately 6 inches above the floor. This assists identify leaks quickly. Convenience is something that tends to be overlooked but it saves hassle and frustration down the road.
5. Prohibited Areas
Bypass areas that flood – such as basements with inadequate drainage. Never, never, never put a gas heater in bedrooms or bathrooms. Avoid areas near paint, fuel, or other flammable chemicals.
As always, consult your local codes for additional off-limits type rules.
System Assessment
A system assessment forms the groundwork for gas water heater installation. This step checks the current setup, looks at the condition of key parts, and spots safety risks or inefficiencies. Professionals often start with this before making changes or installing a new heater, using it to decide what needs to be fixed or upgraded.
Gas Supply
It’s a system check beginning with the gas line. The line size is important since each water heater draws a set amount of gas per hour. If a line is too narrow, the heater could not function properly or even shut down. Leak checking is a must – either with soapy water or a leak detector – since leaks are dangerous. A functional gas shut-off valve is required for safe installs and future service. Gas supply pressure must match the heater’s needs; a mismatch can cause poor heating or damage. For instance, a heater rated for a specific inlet pressure won’t function properly if the supply dips below that.
Water Lines
Old or rusty water lines can leak, so they receive close scrutiny during inspection. Other times, tiny leaks or corrosion remain hidden until a professional inspects joints and valves. Be sure the cold water line goes to the proper heater inlet – mix-ups cause performance issues. When connecting water lines, fittings must be snug and aligned – often with PTFE tape – to prevent leaks. Materials count as well – using the wrong type can lead to rust or premature breakdown.
Exhaust Vent
The exhaust vent doesn’t just push fumes to the outdoors. It’s got to line up with the new heater’s specs or gases may not clear out safely, a huge health and code compliance issue. The vent should be inspected for any clogs – bird nests, debris or corrosion can obstruct the airflow. Installers have to follow the heater’s venting guide, frequently using clamps or sealant to ensure no exhaust escapes inside. When the work is done, vent testing is critical to ensure that fumes are exiting the area appropriately.
Essential Components
A gas water heater functions due to its components, each of which has a specific task. Each component, from the relief valve to the drip pan, assists in keeping the heater safe and operating optimally. Prior to any installation, verify that these essential components are prepared, as missing parts will bog down the job and compromise safety or function.
Relief Valve
The temperature and pressure relief valve prevents the tank from becoming over-pressurized, which is dangerous. It should be located on the top or side of the tank and must connect to a discharge pipe that vents any hot water safely away from individuals and belongings.
This valve must be tested after installation. To test this, softly pull up on the test lever and verify that water comes out the discharge pipe. If it doesn’t or the valve leaks after you replace it, replace it. Check your relief valve annually to maintain it in good condition and prevent unexpected breakdowns.
Expansion Tank
Thermal expansion tanks prevent large pressure surges by absorbing the excess water volume when it heats. Simply choose a tank appropriately sized to the water heater and your home’s needs – available in the manual or with a sizing chart.
The perfect location for this tank is on the cold water feed, near its entry to the heater. Once mounted, check the tank’s air pressure with a pressure gauge. Catch leaks or loss of pressure early by checking out the tank at least once a year.
Shut-Offs
You’ll need both gas and water shut-off valves for safety and future maintenance. Set them near the water heater where you can get to them quickly.
Try each valve prior to completing. Shut the water and gas off and on to check whether they function. Label each valve “Gas” or “Cold Water” or whatever so anyone can find them in a mad dash.
Drip Pan
A drip pan sits under your water heater to catch leaks. It should attach to a drain line that goes to a floor drain or outside so water doesn’t accumulate.
Test the pan regularly for water and select a size that suits your model.
Installation Realities
Gas water heater installation requires more than just some simple tools and a free afternoon. It means balancing the actual risks, expenses, and effort. Every stage, from selecting an appropriate heater size to forming secure gas and water line connections, requires diligence and preparation. Easy errors can cause safety issues or increased charges.
The DIY Question
Deciding to install a gas water heater yourself starts with a real look at your skills. If you haven’t worked with gas lines or plumbing before, it’s easy to miss important steps. One skipped detail – like not running a discharge pipe from the relief valve to the right spot – can cause unsafe pressure buildup. Even a small leak in a gas line is a big risk.
Most areas have stringent codes for gas appliances. You’re going to have to figure out local regulations and obtain necessary permits. Violating these rules can result in fines or a failed inspection. Be sure you have all the proper tools and parts in place before you begin. Certain tasks require pipe wrenches, pressure testers, or sealants you may not have. For the majority, bringing in a licensed plumber will be the safest route – particularly if the work is complicated or you’re not sure what to do.
Hidden Costs
A new gas water heater’s installation can cost anywhere from $880 to $1,800+. This doesn’t always cover the concealed expenses. Permits, special fittings or new vent pipes increase the price. Sometimes you’ll discover plumbing issues or aging pipes that have to be fixed before the new heater can be installed.
Upgrading gas or water lines is typical, particularly in older dwellings. These updates aren’t always obvious until installation begins. In certain jurisdictions, a professional inspection is required, which will be an additional expense to factor in.
Common Mistakes
Incorrect venting is a typical mistake. It can cause gas leaks or deadly backdrafts. Always make sure vent pipes are properly sized and fit snugly.
Loose gas or water line connections can cause leaks. Test each joint after installation. Clearance is key – allow ample room surrounding the heater for safe installation and future repairs. Use the maker’s directions for install, not just winging it.
Time Commitment
Think more than a couple of hours. It typically requires an entire day, even for pros. Add additional time for permit and potential repair.
The Process
Installing a gas water heater is about the undertaking of setting it up safely and ensuring it performs consistently for years. A process reduces errors from priming the room to trying the system. Of course, documenting every step aids in long-term maintenance, making that yearly tune-up more straightforward and successful.
Preparation
Evaluation is first. Experts inspect the existing water heater for any leaks, corroding and inefficient operation. That’s testing its water-heating longevity, exploring the valves and anode rods that typically fail.
Before stripping, the primary gas and water supplies have to be off. This avoids mishaps and water splashes. Your old heater is emptied completely, typically via a hose at the bottom, and then taken apart. Detailed notes or pictures of wire and pipe locations will assist you down the road. First, we need to inspect the new heater for missing or damaged parts, because defective components can wreak havoc in the future.
Connection
Hook up the cold water line to the new heater’s inlet. Check the fittings. Loose bits are leak-makers. Next, attach the gas line, applying sealing tape or compound where suggested. Snug up connections but don’t over-tighten or you’ll strip threads.
Fit the vent outlets as per manufacturer’s instructions – safe venting is vital to prevent carbon monoxide poisoning. Make sure everything – gas, water and vent connections – is double-checked before turning the supply back on. Every fitting should be leak free, which you can check by using soapy water on joints.
Commissioning
Refilling the tank with water is next. Turn on a hot water tap to bleed the air, then keep an eye for leaks at every connection. Fix any issues before moving on.
Light the pilot as the instructions say. Dial the thermostat down to about 120°F, a safe and efficient setting. Watch the heater as it operates – listen for strange noises and check for gas odors. Testing guarantees effective, secure functioning from the first day.
Documentation
Document what you do – dates, steps, problems discovered. Store manuals, photos, etc. Routine notes are useful during annual tune-ups and should parts need to be replaced or repaired.
Post-Installation
Once that gas water heater is installed, post-installation maintenance is crucial. Post-installation, fill the tank with water prior to energizing the heater. This protects the heating elements from harm. Allow the water to flow until the tank is filled – generally 5–10 minutes is sufficient, though some require as much as 30. For tank-style heaters, anticipate roughly an hour for the water to become heated. For the initial days, monitor the heater for any leaks, strange noises or other differences. Local codes could establish an inspection grace period. Document all maintenance for future reference.
Maintenance
Draining it a few times a year really helps clear out sediment. This enhances heater efficiency and life. For hard water areas, sediment can accumulate quicker so it’s best to flush 2 – 3 times per year.
The anode rod saves the tank and prevents it from rusting. Verify it annually. If it appears worn or less than half its original size, replace it. This little thing can stave-off major corrosion and save you big money down the road.
Spray some gas line leak finder on the line and connections. Bubbles signify a leak. Even a minor leak is serious and requires immediate repair. Be sure to inspect these joints any time you move or work near the heater.
Ensure the heater’s venting is unobstructed. Good ventilation prevents the accumulation of harmful gases. Maintain an open surrounding around the heater.
Troubleshooting
Leaks, strange noises or insufficient hot water are typical. Leaks proximate to the floor could indicate an issue with the tank or the piping. Strange noises may be from sediment contained in the tank.
Check thermostat if water temperature swings. Occasionally it’s too low or too high. Tweaking the setting usually does the trick.
Clogged vents can trap dangerous gases. If you detect odors or inefficiency, check to see if your venting is clogged.
Consult your user manual for assistance. Troubleshooting steps can vary with each model.
Documentation
Note all checks, repairs, and flushes.
Write down part replacements and inspection dates.
Save receipts and service reports.
This record helps with warranty claims.
Conclusion
Gas water heater install requires attention, proper tools and straightforward instructions. A solid scheme makes everything click from beginning to end. Selecting an appropriate location, system inspection and utilizing essential components all make a significant contribution. Each stage – from installation to final inspection – ensures your environment is secure and assists the unit in operating efficiently. A pro knows how to detect minor problems and repair them fast. Done correctly, hot water flows steadily and you get peace of mind. If you would rather leave gas water heater installation to a licensed team, 1st Choice Pro Services handles installation, venting, and permits for homeowners across Parker, Castle Rock, Centennial, and Highlands Ranch.
Frequently Asked Questions
What are the key location guidelines for installing a gas water heater?
Select a location that is well-ventilated and convenient to service. The placement of the unit should meet local safety codes and distance the heater from combustible substances.
How do I assess if my home is suitable for a gas water heater?
Ensure a dependable gas connection, ventilation and enough room. Schedule a visit with a licensed professional to check your current infrastructure and guarantee safety.
What essential components are needed for installation?
You require a gas water heater unit, gas lines, water pipes, venting, safety controls like a pressure relief valve.
What are common challenges during installation?
Issues encompass poor ventilation, incorrect gas hookups, and constrained space. Professional installation helps you avoid hazards and keeps everything up to code and safe.
What steps are involved in the installation process?
Installation includes site preparation, gas and water line connections, vent installation and testing for leaks and proper operation.
What should I do after installation?
Look for gas or water leaks, test your heater’s functionality, and book maintenance. Adhere to manufacturer’s instructions for safety and efficiency.
Is professional installation necessary for gas water heaters?
Yes, professional installation is a must. Specialists adhere to safety codes, reduce risk and assist prolong the existence of your water heater.
Key Takeaways
Be on the lookout for slow drains, foul odors, gurgling noises, water backups, and pest activity as indicators that drain…
Key Takeaways
Tankless water heaters provide instant hot water. They are energy and space-saving, and they usually have a longer lifespan…