Fixing a Toilet Leak at the Base in Highlands Ranch, CO
Key Takeaways
-
Look for pooling water, floor discoloration, musty odors or toilet movement as initial indications of a base leak and record what you find to assist with diagnosis and repairs.
-
Employ the dye test and a soft stability poke to separate a failed base seal from tank or supply leaks prior to commencing work.
-
Typical reasons are a deteriorated wax ring, loose bolts, ruptured porcelain, and compromised subfloor. Fix the underlying cause, not just the symptoms.
-
For DIY repairs follow a clear checklist: shut off water, drain the bowl, remove the toilet, replace the wax ring, inspect and repair the flange and subfloor, then reinstall and test.
-
Call a licensed plumber if leaks persist following your DIY efforts, when you discover cracked porcelain or subfloor damage, or when local code or foundation issues complicate the repair.
-
Plan on materials and an hour or two for your standard DIY repair, or higher costs and potential permits for professional repairs. This is particularly true if subfloor or foundation repairs are necessary.
A toilet leaking at base repair Highlands Ranch refers to fixing leaks where the toilet meets the floor in Highlands Ranch homes. Typically it’s a bad wax ring, loose bolts or cracked flange.
Repair usually means shutting off water, a trip to the store, removing the toilet, installing a new seal, resetting the fixture with new bolts and a level.
Local codes and basic tools influence duration and price, and the core provides step-by-step instructions.
Leak Identification
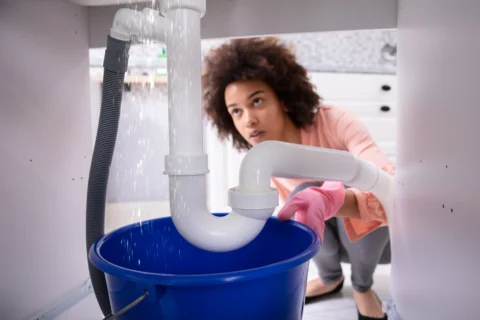
How to Identify a Toilet Leak at the Base. Begin by observing, sniffing, pumping, and conducting little tests. Early detection prevents minor issues from turning into big water damage repairs and determines if a homeowner can handle the repair or must hire a pro.
1. Visual Signs
-
Pooling water around the toilet base after each flush
-
Discoloration or warping of flooring near the toilet
-
Persistent dampness or mildew growth at the base
-
Noticeable fissures or holes around the base of the toilet.
Check the clear floor after a few flushes. One puddle may be a spill, but pooling that returns following flush occurrences signals a leak. Flooring discoloration, such as soft spots, dark stains, or raised tiles, means moisture has been there long enough to permeate and harm materials.
Wax rings degrade. Inspect them once a year or so, particularly if you detect odors, moisture, or light floor staining.
2. Odor Clues
Recognize musty or sewage-like odors as signs of leaks. If you smell something funky all the time, it usually indicates moisture lurking underneath or a damaged wax ring. The way to notice leaks, according to Sharp, is to compare your usual bathroom smells with new, pervasive ones.
If the scent pools at the floor, it is probably under the toilet and not from a drain. Employ smell location to direct manual inspections and record where gases smell most potent for a service technician.
3. Stability Test
Give your toilet a gentle rock to see if it moves or is loose. If the bowl moves, the base seal gets compromised or bolts loosen, and that movement speeds seal failure. Listen for creaks or grinding and observe if there is any sudden movement.
Instead, record sanity checks every few months as part of routine maintenance. Shifting may indicate floor frailty. A marshy or spongy sensation underfoot should be cause for immediate investigation.
4. Dye Method
Put 10 drops of food coloring or a packet of drink mix in the tank and don’t flush for 10 to 15 minutes. Look for the colored water on the floor. That means it’s a leak and not just a tank-to-bowl matter.
This test aids in detecting slow or intermittent leaks that are otherwise invisible. For more general leak detection, monitor the water meter daily to identify abnormal water consumption.
5. Floor Integrity
Check adjacent floor for softness, sponginess, or mold. For sink leaks, press gently to test structural integrity and scan beyond the toilet for spread. If the floor damage extends, this means the leak has been going on for a while and potentially needs subfloor or joist repair.
Remember that leaks to service lines have the ability to reduce domestic water pressure, lead to soil subsidence, or cause constant ground saturation at the foundation.
Underlying Causes
A toilet leaking at its base is typically due to a seal, mounting hardware, fixture, or substrate failure. These sections dissect the root causes, illustrate how mechanical failures differ from structural ones, and demonstrate why proper installation and root cause addressing is critical for a long-lasting repair.
Failed Seal
A degraded wax ring is often the issue. Wax rings slip in between the toilet outlet and the flange on the floor. Over a period of years, the wax can compress, crack, or shift, or it could have been improperly installed from the very beginning.
Water typically resurfaces only after flushing when the seal is stressed and water pours over the breach. This is an important indication the wax ring has failed. Age or bad install both cause seal failure.
Is the flange recessed, misaligned, or was the toilet not set squarely? The ring won’t seat. Misaligned or clogged drain pipes can stress the seal and lead to leaks at the base. Change that wax ring and maybe install a reinforced flange gasket for good measure.
Loose Fasteners
Loose or missing toilet bolts allow the fixture to rock. Check your closet bolts at the base. If they are loose, the toilet moves when someone sits or flushes, which breaks the wax seal and lets water seep out.
Tighten or replace bolts to return stability and prevent leaks. Be wary of overtightening since porcelain can crack under too much torque. If the flange or bolts are rusted or the bolt slots are stripped, replace with new bolts and a flange repair kit.
Routine upkeep, including occasional inspections to make sure bolts are tight and the foundation doesn’t shift, prevents minor problems from turning into drips. A broken toilet flange can masquerade as bolt issues, so check that component carefully.
Cracked Porcelain
Examine the toilet base for any obvious cracks, hairline fractures or chips. Even minor cracks around the outlet or base of the bowl could allow water to trickle under the toilet during and after flush cycles. Such defects can exacerbate.
A hairline crack can propagate and ruin structural integrity. If cracks are structural, replacement is safer. Long-term usage, of course, risks even larger leaks and damage to the subfloor.
No cracked toilets to use until they get them replaced. This prevents further water damage and unsanitary conditions!
Subfloor Problems
Leaky water can rot the subfloor under your toilet. Check for sagging, soft spots, or uneven flooring near the toilet, all indications of compromised support. A rotten or uneven subfloor allows the toilet to shift and breaks the wax seal repeatedly.
Fix or replace compromised subflooring prior to resetting the toilet. With proper underlay and subfloor repair and a solid, level flange mount, you guarantee a stable, leak-free installation that won’t set you up for repeat leaks.
DIY Repair Process
A well-defined stepwise approach keeps you from screwing up when fixing a toilet that leaks at the base. Go through each of the phases in sequence, always keep safety at the forefront and use a checklist to organize your tasks.
The numbered list below describes the complete repair flow prior to the detailed substeps.
-
Prepare and protect the work area: Clear the bathroom, place drop cloths, and gather tools and parts.
-
Turn off water and empty out the bowl and tank as much as possible.
-
Disconnect supply line and remove toilet from flange.
-
Inspect flange, floor, and old seal for damage.
-
Remove old wax ring and clean mating surfaces.
-
New wax ring or other gasket, centered carefully.
-
Re-seat the toilet, squeeze the seal and tighten the bolts evenly.
-
Reconnect supply, open water, and test for leaks.
-
Tighten or adjust bolts if minor seepage shows up. Replace the flange if damaged.
-
Final cleanup, document steps and note parts for future reference.
Gather Tools
-
Adjustable wrench and socket set.
-
Screwdriver (flat and Phillips).
-
Putty knife or scraper.
-
New wax ring (or wax free gasket) and flange bolts.
-
Towels, sponge, and a bucket.
-
Protective gloves and safety glasses.
-
Torque-limiting wrench or hand tools prevent over-tightening.
-
Flashlight and silicone caulk (optional).
Get all your materials ready so you don’t have to stop in the middle. Wear gloves and have towels handy to mop up any spills quickly.
Verify that the bolts and seals fit the toilet bolt pattern and flange height.
Water Shutdown
Find the shutoff valve, normally on the wall near the toilet base, and turn it clockwise until it’s stopped. Flush to drain the tank, holding the handle to clear as much as you can.
Sponge or towel out leftover water in the bowl and tank, squeezing into a bucket. Verify the water is off by placing a hand over the valve and observing for drips or by momentarily opening the supply line after disconnecting.
Toilet Removal
Shut off the water, detach the supply line with a wrench and cap it if necessary. Unscrew the floor bolts. If rusted through, hack-saw them.
Rock the toilet to break the old seal, then lift straight up. It is hefty, so get help. Place the fixture on a soft, protected surface to prevent chipping.
Examine the flange for cracks, rust, or broken bolts and observe any problems that will impact resealing.
Seal Replacement
Scrape all wax from the flange and toilet outlet with a putty knife, getting it off completely. Carefully clean the flange area with solvent if required and check for level.
If the flange is warped, it must be repaired or a spacer used. Position the new wax ring above the flange or on the toilet horn, depending on ring type.
Pop it back on right away or you will warp the wax. That is why the ring stays flexible.
Secure Reinstallation
Drop the bowl straight down, matching bolt holes to flange studs, then perch to mush the wax flat. Set down weight, not force, and then tighten nuts a little bit at a time, alternating.
Don’t over tighten or you’ll crack the porcelain. Use washers where indicated. Attach the supply, open the valve and observe for leaks at the base and tank.
Professional Intervention
A toilet leaking at the base requires professional intervention when it demonstrates more than wax ring replacement symptoms. These hidden leaks, recurring wet spots, warping floors, or unexplained increases in water use often need tools and training a homeowner just doesn’t have.
A licensed plumber arrives with diagnostic equipment, expertise in local codes, and the capacity to conduct repairs that are safe and warrantied.
When to Call
Call a plumber if DIY leaks occur. If it continues to seep after you’ve replaced the wax ring, that points to even electro domestic carcass damage, a cracked toilet horn, or a failing flange, and you’re going to need some pro repair.
Getting professional help for persistent leaks despite replacing the wax ring is essential. Repeated leaks can indicate subfloor rot or an overlooked hairline fracture in the bowl.
Plumbers can lift the fixture correctly and inspect the flange and floor, which is difficult to do safely without the proper equipment.
Call in the pros for obvious cracks or subfloor damage. Water-stained floors, spongy sections, or perimeter mineral deposits at the base indicate structural or plumbing element failure.
Professionals will examine and record damage to demonstrate if structural repair or complete toilet replacement is required.
Hire it out if you’re not certain how to install it properly. Mis-set bolts or uneven floors or bad sealants leak. A licensed plumber installs it according to manufacturer specs and local rules, minimizing callbacks.
Service Expectations
Professional intervention: anticipate a meticulous examination of the toilet and adjacent wall. Technicians armed with moisture meters and keen eyes seek out areas of elevated moisture on floors and walls and can even run dye tests or apply short-term water loads to watch the paths of leakage.
Expect obvious problem and solution statements. A trusted plumber lays out choices: wax ring, flange repair, subfloor patch, or new toilet, explaining advantages, disadvantages, cost, and estimated time.
Get an advance repair cost and timeline estimate. Estimates should separate parts, labor, and any permit fees.
Professionals talk about contingencies, like finding more rot after they take out the toilet.
Advantage of warranty or guarantee on expert fixes. Licensed plumbers typically offer workmanship and parts warranties, which safeguard homeowners from early breakdowns or overlooked problems.
Local Code Nuances
Make sure repairs follow Highlands Ranch plumbing codes. Local codes can dictate materials, waste line slopes, and approved methods for sealing and securing toilets.
Know that local laws might impact how you can repair it. Certain codes may insist on flange replacement or govern the manner in which subfloor repairs are done to preserve structural and sanitary integrity.
Make sure professionals get permits when needed. They protect homeowners by ensuring there are inspections and that the work is up to current standards.
Get the scoop on code updates affecting toilet installations. By having regular inspections and hiring licensed contractors, homeowners can avoid noncompliant work and lessen future liability.
Cost and Timeline
Toilet leak at the base repair costs and time frames vary by cause, parts required, and state of the floor and plumbing below. Here’s a close up on average DIY versus professional costs, short- and long-term cost trade-offs, how long you can expect each method to take, and how to plan ahead for curveballs such as subfloor damage or elusive parts.
DIY Expenses
-
Wax ring or rubber gasket: 8–30 (metric currency)
-
New flange or flange repair kit: 20–150
-
Fill valve or flapper replacement: 10–60
-
Basic tools and sealant: 15–50
-
Replacement bolts, nuts, and shims: 5–25
-
Protective gear and cleaning supplies: 5–20
DIY can save 50 to 70 percent compared to hiring a pro on easy jobs like swapping out a wax ring or fill valve. You could skip a service call charge and pay only for parts. That’s the time involved, including prep, removal, and cleanup.
Anticipate one to two hours of work plus drying time. Value of your time stuff. If you bill your own time at an hourly rate, savings quickly diminish. Mistakes can add cost. A cracked porcelain during removal, a damaged flange, or improper seal can push expenses into the hundreds or more if a professional must correct errors.
Professional Fees
|
Service element |
Typical range (metric currency) |
|---|---|
|
Basic leak at base repair (seal replacement) |
80–250 |
|
Flange replacement or repair |
150–450 |
|
Subfloor repair and re-seat toilet |
400–1,500+ |
|
Full toilet replacement/installation |
200–1,000+ |
Emergency or after-hours visits can tack on 25 to 100 percent to the bill. Fees climb yet again when work involves pulling up floor coverings, repairing structural damage, or making substantial changes to plumbing.
A standard plumber cost covers diagnosis, labor for the repair, basic parts, and disposal of the unit where appropriate, while premium parts and large-scale cleanup are typically additional.
Project Duration
Typical DIY fixes require 1 to 2 hours of hands-on work for a modestly skilled person. Be sure to add additional hours for drying, setting fresh wax or sealant, and cleanup, so the total elapsed time can hit a day.
Technicians tend to do the majority of base-leak jobs in one 1 to 3 hour visit depending on the severity. If you uncover subfloor rot or structural damage, plan on adding days to your project time.
Subfloor replacement, curing mortar or plywood adhesive, and then reinstalling tile or floor covering all add time and cost. Replacement can be a wiser long-term decision for old, inefficient toilets. Toilets can last for many decades with proper care, and occasionally a full replacement pays for itself in lowered water bills and fewer repairs.
Budget extras: Set aside 20 to 40 percent of the estimated repair cost for unexpected parts or damage.
Highlands Ranch Specifics
Highlands Ranch has local factors that affect the manner in which base leaks should be diagnosed and repaired. From soil type to water quality, and altitude to whose responsibility the water system is, these inform repair decisions. These subtopics cut to what counts for homeowners and technicians working on a leaking toilet at the base.
Soil and Foundation
Expansive clay soils that swell with moisture and dry shrink in our area, shifting slab and pier foundations and tilting a toilet flange. Keep an eye out for new cracks in floors and doors that stick or gap at trim. These are indicators that the foundation is settling, which can create an uneven seal at the base of your toilet.
Address soil movement before reinstalling a toilet. Re-level the flange, replace a broken closet flange with a reinforced flange, or use a flange extender if the slab has been lowered. If you see subsidence outside your home near irrigation or sewer lines, call Highlands Ranch Water at 303-791-2185 for common-area leak checks.
Check local building codes and a structural contractor when foundation work comes into play, as a lot of fixes will need permits or local tie-in standards.
Water Hardness
Hard water in the area is notorious for leaving mineral deposits on the bowl, tank components, and wax ring surfaces that will not allow a tight seal and cause leaks around the base. Check the tank-to-bowl gasket, the wax ring, and bolts for white crust, pitting, or worn rubber that will not compress.
Scrub mineral deposits with a vinegar soak or replace parts once deposits have changed fit. If mineral build-up is a repeated issue, a whole-house water softener can keep your seals and metal fittings safe because softening prevents corrosion on bolts, nuts, and the toilet flange.
Inspect for corrosion on metal fasteners and replace them with stainless steel or brass as necessary.
Altitude Effects
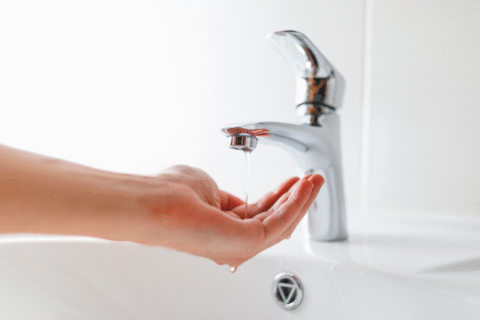
The higher altitude can alter water pressure habits and affect flush efficiency, with pressure in Highlands Ranch homes recommended to be between 45 and 70 psi. Static pressure beyond that range may indicate a busted PRV and can strain tank fittings, resulting in leaks.
Adjust or replace flush mechanisms to match local pressure: fill valves with pressure-compensating features and flappers rated for higher or lower pressure as needed. Check venting local code, as different vent runs impact trap seal and siphoning at altitude.
Make sure that any replacement parts you get are good for these conditions and for regular water use. Many current toilets use 1.6 gallons per flush, while older ones can use 3.5 to 7 gallons, which changes flush force and leak behavior.
Homeowners should read their water meter to track usage and detect leaks. Highlands Ranch Water is responsible only for the meter itself.
Conclusion
A toilet that leaks at the base in Highlands Ranch often points to a worn wax ring, loose bolts, or a cracked flange. Rapid inspections assist. Detect water post-flush, wobbles at the bowl, or water stains on the floor. Easy solutions might be to tighten bolts or replace the wax ring. For cracked flanges, rotten subfloor, or repeat leaks, call a licensed plumber. Local pros in Highlands Ranch work with standard flange sizes and local codes all the time. Average repair time is one to three hours. Average cost ranges from low tens to a few hundred, depending on parts and subfloor work. What are you waiting for? Pick a repair path now: try the DIY steps or book a local plumber for a fast inspection and fix.
Frequently Asked Questions
What are the common signs a toilet is leaking at the base?
Damp floor, water pooling after flush, wobbling toilet, damp or discolored flooring, and musty smell. Test during and after a flush to verify that the leak is at the base.
Can I fix a base leak myself?
Sure, if it’s because of a worn wax ring or loose bolts. Replace a toilet leaking at the base. Come to a halt and phone an expert for cracked bowls, flange damage, or plumbing doubt.
How long does a DIY repair take?
Most DIY wax-ring replacements cost one to two hours for anyone with minimal tools. Give yourself additional time to clean, seal, and re-level the toilet.
When should I call a plumber?
Call a plumber if the toilet or flange is cracked, if the flange is corroded or misaligned, if leaks persist after replacement, or if you’re uncomfortable removing the toilet. Experts make it stick.
How much does professional repair usually cost in Highlands Ranch?
Think local, anywhere from around 100 to 400 EUR (roughly translated to metric-friendly pricing) for basic wax-ring swaps. It will be higher if flange repair or replacement is required. Be sure to get a quote in writing before work.
Will a leaking toilet cause structural damage?
Yes. Drips can rot subflooring, promote mold, and ruin finishes. Fix leaks now to avoid costly repairs and health risks.
How can I prevent future base leaks?
Make sure to tighten bolts just right, not too much and not too little. When you remove the toilet, replace the wax ring and check seals annually. Fix shifting floors or loose mounts as soon as possible so the toilet stays in place.
Key Takeaways
Centennial homeowners would be wise to seek out a local 24 hour plumbing service that knows freezing winters, shifting soils,…
Key Takeaways
Know that municipal infrastructure, elevation, and seasonal demand impact water pressure in Centennial homes, so begin by…