Furnace Installation in Parker, CO | Complete Guide to Tools, Safety & Sizing
Key Takeaways
-
Check compatibility and site preparedness prior to installation to prevent delays and additional fees, as well as ensure permits, codes, and insurance are squared away.
-
Right-size the furnace to the home’s heating load using BTU and efficiency information preventing short cycling and maintain low energy usage.
-
Position the unit for convenient servicing and efficient airflow, reduce duct runs and keep away from dusty or flammable locations.
-
Proceed with a clearly outlined step-by-step installation process: prep, secure placement, sealed ducts, connections and commissioning.
-
Implement rigid safety standards and employ certified experts, posting reminders visibly on job locations and providing ongoing instruction to minimize danger and maintain regulations.
-
Book annual tune-ups, register warranties and provide service plans to safeguard efficiency, prolong equipment lifespan and ease future claims.
Parker furnace installation means installing a Parker-brand gas furnace in a home or a building. This all involves not only sizing the unit but placing the cabinet, connecting gas and venting, and wiring the thermostat.
Installation has an impact on safety, efficiency and service life. Our licensed hvac technicians adhere to local codes and use metric measurements for easy-to-understand specs.
The body details expenses, timelines, pitfalls and tips to maintain a trusted system.
Pre-Installation Checks
Pre-installation checks confirm that the location, systems and documentation are prepared for a Parker furnace installation. They minimize risk, prevent surprises and provide a defined scope of work before the tools arrive.
Sizing
Determine heating load based on home square footage, insulation levels, window square footage and local design temperatures to select the appropriate BTU output. Use Manual J or its equivalent to obtain a good number; a unit sized only by rule-of-thumb still short cycles or never reaches setpoints.
Contrast model AFUE or percent efficiency and sensible heat output – greater efficiency can reduce fuel consumption but increase up-front cost. Make certain your selected Parker model is matched to duct capacity and blower performance so air flow remains within manufacturer limits to prevent noise, distribution problems or shortened life.
Techs frequently correct ducts, vents or add zoning when calculations return imbalanced results, resizing ducts and moving supply grills as needed to achieve design airflow.
Codes
Check applicable local, state and national codes for gas and electric furnaces as well prior to commencing work. Document requirements for refrigerant fittings, expansion valves, pressure regulators, flue terminations and combustion air.
Verify installer licensing and insurance comply with code and manufacturer warranty regulations – many works under regulation must be performed by licensed technicians. Document permits and inspection timing to keep final approval on schedule, as poor documentation can cause rework or void warranties.
Placement
Select a location with necessary clearances, adequate ventilation and convenient service access. Position the furnace to keep duct runs and bends, which waste energy, to a minimum – shorter runs mean less pressure drop for the fan and less noise as well.
Don’t site close to combustibles, high dust or moisture-prone areas — a utility room with a solid floor is best and may require floor reinforcement for heavy units. Verify floor space versus unit dimensions and flue or condensate lines route.
Build a checklist that encompasses clearances, access panels, vent paths, thermostat wiring reach, and maintenance space so nothing gets missed.
Tools
Collect the basic hand tools, torch, micrometers, leak detectors and safety equipment before you come. Bring specialized instruments for refrigerant controllers, electronic refrigeration controllers and duct balancing like manometers and temperature sensors.
Stock typical replacement parts, filters and compatible thermostats – check existing thermostat compatibility to new Parker control scheme. Prepare materials and lay-out to avoid having to wait and minimize risk of site debris destroying components.
Check ducts and electrical connections for leaks or faults as pre-installation checks for a seamless install.
Installation Process
Parker furnace installation takes a plan that includes safety, fit and long-term performance. The job usually takes a couple hours for a direct swap but can easily stretch a day or more if ductwork, venting or elevation adjustments are required. The steps beneath track a pragmatic, stepwise path and highlight where interfacing, documentation, and oversight are called for.
1. Preparation
Turn off power and gas before starting any work on the HVAC system. This is mandatory for safety and for code.
Protect the home with floor savers and dust barriers – simple drop cloths and sealed plastic sheeting cuts down cleanup and saves finishes. Consult manufacturer instructions for your particular Parker furnace model and Parker control inlet.
Manuals provide necessary clearances, combustion air specifications, and any elevation-related BTU adjustments. Install as many pre-assembled ducts, valves and sensors as possible to increase work velocity. For instance, if you mount the inducer or control board on a bench first, it reduces bench time at the unit.
2. Positioning
If possible, level the furnace on a stable surface to avoid vibration and the resulting noise. Even a slight tilt can make burners modulate badly, or cause rattle.
Coordinate unit dimensions with existing ductwork and refrigerant and electrical lines to facilitate easy installation and minimize awkward field modifications. Make sure you fasten the furnace with proper fasteners and brackets for safety and peace of mind, particularly if you’re installing it in a loft or garage where movement may shift the connections.
Verify clearances around the unit for airflow and technician access — manufacturers specify minimum service clearances.
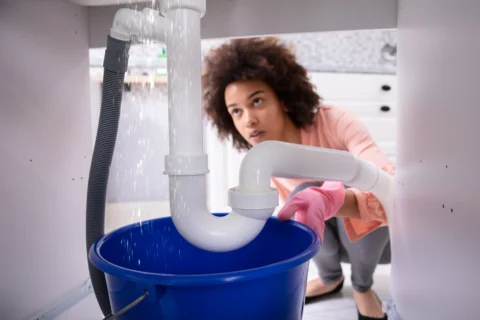
3. Ductwork
Check and clean existing ducts for maximum airflow and comfort – blocked or dirty ducts limit your system’s capacity and increase fuel consumption.
Mastic or metal tape, not duct tape, should be used to seal joints and connections. Resize and reroute new ductwork where necessary for new construction or large design changes — undersized runs cause uneven heating and fan noise.
Include air cleaners and ventilators for quality control and system life — for example, install a MERV-rated filter or ERV where the design permits.
4. Connections
Hook up gas, electrical and refrigerant lines as per manufacturer and Parker heat specifications! Check all connections for leaks, appropriate voltage and tight fittings before moving on – a manometer is great for gas pressure checks.
Install expansion valves, check valves and electronic refrigerant controllers as needed on heat pump combos. Tag all connections for quick identification during future servicing.
5. Commissioning
Conduct final safety check and initial startup to test operation and combustion. Inspection of combustion air supply and venting clearance is essential.
Set superheat, subcooling and thermostat calibration for maximum efficiency and altitude corrections. Capture operational information and debrief performance with the client.
Hold on to them for warranty and later troubleshooting.
Safety Protocols
Safety underpins each Parker furnace installation. Prior to beginning work, evaluate the site for any gas lines, electricity panels, and ventilation routes to identify hazards and strategize safe entry. Establish fuel type and shutoff points, establish electricity disconnect and check for combustible materials.
Write down the plan and distribute it to the team so everyone knows what needs to be done when, what is their responsibility and where the emergency shutoffs are.
Enforce strict adherence to safety procedures when handling gas, electrical, and refrigerant components
Perform work on gas or electrical systems only after lockout-tagout steps and zero energy state has been verified. Employ calibrated gas detectors for leak detection prior to and during connection efforts—exceed-safe-limit readings mean evacuate and ventilate!
Test circuits with multimeter rated for system voltage and check ground. For refrigerant-based systems, adhere to local refrigerant handling regulations and employ recovery equipment to reclaim refrigerant instead of releasing it. Note pressure and leak-test results in the job log for reference.
Require technicians to use personal protective equipment and follow rigorous employment screening
All technicians must wear PPE suited to the task: safety glasses, flame-resistant clothing when brazing or soldering, insulated gloves for electrical work, and respiratory protection when required. High-visibility vests and steel-toe boots mitigate slip and impact hazards on bustling jobbys.
Employment screening should involve background checks, certification, and verification of hands-on experience with furnace models. Have licenses and training on file and vet them before pushing technicians to any gas or electrical work.
Conduct regular training on emergency response, fire prevention, and safe tool usage
Conduct hands-on drills on a scheduled basis for leak response, fire extinguisher use, and rapid shutdown of systems. Educate on proper brazing and soldering procedures to minimize open-flame risks and manage ignition sources.
Educate employees on how to correctly use and maintain tools, ladders, and lifts to avoid falls and equipment malfunction. Refresh training when codes or manufacturer guidance evolve. Add in scenario-based exercises, like a hidden gas valve leak or electrical fault during start-up, so teams rehearse cool, sequential response.
Visible safety reminders in the work area
-
Label all shutoffs and hang up obvious diagrams of gas and electrical paths.
-
Post emergency phone numbers and evacuation maps by entrances.
-
Post PPE checklists at tool stations and access to work zones.
-
Post start-up and shutdown step-by-step instructions on the furnace cabinet.
-
Designate no smoking areas and make fire extinguishers easily accessible.
-
Utilize barrier tape and signage, to keep non‑technicians out of active work areas.
Common Pitfalls
Typical errors in Parker furnace installation cause early malfunctions, increased power consumption and hazards. Early detection and correct practices reduce long-term costs and keep systems reliable. The below dissects the most common trouble areas and where installers and owners should concentrate.
Ventilation
Letting combustion gases linger this way, by venting improperly, increases your risk of carbon monoxide exposure. Check flue pipe slope, joints are secure and no corrosion. Inspect exhaust outlets for bird nests, debris or snow blocks that backdraft and unsafe operation.
High‑efficiency furnaces utilize venting materials and configurations that differ from previous units. Validate venting materials are consistent with manufacturer specifications and local code. In other words, balance airflow where needed and make sure makeup air is sufficient in tight buildings.
Bad ventilation connects to both humidity and indoor air quality – maintain 30–50% humidity to escape mold and dust mites that thrive when venting’s amiss.
Connections
Leaks, failures and fire hazards are a result of faulty connections. Check gas lines for proper fittings, thread sealant and no cross‑threading. Verify electrical wiring has tight terminations, correct polarity and proper gauge wire. Corroded terminals or loose screws cause intermittent faults.
Use certified valves and unions and check each joint with a leak detector or gas with soapy water. Electronic controls, sensors, and thermostats should be tested post-installation — record calibration and baseline readings.
Mark connection points and print photos in the service file so subsequent techs can follow issues fast. Thermostat mis‑settings or faults are responsible for a lot of comfort complaints – check setpoints, wiring and sensor location.
-
Common mechanical problems and impacts:
-
Leaky ductwork: reduces delivered heat, raises energy bills, shortens system life.
-
Dirty air filters: lower airflow, raise fan stress, decrease efficiency.
-
Low refrigerant: not typical for furnaces but related HVAC components requires leak locate and recharge.
-
Corroded burners or flues: reduce combustion efficiency and increase failure risk.
-
Faulty motors/bearings: lead to overheating and early replacement.
-
Poor insulation/air leaks: force higher run times and faster wear.
-
Neglected maintenance: small faults become large repairs or replacement.
-
Sizing
Selecting the incorrect capacity results in poor comfort and expense. Under‑sized units operate continuously and never attain set temperatures. Over‑sized units short cycle constantly, resulting in wear, inadequate humidity control and increased bills.
Use the manufacturers’ efficiency ratings and do a load calculation associated with home performance. Consider future changes: added insulation, home expansions, or tighter weatherproofing can alter needs.
Signs of incorrect sizing:
-
Uneven room temperatures and persistent cold spots.
-
Short cycling — frequent on/off cycles within minutes.
-
Long, continuous run times without achieving set temperature.
-
Excessive noise, rapid component wear, and high energy use.
Post-Installation Care
Post-installation care keeps your Parker furnace humming. This guide addresses the post-installation care consisting of seasonal maintenance, warranty procedures, and upkeep that safeguard the investment, maintain warranty rights, and keep indoor comfort consistent.
Adhere to these to stave off surprises and facilitate service when necessary.
System Checks
Test all system functions – heat pump cycles, air conditioning, programmable thermostat settings. Verify thermostat is talking to furnace and scheduled programs adjust temperature as programmed.
Run the system through a complete start-stop cycle to listen for strange noises and to detect short cycling.
Check air filters, ducts, vents and sensors for cleanliness and functioning. Swap or wash filters as soon as clogged – homeowners frequently neglect this and then blame it for elevated energy costs and decreased production.
Inspect duct joints and return grilles for loose seals and blockages that hamper airflow and efficiency.
Check refrigerant levels, pressure regulators and expansion valves where applicable. Low refrigerant or wrong pressures reduce heating or cooling capacity and can damage the compressor.
Use manufacturer specs to compare pressures and adjust only with correct gauges. Document everything in a maintenance log including dates, readings, and corrective actions.
Logs validate warranty claims and speed future troubleshooting. Retain electronic and hard copies if you can.
Warranty
Register the new furnace with the manufacturer and handoff customers with warranty documentation at handover. Registration typically activates comprehensive warranty coverage and may even lengthen coverage terms.
Talk coverage, what’s not covered, and claim process. Explain what parts and labor are covered, any maintenance needed to keep coverage active and deadlines for submitting claims.
Advise saving receipts, service logs, and original invoice as proof. Advise customers to maintain records of all service and maintenance for warranty purposes and expedient claims.
Extended warranties are an added peace of mind. Skim terms to see about caps, deductibles, and repair-service networks.
|
Warranty Type |
Typical Coverage |
Considerations |
|---|---|---|
|
Manufacturer |
Parts, some components |
Must register; follow service schedule |
|
Extended |
Parts + labor, longer term |
Read exclusions; may require dealer service |
|
Service Agreement |
Annual tune-ups, discounts |
Good for priority response and savings |
Maintenance
Establish a maintenance plan with yearly professional tune-ups and seasonal inspections. Yearly tune-ups catch minor problems before they become major meltdowns and contribute to longer furnace life.
Change air filters and check ducts for dust. Good ventilation and airflow are important. Blocked returns make the furnace labor and reduce component life.
Homeowners can do filter changes. Suggest pros check yearly. As part of the service visit, lubricate moving parts, test safety devices, and check refrigerant controllers.
These things keep it humming efficiently and safely. Remind customers to maintain records and to reset thermostats seasonally for best performance and cost savings.
The Professional Edge
Professional installation means a Parker furnace setup with less surprises and more predictability. Experienced technicians from respected companies such as Son HVAC LLC have standard protocols for site evaluation, duct sizing and system balancing. This begins with a crisp, precise quote that itemizes parts, labour, timelines and warranty information so the homeowner has clarity on cost and scope before work commences.
Technicians who maintain certifications can demonstrate training and certification, which is important when systems are still under warranty or when local codes require certain credentials. As the book’s subtitle suggests, a strong work ethic and attention to detail minimize callbacks and concealed expenses.
When installed, they verify clearances, gas pressure, venting and electrical connections to manufacturer specifications and local codes. They test combustions, quantify air flow in metric terms, and record results. For instance, a tech may measure supply and return flows in litres per second to validate balanced delivery, then optimize fan speeds or dampers to achieve the design objective.
This incremental attention prevents hot spots and enhances sustainability. Response and quick evaluation are important when lag impacts comfort or security. Good companies respond to questions promptly, coordinate site visits within days, and stock frequent parts to complete jobs in a single visit.
A personable, down-to-earth attitude helps keep the conversation straightforward–technicians break down problems in easy terms, display pictures of affected areas, and guide customers through alternatives such as high-efficiency models or zone controls. When you explain things clearly, clients can make good decisions and trust you.
Regular training and employee vetting provides a consistent, trusted team. Companies that require background checks, verify certifications and provide regular skill refreshers reduce liability and improve workmanship. Proper insurance safeguards both the client and the installer in the event of mishaps.
A demanding hiring procedure combined with ongoing training means the tech is more likely to be up to date on Parker’s newest furnace models, controls and diagnostic equipment. Customer service, satisfaction guarantees and value distinguish routine work from professional care. Good firms do follow up checks, respect service windows and provide written guarantees for parts and labour.
They offer trade-offs, like upfront cost vs seasonal efficiency, and they suggest maintenance schedules that preserve warranties. Best client experience sometimes means rapid response to questions post-installation, transparency about next steps if there’s a problem.
Conclusion
A Parker furnace is perfect for numerous homes. It warms rooms quickly, operates quietly and is more fuel efficient. Do the pre-checks, keep ducts clear, and choose the proper size. On install, adjust levels, seal all joints and test. Adhere to safety guidelines and lookout for typical defects such as inadequate venting or open wiring. Post-installation, you can change filters, log service dates, and run seasonal checks. Bring in a certified tech for the complicated stuff, and for warranty work. A specialist expert drops risk and keeps the unit on track. Get off to a smooth start, book a pro for the first tune-up and maintain with an easy care plan to save on life and costs. Set that tune-up today.
Frequently Asked Questions
What pre-installation checks should I perform for a Parker furnace?
Look at the furnace model, duct compatibility, fuel type and electrical supply. Double check your installation space measurements and local permits. These checks save you time and money with added fees.
How long does a typical Parker furnace installation take?
Most installations require 4–8 hours for seasoned technicians. More complicated configurations or ductwork modifications could push that to a full day.
What safety protocols do installers follow during a Parker furnace installation?
Technicians observe gas shutoff, power isolation, carbon monoxide testing and correct venting checks. They utilize PPE and adhere to manufacture instructions.
What are common pitfalls during Parker furnace installation?
Typical problems are wrong size, bad venting, insufficient electric supply and incorrect flue connections. These lead to waste & danger.
What post-installation care is required after installing a Parker furnace?
Switch filters, check your thermostat settings and book a system check. Schedule a pro tune-up during that first year.
When should I hire a professional instead of doing it myself?
Employ a certified HVAC specialist for gas hookups, electrical work, duct modifications or when permits are necessary. Experts minimize hazards and warranty protection.
How does professional installation benefit my Parker furnace’s performance?
Professional installers guarantee right-sizing, safe venting, and proper calibration. This maximizes efficiency, prolongs equipment life and safeguards warranties.
Key Takeaways
Centennial homeowners would be wise to seek out a local 24 hour plumbing service that knows freezing winters, shifting soils,…

Key Takeaways
Know that municipal infrastructure, elevation, and seasonal demand impact water pressure in Centennial homes, so begin by…