
How to Fix a Dripping Bathtub Faucet: Step-by-Step DIY Repair and Prevention
Key Takeaways
-
Triage the leak before you jump to repair. Its drip pattern, water stains, pressure changes, and pooling will determine urgency and scope.
-
Identify the faucet type and locate the leak at the spout, handle, or wall connections to determine the appropriate parts and tools.
-
Preparation is key. Assemble a comprehensive toolkit and matching replacement parts up front, from basic tools to a faucet repair kit to any specific pullers or wrenches.
-
Here’s a simple step-by-step guide to repairing a dripping bathtub faucet. Start by shutting off the water. Next, remove the handle. Then, replace the worn components. Finally, reassemble carefully.
-
Once repaired, turn the water back on slowly, check all joints and handles for leakage, and continue to observe performance over time to ensure that the fix remains intact.
-
Think about factors such as high water pressure, hard water, pipe corrosion, and the age of your faucet when making your repair or replace decision for maximum long-term savings.
How to fix a dripping bathtub faucet describes easy measures to prevent leaks and conserve water. There’s a constant drip. Worn washers, cartridges, or valves may be the cause.
Simple, foolproof solutions like a wrench, a screwdriver, and some replacement parts fix most issues in less than an hour. Understanding your faucet type first helps you select the correct part and approach.
It provides step-by-step checks, part choices, and safety tips to make your repair reliable.
Faucet Diagnosis
Start by verifying the leak and its pattern so you can tailor the repair to the issue. Check for consistent drips, occasional slow drips, water staining around the faucet, or new pooling at the tub base. Look for mold, rust, or mineral streaks on and under the spout. These indicate persistent leaks.
Observe any change in water pressure or uneven flow as handles move. Pressure changes can stress parts and indicate if the problem is supply-side or inside the faucet.
Faucet Type
Find out if it is a single or double handle or a diverter style tub spout. Single-handle units utilize cartridges, whereas double-handle taps depend on valve stems and washers. Diverter valves introduce moving parts at the points where tub or shower water redirects.
Examine the exposed design to see whether the maker or part numbers are imprinted on the escutcheon or handle, assisting in locating matching rebuild kits. Many hardware stores and online suppliers sort kits by type: cartridge kits for single-lever, rubber washer kits for compression (double-handle), and diverter rebuilds for shower-tub combos.
Confirming the type before disassembly saves you time and prevents acquiring wrong parts. For example, a common ceramic-disc cartridge fits many modern single-lever faucets, while older compression fittings need exact-diameter washers.
Leak Source
Trace it to where the water is leaking. A drip from the spout generally indicates a worn valve seat, damaged cartridge, or mineral buildup inside the spout channel. Leaks at handle bases indicate worn seals, packing, or a failing cartridge.
Water behind the wall or on the tub apron can point to loose supply connections or a failing diverter. Use tissue or a paper towel pressed around handles, joints, and the spout to catch small weeps and verify the source.
Pull the faucet trim and peek behind the escutcheon for wet insulation, soft drywall, or corrosion — indicators of concealed leaks that require immediate care to prevent structural damage.
Part Identification
List and inspect likely faulty parts: rubber washers, O-rings, cartridges, valve stems, packing nuts, and valve seats. Bring the removed pieces to the store, or snap a photo of them against a ruler to pair up size and shape.
Faucet Diagnosis and Repair… check used parts against replacements before installing. Even small differences in lip angle or bore size can cause new leaks.
Make a checklist: cartridge or stem, O-rings, washers, valve-seat wrench (if needed), plumber’s grease, and replacement screws. Remove mineral deposits with vinegar or a descaling solution prior to replacing parts. Build-up can simulate part failure.
If repairs fail or the valve seat is corroded, call a professional. Routine maintenance and parts replacement prolong the life of your faucet.
Essential Toolkit
A small, clean, organized toolkit turns a dripping bathtub faucet repair faster and less error-prone. Collect tools, components, and protective gear in advance. Just set them on a towel or tray within arm’s reach of the tub and you won’t have to pause in the middle of the fix to hunt down a screw or seal.
Identify the faucet model and record whether it’s a cartridge, ball, or compression valve faucet. That decides which replacement parts and specialized tools you’ll require.
Basic Tools
Flathead and Phillips screwdrivers, an Allen key set, and an adjustable wrench or basin wrench are the default tools for many repairs. Add a socket wrench for those stubborn nuts and needle-nose pliers for clamping onto tiny parts.
A utility knife is needed to cut old plumber’s tape and to trim seals if necessary. Plumber’s tape (Teflon) and a tube of plumber’s grease (silicone) keep threaded joints and O-rings seat and seal properly.
Leave a small container or magnetic tray open beside you to catch screws, springs, and pins as you disassemble so nothing goes missing. A clean rag or towel serves multiple roles: it wipes parts, dries surfaces, and protects finishes from drops.
Most DIY fixes wrap up in less than an hour once tools are primed.
Specialized Gear
A faucet repair kit paired to your faucet brand accelerates diagnosis and replacement. Kits typically contain O-rings, seats, and springs sized to common brands.
For recessed cartridges or hard-to-access valve seats, a cartridge puller or seat wrench spares the stress and avoids incidental damage. A basin wrench comes in handy if there is tight access behind the faucet.
Put on some heavy-duty gloves to shield your hands from the jagged metal edges and mineral deposits. Carry a flashlight or headlamp to illuminate shadowed areas behind the tub spout and under escutcheons.
Certain fixes are aided by a small mirror for checking seats and seals. Remember to keep a bucket under the work area for residual water when you open supply lines.
Replacement Parts
Purchase new washers, O-rings, cartridges or valve stems depending on your faucet’s manufacturer and model. Bring the old parts with you to the store for direct comparison to prevent mismatch.
For your repair, opt for top-quality brass or ceramic replacements when possible to increase its longevity. Look at the package for specific compatibility notes and sizes in metric. Some components list millimeters.
If that part isn’t available, a universal repair kit might do, but anticipate some additional fitting or trimming. Frequent checking of seals and fasteners as part of your regular cleaning routine will help avoid any future leaks.
The Repair Guide
A dripping bathtub faucet not only wastes water and can increase your utility bill, but can cause structural damage if ignored. Know your leak source before you start. Basic tools — adjustable wrench, screwdriver, Allen key, plumber’s tape, and replacement washers or cartridge — are usually all it takes. Teardown takes around 15 minutes. Most repairs are completed within an hour once parts are in hand. Photos or diagrams at every step minimize guesswork and assist with proper reassembly.
1. Water Shutdown
First, shut off the water to your bathtub — you’re wasting lots of water and you’re going to make a mess if you don’t! Identify the master shutoff or the bathroom’s local shutoff valve. Most homes have one in or near the bathroom or the water meter.
Turn on the faucet all the way to drain any remaining water and drop pressure in the lines. Test the flow stopped by observing drips. If water continues, shut the main house valve and drain again.
2. Handle Removal
Pop off any fancy cap to access the screw. Pull the handle straight off with a quick, yet careful jerk to prevent bending the stem or scarring the escutcheon.
Place screws and small parts on a rag or in a small container and take a picture of the stack and orientation for later reference.
3. Component Access
Remove the escutcheon plate to unveil inner workings. Certain trim sets conceal screws beneath a trim ring. With a socket wrench or pliers, pull out the valve stem or cartridge.
Each type of faucet requires a slightly different pull, so reference a diagram or photo example if uncertain. Clean the exposed portion with a cloth to eliminate mineral deposits and examine seals, springs, and seats for signs of wear or corrosion.
Capture images prior to deeper disassembly. These images assist in fitting pieces back in the correct sequence.
4. Part Replacement
Swap in matching parts, such as worn washers, O-rings, or even a whole cartridge. Use plumber’s grease on moving parts to minimize friction and extend life.
Be sure seals and gaskets lay flat and proper. Misaligned seals leak even on new parts. Gently tighten fittings but don’t overdo it. Overtightening can crack components or strip threads.
5. Faucet Reassembly
Reassemble in reverse of removal order, with photos as reference. Install the escutcheon plate and handle, secure decorative caps, and do not force parts.
Wrap metal-threaded connections with plumber’s tape where metal threads join. Test handle movement; it should be smooth. Turn water back on and check if it still drips. If so, call a plumber.

Post-Repair Checks
Conduct a rapid general overview prior to the specific checks to ensure the work zone is empty and tools removed. This aids in concentrating on operational checks and keeps stray junk from causing a leak down the road.
Gradual Restore
Crack open the main shutoff or local supply valves to let water back into the lines. Crack them a bit open at first for 10 to 20 seconds, then pause, as this avoids a surge that could blow seals or loosen fittings. This will allow air to escape and observe a consistent flow.
It removes trapped air that can cause sputtering or spikes in pressure. Pay close attention to the sound as the water fills into the pipes. Small hisses or light knocking are okay for a quick moment, but if you’re hearing loud bangs or constant vibration, you’ve got pressure problems or something loose.
As you pressurize, examine the fixed faucet and adjacent fittings for instant leaks. If water appears at joints or beneath the spout, shut off the valve and either re-tighten fittings or re-seat seals.
Leak Inspection
Inspect all exposed joints, the tub spout and connections under the access panel for drips or moisture. Run hot and cold water separately and together to test whether the drip returns under different temperatures and if temperature adjustment is still smooth.
Carry a dry tissue or paper towel and run it along seams and the base of the spout to feel for minuscule leaks you might overlook with the eye. Fill the tub a bit and then drain it to make sure the drain and overflow work correctly.
Pooling at the drain edge can indicate misaligned fittings or mineral buildup. Check adjacent walls and floors for water damage or calcium deposits. White crusts, mushy caulking, or stained grouting are evidence of past leaks or current seepage.
Check again in a few hours, then the following day to catch any leaks that might be delayed due to settling or pressure shifts.
Handle Function
Turn the handle through to its full range of motion to verify that it rotates smoothly and is aligned correctly. Test both stopping and starting: turn fully off and watch for any residual drip over several minutes.
If your diverter is present, toggle between tub and shower several times while water is running to help it seat properly and stop water from being diverted where it shouldn’t. Post-Repair Checks check for wobble or loose play in the handle.
Tighten the retaining screw or adjust the cartridge to remove looseness without binding. Pay attention to how the handle feels. Gritty movement or inconsistent resistance is often a sign that debris has become trapped, or the cartridge may be worn out and in need of replacement.
Write down the repair date, parts replaced, and any notes for future maintenance and warranty reference.
Hidden Factors
Like a slow drip from a tub faucet, it is a surface symptom of behind-the-wall problems. Before you replace the cartridge or washer, consider whether water quality, pressure, or pipe condition is causing the leak to keep coming back. Solving these hidden factors can save a householder money and prevent mold, framing, or subfloor damage.
Water Pressure
Test water pressure at an outside hose bib or close to the main supply with a gauge. Standard residential pressure is 300 to 550 kPa (3 to 5.5 bar). Pressures in excess of 550 kPa frequently strain faucet seals and joints and can result in bursts or a persistent drip that returns after repair.
Get a pressure-reducing valve (PRV) installed if your pressure is too high. Your plumber can adjust it to a safe range. A controlled system limits cartridge and washer wear and prevents other plumbing components from succumbing to pressure imbalance related early failure.
Symptoms are sudden surges when other fixtures run, noisy pipes, or non-stop slow drips when fixtures are off. Check pressure from time to time, particularly after new municipal changes or appliances, to avoid stressing seals and keep repairs long-lasting.
Water Hardness
Check your water for hardness with a home kit or send a sample to a laboratory. Hardness greater than 180 ppm (10.5° dH) usually creates scale. Mineral buildup restricts flow and disintegrates rubber parts in faucets, causing them to leak and seem to leak again even after you replace the part.
Clean aerators, spouts and cartridges in vinegar or descaler to free deposits. Replace pitted or brittle parts. If you install a water softener, it helps reduce future build up and can prolong the life of faucets and valves throughout the house.
Routine maintenance matters: schedule aerator cleaning and check cartridges yearly in hard-water areas. This maintains flow and reduces the danger of clogs that cause mechanical breakdown.
Pipe Corrosion
Check exposed supply lines and trap for rust, greenish staining, or flaking — all indicators of metal deterioration that frequently reaches behind walls. Rusty pipes can still leak within wall cavities, leading to hidden moisture and the perfect breeding ground for mold.
Replace corroded sections with corrosion-resistant materials like properly fitted copper, PEX, or stainless-steel flex lines when you repair or remodel. A one-day bathroom remodel done with hidden factors can make your upgrades more efficient than piecemeal fixes and tackle multiple issues at once!
Early action prevents higher costs. Delayed repairs risk structural damage to framing or subflooring, larger water bills from wasted gallons per day, and compounded failures elsewhere in the system. Consider an insistent drip a hint, not merely a headache.
Repair or Replace?
Repair or replace, so in other words, determine wreck or rehab by first evaluating the leak’s origin, the age of the faucet and the cumulative cost. Small, isolated leaks from worn washers or cartridges are often repairable. Corrosion, patches or indications of systemic plumbing issues suggest replacement.
Take into account immediate cost, expected lifespan, water waste and the potential for hidden damage like mold or rot when deciding what to do.
Cost Analysis
Calculate DIY repair costs: basic tools (wrench, screwdriver) and parts (washer, O-ring, cartridge) usually total between 10 to 60 USD or 10 to 55 EUR, depending on part quality. Plus your time—an hour or two for a good DIYer, longer if they need direction.
If the valve seat is corroded, machining or seat replacement drives up costs and can put the job beyond DIY.
Compare repair to replacement: a simple repair is low cost. A good new tub faucet, with trim and installation if you get a plumber, runs anywhere from about $100 to $600 (90 to 540€) for typical designs, more for designer or tub-shower combos.
If the repairs are repeated, the combined cost can dwarf the price of replacement in less than a year.
Factor in water savings: a steady drip wastes liters per day, which adds to utility bills and offsets repair costs over months. When you replace an inefficient faucet with a modern, low-flow model, you can reduce water use by as much as 30 to 50 percent in the fixture, depending on flow rates and usage.
|
Option |
Typical upfront cost |
Typical follow-up costs |
Notes |
|---|---|---|---|
|
Repair (DIY) |
10–60 USD |
Low |
Best for worn washers/cartridges |
|
Repair (pro) |
80–250 USD |
Possible return visits |
Useful if seat or piping work needed |
|
Replace faucet |
100–600+ USD |
Low |
Reduces future leaks, improves efficiency |
|
Item |
Example costs (USD) |
|---|---|
|
Washer/cartridge (part) |
5–40 |
|
Tools (one-time) |
10–50 |
|
Plumber service call + labor |
80–200 |
|
New faucet (mid-range) |
150–350 |
Age Assessment
Check for manufacture marks or model numbers, or perhaps old work invoices to estimate the age. Rust, pitting, mineral deposits, and soft seals are contributing factors. If the faucet requires more than two repairs in five years, replacement is usually more economical.
If the water has a lot of minerals, it can speed wear. In that case, schedule more frequent maintenance or choose corrosion-resistant finishes.
Of course, check the plumbing behind the wall when you can. A worn out pipe or bad water pressure can mimic faucet failure. If corrosion has spread to the valve seat or supply lines, then repairing the faucet may not address the underlying cause.
Plan upgrades if the fixture is close to or beyond its expected lifespan, usually 10 to 20 years, depending on the material and usage.
Future Value
A sleek new faucet feels great and, if the rest of the bathroom is updated, can boost the perceived value of a home. Modern fixtures provide improved seals, ceramic cartridges and low-flow aerators that reduce both drips and expenses.
Eliminating leaks minimizes your risk of water damage and mold and expensive repairs to your finishes and structure.
Some simple TLC can extend a faucet’s life and protect your investment. If DIY fixes falter or plumbing issues reoccur, have a licensed plumber determine if a wider replacement, including pipes, is warranted.
Conclusion
A drip, drip, drip really does add up. Fixing a bathtub faucet saves you water and trims a substantial little bill. Follow the steps laid out here: spot the leak, shut the water, swap worn parts, and test the flow. Make sure you have the appropriate tools and parts to fix your dripping bathtub faucet. Inspect valve seats, O-rings, and cartridge fits. Be alert for mineral build-up or worn pipes that necessitate a complete replacement. For easy cartridge or washer swaps, the vast majority wrap up in less than an hour. If you notice cracked fittings, low water pressure, or recurring leaks, call a plumber. Give the repair a shot if you’re feeling handy. Book a pro if the job looks larger. Ready to dive in? Dust off your toolkit and choose the initial step from the guide.
Frequently Asked Questions
What causes a bathtub faucet to drip?
Most drips originate from worn washers, O-rings, or valve seats. Mineral buildup and loose parts cause leaks. Knowing where the leak comes from accelerates repair and saves water.
Can I fix a dripping faucet myself?
Yes. Most repairs need simple tools and a new washer or cartridge. Take safety precautions, turn off the water, and photograph so you can put it back together correctly.
What basic tools do I need?
You’ll require an adjustable wrench, screwdrivers, pliers, new washers or a cartridge, plumber’s grease, and a soft cloth. These address the most common repairs.
How long will a typical repair take?
Most fixes can be done within 15 to 60 minutes. Cartridge replacements are a bit more involved than replacing a washer. Time depends on the type of faucet and your level of expertise.
When should I call a plumber?
Call a plumber if you have persistent leaks, broken valve bodies, can’t pinpoint the source of the leak or if the repair involves soldering or major plumbing. A professional helps keep water damage away.
Will fixing a drip save money?
Yes. One drip can waste liters a day and boost your water bill. Repairing leaks saves water and avoids expensive damage down the road.
How do I prevent future drips?
Routinely clear aerators and cartridge areas and replace worn seals. Stay away from corrosive chemicals and have your older fixtures inspected to detect wear before it gets bad.

Key Takeaways
Isolate the smell by determining its precise odor, where it is coming from and when it occurs, in order to zero in on causes…
Key Takeaways
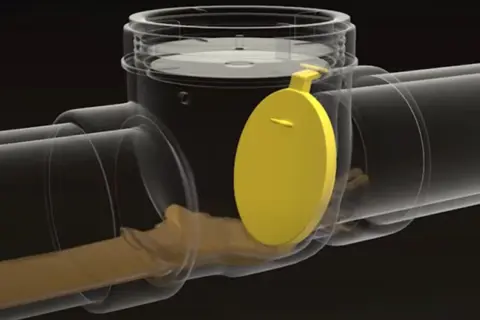
Backwater valve prevents sewage backflow into a home by letting it out as usual but automatically closes when there is reverse…