
How to Fix a Stuck Sump Pump Float?
Key Takeaways
-
Check the float and pit for obstructions, wear, or switch faults. Clear debris or entangled cords to allow free float movement.
-
Visually inspect, manually test lift, and multimeter test the float, switch, and electrical supply to diagnose how to fix a broken sump pump float.
-
For safety, unplug the power source, wear gloves, and work in a well-illuminated area before reaching into the pump and float assembly.
-
Clean, reposition, or adjust the float and tether. Then refill the pit and test cycling until the pump turns on and off at the correct water levels.
-
Choose to repair or replace, considering the damage, pump age, repair history and repair versus replacement cost. Keep in mind that replacing early can avoid expensive water damage.
-
Set a maintenance schedule that involves debris removal, float checks, electrical testing, and proactive part replacement to minimize future breakdowns.
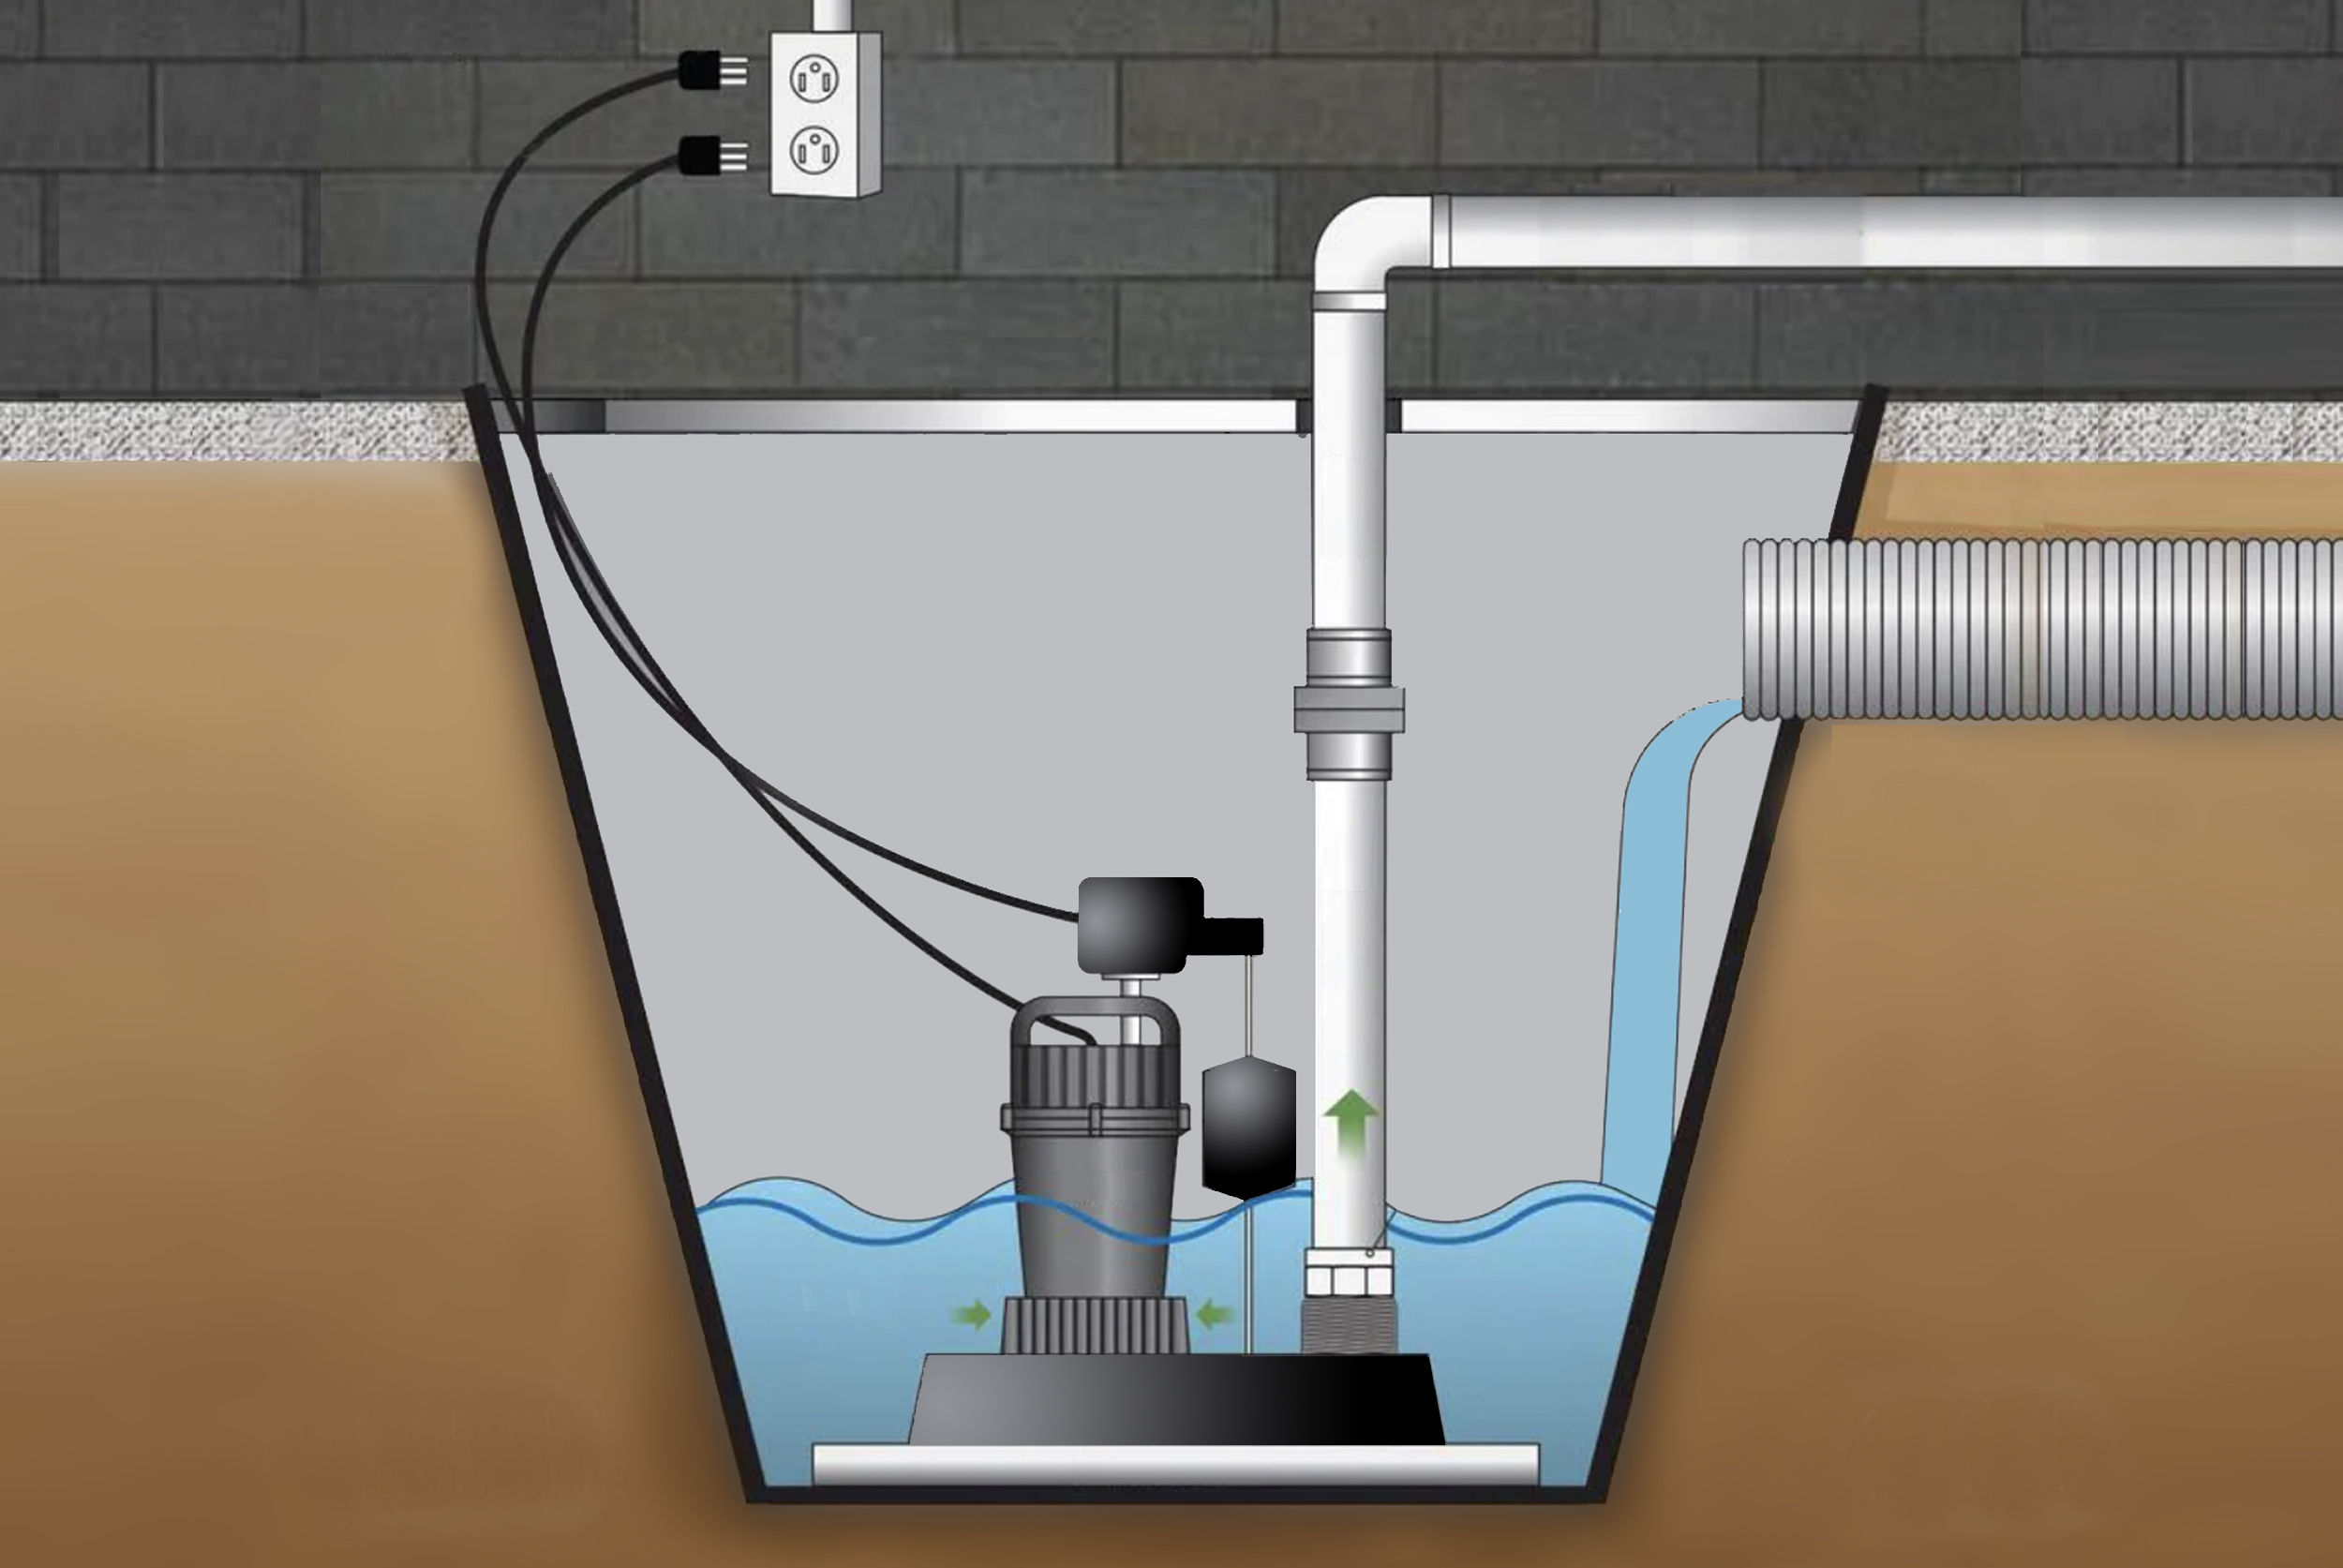
A broken sump pump float prevents the pump from sensing water and can lead to basement flooding. Typical reasons are stuck floats, wiring faults, or junk preventing action.
Basic float arm inspections, pit cleanings, and switch testing can frequently revive the functionality without swapping out the pump. For electrical or complicated mechanical issues, bring in a professional.
The guide below provides step-by-step checks and safe float troubleshooting tips to diagnose and fix the float.
Float Malfunctions
A float malfunction takes place when the float assembly doesn’t either move or signal the pump properly. Reasons can be mechanical failure, defective switches, incorrect installation, corrosion, debris accumulation, or electrical issues. Float malfunctions include constant pump run, failure to start, or not turning off at the right water level.
We see it with regular sump pump floats and we see it with sewage pump floats. Ignoring a stuck or failed float can permit water to overflow past design limits and flood basements.
Obstruction
Check the sump pit for detritus, sludge, and sediment that can obstruct float movement. Small stones, rags, leaves, or clumps of sludge often lodge near the float and prevent it from rising. Look for belts, zip ties, hose loops, or the discharge pipe draped across the float.
These frequently impede the free route the float requires. Make sure the float isn’t rubbing up against the sump cover, basin wall, or internal brackets. Even soft rubbing can drag you down and make it switchy.
Dislodge foreign objects and scrub buildup with a stiff brush or shop vacuum. Once clear, manually lift the float a few times to make sure it smoothly rises and falls. This easy test frequently uncovers unseen obstructions.
Wear
Assess the float for visible damage. Hairline cracks, softened plastic, or waterlogged foam indicate end-of-life. Older floats may absorb moisture or develop small leaks, which change buoyancy and trip points.
Examine tether cords and counterweights for stretching, fraying, or corrosion of attachment hardware. A sagging tether alters the on/off levels and can cause the pump to run too long or not start.
Check for mineral deposits or gunk around the switch mechanism that can prevent movement. Hard water leaves scale on pivot points, and sewage puts grease and biofilm. Instead of retrying repairs on degraded components, replace worn or damaged floats promptly.
As the title suggests, a lot of times, swapping the float is quicker and less dangerous than trying complicated repairs.
Switch Failure
Test the float switch electrical continuity with a multimeter to verify it opens and closes as the float moves. A failed internal contact will not measure. Identify if the switch is stuck on or off.
Stuck-on runs the pump constantly and stuck-off means no pump. Check piggyback plugs, connectors, and wiring for loose contacts or corrosion. Defective connectors cause intermittent operation and random tripping.
Float switches like MAC3 or MAC5 styles have different mechanisms and failure behaviors. Reference manufacturer guidance for proper tests and replacement components.
A few failures are caused by control circuit issues, not the float, so check wiring and the pump’s control module when easy fixes don’t work. By regularly inspecting your float and replacing defective components in a timely manner, you can minimize the risk of water level control related issues and expensive damage.
Diagnostic Steps
A careful diagnostic process helps you isolate float issues prior to any repair. Begin with the basics: know how the float switch works. Some floats contain a magnet that moves past a reed switch inside a tube. That basic physics directs a lot of the subsequent troubleshooting. Collect a flashlight, work gloves, a multimeter, and a notebook for observations and readings.
Visual Check
Take the sump cover off and examine the float, switch, and pit. Check for debris, mineral build-up, or slipped guide rails that can jam the float. Test the float body for cracks or punctures that let water in and alter buoyancy.
Verify the water level is within the pump’s rated activation range. Gauge where the float ought to sit when the pump runs. Many floats use a pivot or tether that restricts movement, so check that the linkage isn’t twisted. Raise and lower the float gently. It should swing freely and click the switch readily.
Check the outflow pipe as well. Ensure it runs away from the foundation a minimum of 3 meters (10 feet) and that there are no visible kinks, frozen sections, or loose clamps. Record anything out of the ordinary.
Manual Test
Unplug the pump from the outlet prior to touching components. With power off, lift the float to mimic rising water and sense smooth movement in the pivot or tether. If the float binds, check for rubbing points and clean or reposition the guide.
Once power is restored, lift the float momentarily to check if the pump starts and stops upon lowering. Pay close attention to unusual sounds or intense vibrations indicating impeller damage or motor stress. If the float sticks in this motion, take it out and clean the outside.
Check the impeller and intake for clogs with the unit unplugged. If the pump seems to prime poorly, try an airlock fix. Unplug the pump, let it sit for a few minutes to let trapped air escape, then plug it back in and test again.
Electrical Test
Using the multimeter, test for voltage at the float switch terminals, raising and lowering the float only if you’re comfortable with basic electrical safety. Check open/closed readings against the manufacturer’s wiring diagram or manual. A reed-type switch would flicker as the magnet passes.
Check that the piggyback plug or direct-wire connections are firm and intact. Verify the outlet and power cord for continuity and proper voltage. A good electrical connection eliminates supply concerns.
Test alarm settings. Low or high alarms can indicate float switch issues and should be tested at this time. Record everything, all readings, and whatever steps you took for future maintenance and troubleshooting.
Fixing The Float
Start by determining if it requires cleaning, adjustment, or replacing the float or float switch altogether. Round up a spare float switch, waterproof zip ties, silicone lubricant, replacement tether or counterweight, and good ’ol pliers and a multimeter.
Plan steps in order: power off, access pump, clear debris, adjust or replace float, then test. Maintain the sump pit as dry and clean as possible prior to beginning to minimize slipping, contamination, and additional clogging.
1. Safety First
Unplug the pump to eliminate all electrical hazards and lock the breaker if you have one. Put on chemical-resistant gloves and eye protection, as pits can contain sewage, sludge, and jagged objects.
Make sure you have good lighting over the pit and clear the floor of hoses and tools so you won’t fall. Have someone within earshot or inform a neighbor where you are. Do not work alone in case of an injury or unexpected swoon.
2. Access Pump
Take off the sump cover gently. Some are sealed and have to be pried up with a flat piece of steel. Push aside hoses and cords so you can clearly see the pump and float assembly.
If visibility is bad, raise the pump halfway out of the pit while holding its weight. Otherwise, it’s easy to snap the discharge connection. Hang cords and hoses with a hook or clip to keep them out of your work zone and prevent accidental yanking.
3. Clear Debris
Scoop out mud and rags from the bottom with a small bucket or gloved hands. A wet dry vacuum helps if available. Clean the float and switch with a rag and mild detergent to get rid of mineral crust or grease that can jam movement.
Check the pump intake and discharge elbow for obstructions. Any small piece of cloth can keep the float from rising. Bag any waste according to local waste disposal for sewage or contaminated material.
4. Adjust Position
Ensure that the float is allowed to hang freely and does not rub a wall, pipe, or the pump housing. Adjust the tether to cause the float to start the pump at your preferred trigger height.
A good rule of thumb is to leave a 50 to 100 mm travel range for dependable on/off cycling. Use waterproof zip ties to bundle extra cord away from the float path and a small counterweight if the float tilts badly.
Make sure the switch setting corresponds to your sump’s capacity to avoid short cycling.
5. Test Again
Reconnect power and gradually fill with water to your test level in the pit. Observe the float’s ascent and record both the pump start point and stop point.
The pump must run long enough to clear water without short cycling. Watch for sticking or lag and repeat cleaning or tweaking steps as necessary.
Repair Or Replace?
Whether a float or its switch can be repaired or replaced, start by examining visible damage, testing electrical function, and looking for debris or corrosion. Think about how straightforward it is to source a matching part and how long a repair will take compared to buying new.
Quick repairs get things working again but can mask underlying damage, while complete replacement offers a more durable solution with increased initial expense.
Cost Analysis
Contrast parts, pump price and labor to DIY fix. A simple replacement float switch can run between 15 and 40 USD. A new submersible sump pump costs anywhere from 120 to 400 USD depending on capacity.
A professional service call adds 80 to 200 USD for diagnosis and labor. DIY repair costs cover tools, sealant, wiring supplies, and a replacement float if necessary.
|
Item |
Typical cost (USD) |
Notes |
|---|---|---|
|
Float switch (basic) |
15–40 |
Replaceable alone in many models |
|
Submersible pump |
120–400 |
Higher flow and head = higher price |
|
Professional service |
80–200 |
May include parts and warranty |
|
DIY repair materials |
10–60 |
Tools, connectors, silicone, cleaning supplies |
Early fixes can save money simply by preventing water damage that could cost hundreds or thousands to repair floors, walls, or equipment. Include long-term maintenance in the decision.
Older pumps need more care, and new pumps often come with a multi-year warranty and less frequent service needs.
Age Factor
Verify manufacture date and usage to determine if parts are near average lifespan, refurb or replace. Float switches and pumps typically last 5 to 10 years. Continuous duty or dirty wells reduce that span.
If the pump or float is at or beyond that range, replacing is typically more economical than repeatedly repairing. Older models do not have those seals and protections and it just comes back faster.
If the device has intermittent failures, heavy corrosion or has been previously repaired, replace. Newer units offer superior materials and occasionally more compact, modular floats that are easier to maintain.
Save receipts and model numbers to match up with manufacturer advice.
Failure Frequency
Monitor the failure rate of the float or switch and record circumstances when failures occur. If a breaker trips frequently, sticks, or loses function during storms, it is a design, installation, or environmental problem, not a part failure.
|
Failure pattern |
Likely cause |
Recommended action |
|---|---|---|
|
Single failure after debris |
Clog or obstruction |
Clean, protect intake, consider screen |
|
Repeated sticking |
Poor float design or misalignment |
Adjust position or replace with better float |
|
Electrical failures |
Corrosion or wiring fault |
Replace switch or rewire, inspect ground |
If failures recur, maybe it’s time to step up to a tougher float style (MAC3, MAC5) or add redundancy such as a backup pump or water alarm.
Backup systems minimize the risk of expensive water damage in the event of a primary unit failure.
Proactive Maintenance
Proactive maintenance is scheduled, consistent attention to keep a sump pump and its float functioning prior to an issue arising. It reduces the risk of unexpected breakdown, minimizes repair expenses, and guides the pump to achieve its anticipated life span. The activities below display what to verify, when to respond, and how small measures prevent large damage.
-
EVERY 6 TO 12 MONTHS — Inspect and clean the sump pit. Clear out leaves, gravel, and sludge by hand or with a wet/dry vacuum. Dedicate 20 to 30 minutes to cleaning the pit. It may be the only thing standing between you and blockages that cause pump overrun and $5,000 to $20,000 in flood restoration.
Flush the pit with clean water after debris clearing and ensure the float can move freely without rubbing on walls or cables.
-
Verify float movement and operation quarterly. Manually raise the float to ensure the pump engages and lowers to shut off. Look out for slow starts, chattering, or a float that won’t move. If the float bangs against the pump housing or tether, bend the float arm or replace a warped float.
Catching sticking or slow response early keeps your pump from failing completely.
-
Test electrical and backup systems. Test the backup battery, run a load test, and record the battery installation date on the case with a permanent marker. Swap backup batteries every three to five years even if tests look good.
Arrange for a professional electrical service at least once a year to verify wiring, switch operation, and amperage draw. Experts notice what homeowners overlook and certify system preparedness.
-
Change parts before they wear out. Check seals, gaskets, impellers, and power cords for wear or cracks. Swap out frayed cords and brittle seals without delay. A scheduled component replacement prevents urgent replacement in the middle of a flood, which is 30 to 50 percent more expensive than scheduled work.
If the backup system is more than three years old and a storm season is approaching, replace it proactively to mitigate the risk of it blowing at the most inopportune moments!
-
Create a seasonal maintenance schedule. Be proactive with maintenance. Put in a full check in fall to get ready for winter melt and again in spring just before heavy rains. Quarterly testing, along with annual pit cleaning, gets the pump to its rated lifespan.
Maintain a basic service log for cleaning, battery replacements, and professional maintenance to identify patterns and catch recurring problems.
Train your family on float failure symptoms — strange noise, running constantly, water in pit — and to respond immediately when detected.
Float Upgrades
Float upgrades are a little different, as they concentrate on swapping out or upgrading the switch that signals to the pump when it should operate. They offer float upgrades, which, since a stuck float is a common problem and can make the pump run constantly or not at all, can be a useful repair.
Begin by aligning the new float’s ratings to your pump and basin. Check voltage and current ratings, the pump’s duty cycle and basin depth. Make sure if your setup is a clean-water sump, sewage, or septic application, because some switches are not rated for solids or corrosive environments.
Investigate high-quality float switches. Tethered ball floats are the most common but can catch on debris, basin walls, or pipework. Electronic switches utilize sensors and have no moving float, providing exceptional reliability in tight pits and where sticking is a repeated issue.
Reed or capacitive sensors are less susceptible to mechanical failure, but they still require adequate electrical matching. Search for switches ranked for no less than the pump’s amp draw and with IP ratings appropriate to wet situations.
Tip # 3 – ‘Float’ Upgrades If you have a very tight pit, try switching to electronic or vertical float switches. Vertical floats slide along a rod and are less likely to snag in tight or crowded basins. Electronic or solid-state choices eliminate moving parts, which is a bonus in basins with grease or silt.
For instance, a vertical float on a 300 mm deep basin will have a smaller sweep and avoid inlet plumbing, whereas an electronic sensor mounted on the wall avoids obstructions altogether.
Upgrade to piggyback or integrated alarm models. Universal piggyback switches plug in between the pump and outlet, so replacement is easy and typically costs $10 to $40. Integrated alarms give an early warning if the float fails or the pump won’t start.
Automatic shut-off piggyback units can protect the pump from dry-run damage. Consider low-voltage running alarms so they still sound during power troubles.
Simply make sure the new float switch is compatible with your pump, basin and sewage or septic tank configuration. In sewage, use switches designed for solids and corrosive fluids.
In smaller pits or sumps, verify the float’s range matches the pit depth. Simple servicing, such as cleaning the float, inspecting for frayed cables, and testing operation, can avoid failures and extend life.
Float upgrades are a bargain compared to replacing the whole pump, which costs about 150 to 400 in constant dollars.
Conclusion
You’re now armed with everything you need to spot a bad sump pump float and run quick checks and fix common faults. Test the switch, clear debris, and check the cage or arm for bends. Replace a worn float ball or float cup, or install a new switch if the component breaks. Pick repair for minor, inexpensive repairs. Choose replacement for frequent flunkers or aged pumps that leak or run dry. Keep a simple maintenance plan: monthly checks, clean pit, and a yearly parts review. For more reliable operation, consider a tethered float or a pit-specific vertical switch. If you’re not sure, then phone a local plumber with pump experience. Time to get that broken sump pump float repaired! Begin with the fast quiz and plan any necessary fixes today.
Frequently Asked Questions
How can I tell if the sump pump float is the problem?
Determine whether the float is jammed, can move unimpeded, or activates the pump. Hear the pump running dry or not running when water rises. A quick visual inspection and some rudimentary tests easily identify float problems.
Can I fix a stuck float myself?
Yes. Shut off power, clear out any debris, free the float arm and test its movement. Some repairs are easy. If wiring or motor damage shows up, call a pro.
What tools do I need to fix a float malfunction?
You’ll generally require gloves, a flashlight, pliers, a screwdriver, and a bucket. For testing, a multimeter allows you to check safety switches and power.
When should I replace the float instead of repairing it?
Replace if the float is cracked, water logged, damaged beyond a simple clean, or if the switch fails. Replacement is cheap and it eliminates the risk of breaking again down the line.
How often should I inspect and maintain the float?
Check the float every 3 months and give it a full sump check twice a year. Frequent inspections keep you from being stranded and increase your pump’s lifespan.
Can upgrading the float improve pump performance?
Yes. Modern tethered or vertical floats and electronic sensors provide more reliable activation and fewer mechanical failures. Upgrades minimize false starts and pump wear.
What safety steps should I follow before working on a sump pump?
As always, power down at the breaker. Don’t work in standing water. Utilize insulated tools and manufacturer guidelines. When in doubt, call a licensed technician.

Key Takeaways
Isolate the smell by determining its precise odor, where it is coming from and when it occurs, in order to zero in on causes…
Key Takeaways
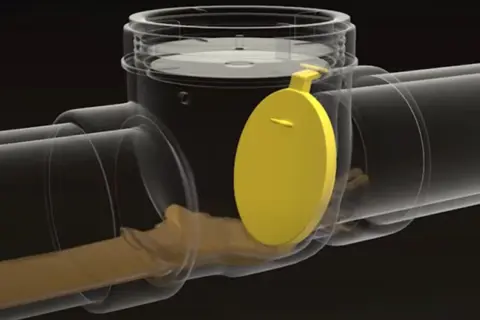
Backwater valve prevents sewage backflow into a home by letting it out as usual but automatically closes when there is reverse…