
How to Fix a Running Toilet Without Tools: Step-by-Step Methods and Safety Tips
Key Takeaways
-
Fix a Running Toilet Without Tools | How to identify the cause before you act – look for clogs, a chronic flapper issue, chain issues, float position, or a loose fill tube so you can select the RIGHT tool-free fix.
-
Shut off the water at the shutoff valve or hold the flapper closed to stop flow before working. Use gloves and towels to keep everything sanitary and safe.
-
Attempt easy, tool-less fixes first like reseating or scrubbing the flapper, manipulating the chain or float with your hand and securing the fill tube back in place to regain normal function.
-
Try household items such as dish soap, hot water, or a covered wire hanger as temporary unclogging aids and steer clear of sharp tools or brute force that can harm parts.
-
Verify the repair by conducting a water and leak test. Then flush a few times and observe that the tank water level remains the same, indicating that the leak or running has stopped.
-
Call a plumber when the toilet still runs after several DIY fixes, if you notice any water damage or mold, or if you don’t feel comfortable making repairs. Be prepared to summarize your steps tried and symptoms observed for the pro.
How to fix a running toilet without tools – easy steps to stop the water waste.
Typical culprits are a flapper that’s worn out, a float that’s misshapen, or some grit in the valve. Common solutions involve scrubbing or repositioning the flapper, gently bending the float arm, or manually adjusting the chain length.
These tricks usually refill properly and put an end to the flow, preserving water and preventing inflated bills.
First Steps
First, verify why the toilet runs. A running toilet can be due to a clog causing a partial siphoning, a worn or crooked part inside the tank, or a water flow issue from the supply line. Test for weak or slow flushes, continuous running water, or water rising in the bowl.
These clues let you hone in on if you need to clear a clog, fine-tune internal components, or intercept overflow at the source. Clear loose objects from around the bowl and tank to prevent spills or breakage and to provide you space to work.
Water Shutoff
Find the shutoff valve behind the toilet at its base and turn it clockwise until it stops. That stops incoming water and avoids spills. If the valve is stiff or seized, lift the tank lid and push the flapper down by hand to prevent water from entering the bowl and tank.
Be sure to have a towel or small rag on hand to absorb any water that has spilled on the floor. Even a slow drip can cause a slippery surface. Test that the supply is closed by flushing one time. The tank should not refill. If water comes back, the valve isn’t fully closed and you should hold the flapper down while you investigate.
Tank Inspection
Lift the tank lid gently and place it on a soft, flat surface to prevent chipping. Search for a chain that’s tangled under the flapper or one that’s super short and tugs on the flapper just a bit open. Untangle or lengthen as necessary so the flapper lies flat.
Check the flapper itself for warping, mineral build-up, or soft spots that prevent it from sealing. Press down and observe if the water level stays steady as an easy test. Confirm the water sits approximately 2.5 cm (1 inch) below the overflow tube.
If it’s higher, adjust the float or pinch the fill valve arm to reduce the fill level. Check the fill tube to make sure it’s inserted above the overflow tube and is not disconnected or pointed the wrong way. A misdirected fill tube can siphon water or cause continuous flow.
Look inside the tank for debris, small objects, or sediment that could obstruct the flapper seat or clog the refill path. Remove any obvious bits by hand while donning disposable gloves.
Keep a plunger on hand — even when targeting tool-free fixes — it’s handy if you check and encounter a soft clog. Keeping cool and proceeding in incremental steps keeps you from making panicked moves that can crack a porcelain lid or rip a seal.
Tool-Free Repairs
A bunch of everyday toilet hiccups can be remedied tool-free and a number of them require less than 10 minutes. In this section you’ll find tool-free fixes for internal parts, easy home remedies for minor clogs, and safe habits that shield your sanitary environment as you work.
-
Common tool-free repairs include flapper reseat or replace, chain adjustment, float repositioning, fill-tube reattachment, handle tightening by hand, minor clog clearing with a plunger, and loose seat swap.
-
Dish soap or hot water can sometimes clear small clogs without tools.
-
Slip on some disposable gloves when dealing with tank parts to stay sanitary!
-
Don’t brute force anything and break plastic or rubber.
1. The Flapper
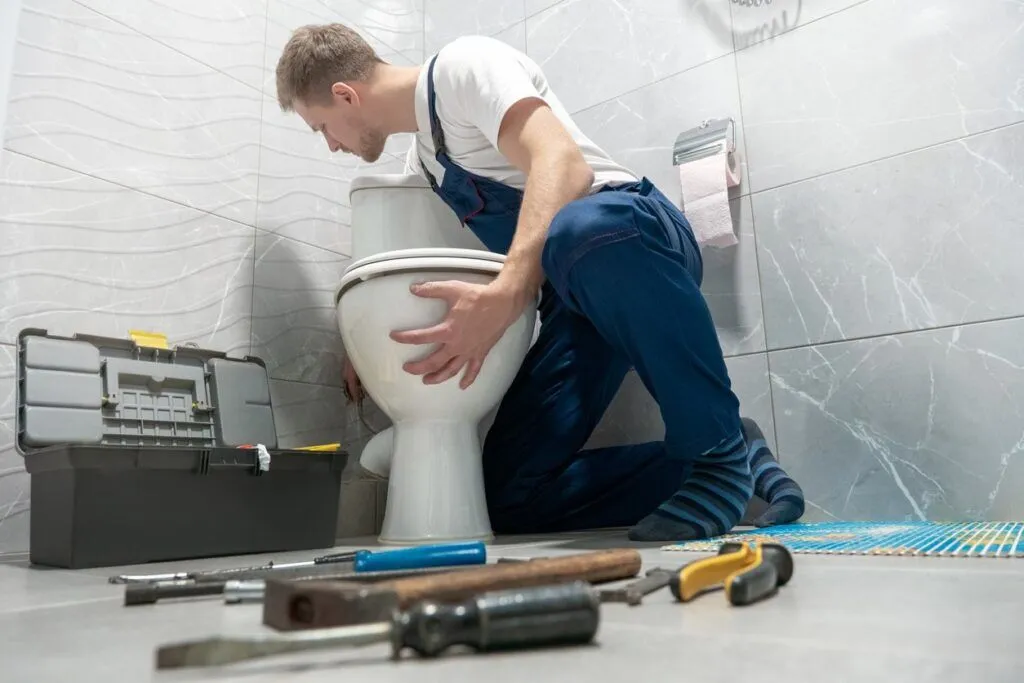
Push on the flapper to test if it seals and stops water flow. If it is off-center or warped, realign or reseat it so the rubber comes into contact with the valve seat evenly.
Build-up on the flapper and seat can stop a seal. Wipe both with a cloth to remove grime and mineral scale. If the flapper is cracked or badly warped, swap it out for a spare if you keep one around at home.
Many last five to seven years and are cheap. In a pinch, a sheet of plastic wrap tucked across the seat can serve as a temporary barrier, but swap it out quickly for a real flapper.
2. The Chain
Free the chain to dangle and allow the flapper to close. If it is too long, simply hook it onto a different link to reduce it and enhance flush control.
Many such chains even feature multiple links, enabling you to quickly adjust them without the need for any additional tools. See if the chain is not caught under the flapper or wrapped around the handle lever.
That usually causes half flushes or constant run. Test the flush after each minor adjustment to assure smooth motion and a complete seal.
3. The Float
Set the proper tank water level by adjusting the float arm or cup by hand. Slide it up to increase the fill level or down to prevent overfilling.
Minor adjustments can make a big difference in the rate of water flow. Hear as the fill valve seeks the perfect stop point. Ensure that the float doesn’t brush the tank wall or snag other components as this can cause it to stick and continue filling.
4. The Fill Tube
Snap a loose fill tube back so it shoots into the overflow tube. Position the tube end just above the overflow, not shoved down too far, to guarantee refill.
If the tube kinks or drags on other parts, nip off extra length with household scissors if accessible or reorient by hand. Check the connection for drips and gently press fittings to seat them.
5. The Handle
Tighten the handle nut inside the tank by hand if it’s loose. Many are hand-tightened originally. Get the handle to move freely and not stick when pushed or released.
Reconnect any chain slipped from the handle lever. If the handle is cracked, switch in a spare from home with just hand pressure.
Household Hacks
Here’s how to fix a running or clogged toilet with simple steps and common household items. Below are usable alternatives, safety tips, and immediate actions to deploy when you don’t have tools at your disposal.
Temporary Fixes
Put a weight on the flapper so it stays sealed until you can fix it for good. This restricts water loss so the tank doesn’t have to refill over and over. Place a clean, flat weight on top — a small cinder block wrapped in a towel or a heavy book in a plastic bag. Check in a few minutes to make sure it isn’t overfilling.
That way, if the water is up and you don’t have a plunger, you can emergency-suction it out with your dry vacuum. Shut off the water at the shutoff valve first. Siphon water to a safe level, then use the vacuum hose to ‘suck’ out water and any loose debris. Always adhere to the vacuum’s safety instructions and if the unit is not rated for wet use, don’t power it on.
Create a list of common household items that can serve as quick fixes in a pinch:
-
Baking soda for deodorizing
-
Vinegar for cleaning and disinfecting
-
Toothpaste for minor scratches on surfaces
-
Rubber bands for grip and organization
-
Coffee filters for dusting and cleaning
-
Olive oil for polishing wood furniture
-
Cornstarch for cleaning windows and furniture
-
Dryer sheets for repelling dust and static cling
-
Dish soap acts to lubricate and emulsify fats. Give it a substantial squirt into the bowl and chase with hot, not boiling, water from a height for momentum.
-
Baking soda and vinegar — Slowly pour 2 cups of white vinegar into the bowl, then add baking soda to fizz! Let it sit for 30 minutes. The reaction helps loosen blockages and freshen the trap.
-
Wire hanger — Unbend and clothswab the end to protect porcelain. Use gently to nudge or fish out soft blockages.
-
Toilet brush — employ that same firm push-pull action as a light plunger alternative to move the clog.
-
Disposable gloves and towels — Guard hands and floors. Surround the base with towels to catch drips.
-
Heavy flat object — For holding a flapper closed temporarily.
Tell family or friends about these quick fixes for future bathroom emergencies so someone can move quickly and secure once an issue begins.
Safe Substitutes
Replace a toilet brush with a plunger if you require additional suction effort, stroking with firm but gentle strokes to prevent splashing. Go green with natural unclogging enzymes, a much safer alternative to corrosive chemicals. They take time to work, breaking down organic matter and loosening it from pipes.
With regular use, they help prevent recurring clogs. Wear disposable gloves when managing any replacement product to keep hygienic and minimize exposure to sewage. Don’t clean it with sharp instruments that might scratch or otherwise damage the bowl or inner components.
Even tiny chips can cause cracks when hot water is applied. Cut off water before big efforts and towel up the floor. Natural enzyme cleaning and less toilet paper prevent future clogs.
The Water Bill Myth
They think a running toilet only counts if you can hear it. Small leaks are easy to ignore and yet they still drain resources and money. Here are shared myths about toilet water use and why quick focus is important prior to presenting granular subpoints.
-
A quiet toilet can’t waste much water.
-
Older toilets always use more water than new ones.
-
If the bowl level appears normal, you have no leak.
-
A little drip is too small to impact the bill.
-
Fixing a running toilet always needs a plumber.
Cost Reality
Nipping a leak in the bud reduces water loss and saves money. Fixes that use no tools can avoid service fees. Regular checks prevent larger parts from failing later. One quick do-it-yourself fix is all it takes to stop constant loss.
Compare basic DIY fixes to hiring a pro: a homeowner can stop a common flapper leak by hand in minutes with no parts or tools, costing nothing. Calling a plumber for the same issue results in a minimum service charge plus time waiting.
For easy valve or flapper issues, the expense of a service call generally exceeds any water conserved in those few days before repair. Easy, no-tools-needed fixes, replacing a flapper, adjusting a chain, and descaling with vinegar, can stop hundreds of litres from leaking.
They put off or eliminate the replacement parts and bigger repairs that do require tools or parts.
|
Scenario |
Fix Timing |
Estimated monthly waste avoided |
|---|---|---|
|
Fix immediately (flapper reseat) |
Same day |
1,500–4,500 L |
|
Delay 1 week |
1 week |
600–1,800 L |
|
Delay 1 month |
1 month |
6,000–18,000 L |
While the numbers change based on the leak rate, the tables illustrate how these small waits can really add up in terms of waste and cost.
Silent Leaks
Silent leaks occur when water passes from tank to bowl or through fittings without the sound of flowing water. They usually come from worn flappers, warped seals, or misaligned fill valves. You don’t see water running, but the tank fills now and then and you lose supply.
Detect leaks with a dye test: drop a few drops of food coloring or a dye tablet into the tank, wait 10 to 20 minutes without flushing, and check the bowl for color. If color shows up, water is flowing through.
Here’s a quick test that works all over the globe and requires no tools. A still silent leak can waste hundreds to thousands of litres a month. Monthly wet checks include inspecting the tank, listening around the base, and doing a dye test to spot problems early.
Quick and easy water interventions prevent the waste before it manifests as a higher bill.
Confirming The Fix
After making repairs, always test the toilet to verify the fix. Flush a couple of times and observe the tank and bowl for normal action. Observe the water level in the tank and bowl, listen for strange noises, and be prepared to step back if the running resumes.
Snapping a before shot of the tank’s intestines prior to your operation has really come in handy when you double check components or have to place a reorder down the road.
The Sound Test
Stand close enough to feel the tank but not so close that you miss small changes in tone. Listen for running, a solid hiss, quick drips or a fill valve click return. Each sound points to a likely cause.
Hiss or steady flow often means the flapper isn’t sealing. Repeated clicks can show the fill valve or float is misaligned. Occasional drips may mean a small leak around the flapper seat.
Identify the origin by coupling hearing with watching. If you hear flow with the tank looking full, observe the flapper region. If the tank refills without flushing, concentrate on the fill tube and float.
Use a simple checklist on paper or your phone: list flapper, fill tube, float, and seat. Mark which you adjusted and the result. This simplifies the choice of how to sample next if the sound persists.
Verify the silence by sitting for a few minutes after a flush. Silence for five minutes typically indicates that the deal is sealed. If you still hear anything, repeat the pertinent fix and retest.
Most internal parts wear out in five to seven years, so that persistent noise could be an aging component that needs replacing, not repositioning.
The Dye Test
Put two to three drops of food coloring or a dye tablet in the tank – don’t flush! Take 15 to 30 minutes and mark the time. If any colored water has developed in the bowl, the color has traveled beyond the flapper or through some other leak path, confirming the presence of a tank-to-bowl leak.
Log the outcome and any subsequent action. If dye appears in the bowl, reseat or change out the flapper and repeat the dye test. If no color shows up, proceed to observe the water levels and listen.
Do this dye test every month as easy home maintenance. It snags slow leaks early before they waste water or do damage.
If the quick fix does work and comes back, walk through the steps again and remember that your flapper, fill valve or float might need to be fully replaced. For instance, check to see if you can replace with the correct parts. Proper fit avoids re-breakage.
Professional Help
When simple, tool-free fixes don’t prevent the toilet from running, professional assistance is the next step. Here’s some advice on when to call, what to prepare and what to expect from a plumber. Have your notes and space ready so the pro can work fast and identify the problem as soon as possible.
When To Call
Call a plumber if water runs after adjusting the flapper, lifting the float, or checking the refill tube and it still sounds or flows. Constant running wastes water and can obscure a worn valve seat or crack in the overflow tube that won’t surface without inspection.
Get help for clogs that don’t budge with dish soap, hot water or a homemade plunger. If backups return or water levels act strangely after you attempt easy fixes, there could be a blockage farther into the trap or the waste line.
Call in a pro if you notice water damage, such as softened flooring, discoloration at the base, peeling paint, or visible mold near the toilet. Those signs indicate leaks that may impact structure or result in expensive repairs.
Seek professional assistance sooner rather than later if you ever feel unsafe or unsure about any step. If bending to peer into the tank strains your back, or you’d simply rather not deal with the insides, a plumber can safely manage diagnosis and repair.
In advance of the visit, write up a brief description of what you have tried and what symptoms you are experiencing. Give dates, times, and if there is a pattern like running after every flush or only at night. Have any warranty or installation receipts on hand if the toilet or parts are new. Clear the bathroom: move towels, rugs, and toiletries away so the plumber has a clean work area.
Common signs indicating it’s time to call and details to prepare:
|
Sign to report |
What to note |
|---|---|
|
Continuous running |
How long it runs, whether constant or intermittent |
|
Noisy fill valve |
Describe sound, when it happens (after flush, at night) |
|
Recurrent clogs |
Steps tried, whether water backs up elsewhere |
|
Water damage or mold |
Location, visible extent, how long present |
|
Recent installation |
Date, installer name, warranty details |
What To Expect
Anticipate the plumber accessing the tank and checking the flapper, fill valve, float, and overflow tube. They might test chain length, measure fill level against the overflow, and look for hairline cracks or warped seats. Diagnosis usually comes fast.
Anticipate a short explanation of the root cause and options: small parts replacement, valve rebuild, or full flush mechanism swap. They can lay out advantages and disadvantages and explain why one avenue suits your particular toilet.
Get an estimate prior to work commencing that details labor hours and parts price in your currency. Request approximate completion time so you can schedule. The majority of straightforward fixes complete within an hour. More complicated problems take longer.
Learn preventive tips: how to set water level correctly, the expected life of parts, and simple checks to catch early wear. Make notes so you can skip repeat calls.
Conclusion
A running toilet can be stopped with some quick checks and minor repairs. Check the flapper, chain, and float first. Tap the fill valve or lift the flapper to check if the parts are free moving. Use a pencil or a strip of tape to shorten a slack chain. Bend the float arm slightly to reduce the water level. Take a clean rag and scrub out the rim holes and valve seat. Observe the bowl and tank for five minutes to verify no drip or flow. If the leak persists, call in a plumber for a speedy and transparent fix. Give these fixes a shot tonight and see what difference it makes. If you want a checklist or photo guide, just ask and I’ll send you one!
Frequently Asked Questions
How can I stop a running toilet without any tools?
First, check and reseat the flapper. Press it gently to test its seal. Even if your chain is tight, adjust it so the flapper closes fully. If the flapper is warped, fold a paper towel under its edge as a stopgap.
Why does my toilet keep running after flushing?
Easy fixes include a worn or misaligned flapper, a stuck fill valve, or a float set too high. These allow water to constantly run from the tank to the bowl. Check your tank internals and figure out what is not sealing or shutting off.
Can I fix a toilet fill valve without tools?
Yes. Lift and lower the float arm or push the fill valve stem lightly to unstick a stuck valve. If the float slides, manually slide it down. This lowers the water level and stops any overflow.
Will a running toilet raise my water bill quickly?
Yes. A running toilet can waste up to hundreds of liters an hour, which reflects on your bill. Getting it fixed pronto saves water and money. Even a little drip adds up over days.
How long should I wait after a fix to confirm the toilet is fixed?
Wait a minimum of 30 minutes, and for crying out loud, don’t flush during that time. Hear water running and is the tank water level high? If all else fails, the issue probably remains.
When should I call a professional plumber?
Call a plumber if your flapper or fill valve is damaged, stuck beyond simple adjustments, or you’re not sure what to replace. Experts can uncover underlying problems and provide a more permanent solution.
What temporary hacks work overnight for a running toilet?
Slip a bit of sponge or folded cloth underneath the flapper edge to seal leaks. Lower the float manually to decrease overflow. These stop leaks temporarily until you can make a proper repair or call a plumber.
Key Takeaways
Understand typical issues such as drain clogs, incorrect installation, and pump or hose malfunctions to target fixes where…
Key Takeaways
We recommend changing your evaporator pad at least once a year, prior to the heating season. Coordinate the change with…