
How to Safely Drain a Water Heater
Key Takeaways
-
Compile your tools and safety items before you begin, and skim your water heater manual to adhere to model-specific directions and minimize risk.
-
Power off, cold water off, tank pressure relieved, hot water faucet open. Now drain water heaters safely and smoothly.
-
Drain the water heater to an appropriate drain by attaching a garden hose to the drain valve and routing it downhill. Then open the valve slowly and look for leaks. Flush until the water is clear.
-
Troubleshoot common issues such as kinks or blockage in the hose, a leaking valve that needs to be tightened or replaced, and backflushing or extra time for tanks with heavy sediment.
-
Shut off the drain valve. Turn back on the cold water supply slowly. Open taps to purge air. Then power up and adjust the thermostat when the tank is refilled.
-
Call a licensed plumber for stubborn leaks, natural gas issues, ambiguous valve placement, or the intricacies of tankless systems to prevent harm and guarantee safe, dependable service.
How to drain a water heater safely is a step-by-step guide on how to drain and replace your water heater, including instructions on removing sediment and lowering pressure.
This entails shutting power or gas, closing the cold-water supply, connecting a hose to the drain valve and opening a hot tap to vent the tank.
With gloves and eye protection, drain water to a safe drain. Below is a guide that addresses tools, timing, and common problems.
Essential Preparations
Before you turn any valves, prep the site and know the system. This minimizes risk, hastens the job, and assists you in identifying issues that draining might expose. Verify the model-specific steps in your product manual and pay attention to warnings, as older units (10+ years) could be concealing a ticking time bomb of odors.
If possible, let the tank cool overnight to prevent hot-water injuries, particularly if the heater was recently in active use.
Required Tools
Collect everything before you begin. A garden hose long enough to reach a safe outside drain or floor drain connects one end to the heater’s drain valve and the other to the drain to prevent spills. Adjustable wrenches or slip-joint pliers come in handy for loosening tight valve fittings because some valves harden over time.
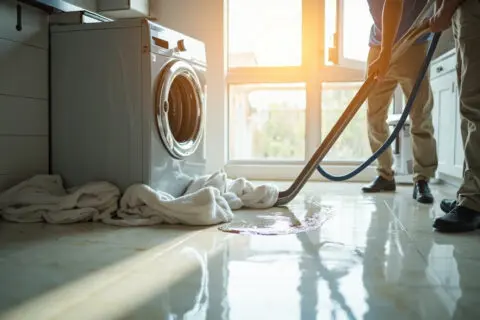
Towels or rags assist in mopping those little leaks and protecting floor surfaces. Keep a bucket nearby for purge water.
-
Garden hose (long enough to reach drain) – transport discharge away from the foundation.
-
Adjustable wrench / pliers — loosen or tighten fittings.
-
Bucket — catch first water and test valve operation.
-
Towels / rags — clean spills and protect surfaces.
-
Flashlight — inspect valve and fittings in dim spaces.
-
Protective gloves — handle hot components safely.
-
Optional: vacuum-rated wet/dry shop vacuum — remove sediment near drain for a clean finish.
One example is for an apartment without exterior access. A 10 to 15 meter hose to a building floor drain is common. In single-family dwellings, divert water away from the foundation.
Safety Gear
Be sure to wear gloves and safety goggles to shield yourself from hot splashes and sharp metal edges. Closed toe shoes are a fundamental and critical shield against spills or dropped tools. If working on a gas heater, ventilate well so you don’t breathe in any fumes.
Open a window or run a fan. For electric heaters, turn off the breaker at the panel and confirm power is off with a voltage tester. Allow the tank to cool overnight if possible, as this lowers the risk of burning and decreases the pressure inside the tank.
If your unit is falling apart, such as corrosion, leaks, or pilot problems, go with replace instead of repair.
Location Assessment
Check a convenient floor drain or outside discharge point. The hose cannot dump water where it causes damage. Ensure that no one gets accidentally tangled with the drain valve, cold-water supply shutoff, or electrical or gas lines.
Examine the neighboring floor and walls for previous water damage or rust that may undermine integrity. Just be sure the hose path is clear of kinks and can sustain constant flow.
Draining usually lasts 20 to 40 minutes, so schedule it at a convenient time and stick around to check you don’t have leaks or other surprises.
The Draining Procedure
Draining sediments out, restoring efficiency, is one of the standard preventive maintenance steps. Plan on the full procedure consuming approximately 30 to 60 minutes in most houses. Larger tanks or heavy sediment can push that window out further. Consult your unit manual for any model-specific cautions before you begin.
1. Deactivate Power
With electric tanks, turn off the breaker or put the gas control on “pilot” or “off” for gas models. Make sure the power light is off. This helps prevent heating elements from firing while the tank is low. Wait a few minutes for the water to cool and pressure to settle, as hot water can burn and will increase splashing.
If you’re not alone in the room, tag the breaker or gas valve so that someone doesn’t turn it on while you’re working.
2. Stop Water Supply
Find the cold water inlet valve located at the top of the heater and turn it off to halt incoming water. In apartments or multi-unit buildings, look for any extra shutoffs on the supply line and close those.
Try a nearby hot tap; it should run, then run down, then stop. That’s how you know the supply is cut. Complete shutoff keeps fresh water from refilling the tank while you drain and minimizes the risk of overflow at the hose vent.
3. Relieve Pressure
Pull open a hot water spigot at a sink or tub and leave it open during the drain. This allows air into the system and promotes draining of the water from the tank easily. Some pressure will hiss out, but when the stream slows to a thin trickle, open the drain valve.
Keeping the faucet open speeds the draining and prevents vacuum lock in the tank.
4. Connect Hose
Connect a garden hose to the drain valve at the tank’s bottom and extend it to either a floor drain, outside, or a massive receptacle. Run the hose downhill with no kinks or loops for continuous flow.
Secure the coupling at the valve. A small drip initially can turn into a leak if the connection is loose. If you want to gather some sediment for examination, place a colander or filter at the hose end.
5. Open Valve
Open slowly the drain valve and note the first flow. Keep the valve open carefully so the water doesn’t splash. Rapid flow can agitate more silt and make a mess.
Check the hose and valve for leaks and tighten if necessary. Leave the hot faucet open to admit air and promote constant draining. This process of ordinary sediment takes 30 to 60 minutes.
6. Flush Sediment
Run water ‘til it clears. Flush again if the stool is still cloudy. Knock on the tank side gently to loosen packed sediment and use the colander to examine particles.
Clearing sediment helps your heater run more efficiently, can prolong its life and prevents headaches down the line. After shutting the valves and turning the power back on, give the tank 30 to 60 minutes to get fully hot.
Common Draining Issues
Draining a water heater frequently exposes common mechanical or procedural issues. This rundown details what usually breaks, why it does, and where to check initially so you can repair errors with minimal downtime. Follow the trouble lists for crystal-clear, step-by-step checks when you’re under the wrench.
No Water Flow
Verify that the drain valve is open and not clogged with sediment. Cold sediment can pack around the valve seat and halt flow. Light taps on the valve can dislodge loose material.
Check the hose for kinks or blockages that might impede water flow. A blocked hose is a simple remedy. Take it off, rinse it out with clean water, and replace it.
Open the pressure relief valve for a moment to get the water flowing if necessary. This can balance out pressure and let trapped air escape, restoring gravity flow. Make sure that the cold water supply valve is closed to prevent backflow problems.
If it is open, water can push against the draining flow and stall it. Keep in mind that older tanks, particularly those 10 years and up, can expose extra defects when drained and might require further servicing.
Leaking Valve
If water seeps around the threads, gently tighten the drain valve with a wrench. You could strip the threads by over-tightening, so use a reasonable amount of torque and test again.
Replace leaky washers inside the valve. Most leaks originate from small, cheap components that are easy to replace.
Have a bucket or towel handy to catch small drips when you’re draining. This protects the workspace and prevents flooding. Prepare to swap the drain valve out completely if you can’t keep the leaks in check.
If the valve body is corroded or cracked, it’s safer to replace than repair multiple times. Old heaters have brittle fittings that burst.
Slow Drainage
Raise the hose end to add gravity-assisted flow to the drain or bucket. Higher discharge minimizes backpressure and accelerates draining.
Backflush the drain valve by turning on the cold water supply briefly. Do so cautiously. A quick jolt can knock sediment loose, but you don’t want to ram debris into downstream plumbing.
Disconnect the hose and inspect for sediment at the valve opening. Sediment can create a plug that has to be taken out by hand or flushed out more than once.

Give older tanks with heavy sediment build-up additional time to drain completely, 20 to 40 minutes or more for heavily scaled units. Routine draining and flushing keeps sediment from prematurely cutting the heater’s life, making it consume more energy and leak.
Numbered Troubleshooting Steps
Numbered troubleshooting steps for quick reference:
-
Verify valve positions and hose condition.
-
Attempt pressure-relief venting to restart flow.
-
Backflush briefly if flow is sluggish. Inspect the hose for blockages.
-
Tighten or replace faulty valves; catch drips during work.
-
Refer to the manufacturer’s manual for model-specific instructions and safety periods.
Refilling The Tank
Refilling is the step that brings service back to the house and prevents corrosion. Just be sure you close the drain valve all the way and are ready before you let the water back in. The subsections below deconstruct each of these mechanical motions to refill safely, expel trapped air and restore power.
Closing The Valve
Close the drain valve by turning it clockwise until it stops and no water drips. A slow, hard turn typically shuts the ball or gate in. Refrain from over-torquing plastic fittings.
Dry off the valve region and surrounding tank surface to see if there is any wetness. Even a little seep can signify a loose connection or a worn washer that should be dealt with before refilling.
Disconnect and coil the garden hose. Leaving the hose connected runs the risk of water theft or tripping. A soggy hose can conceal a leak. Check the hose end for debris that may have entered the valve.
Inspect the valve body for pitting, rust, or twisted threads. Metal valves exhibiting corrosion should be replaced. A new brass valve is cheap and stops future leaks.
Restoring Water
Open the cold-water supply valve at the top of the heater, slowly turning it to the open position over a period of several seconds. A quick open can induce a pressure spike in older plumbing and jar joints.
Hear the tank and connections for water noise. A continuous filling sound is okay, but a booming hammer is not. Check fittings and the pressure-relief valve for leaks as the tank fills.
Leave a proximate hot water faucet running to give air an escape route. Look for an air-free stream. When water runs without sputter and no air bubbles appear, your tank is most likely full.
Turn off the hot water tap once the flow is established. Don’t run multiple fixtures heavily during the fill. Low-flow filling minimizes turbulence and aids in tank seating.
Removing Air
Open the hot faucet until just water comes through, as trapped air can spike noise and pressure. Sputtering or intermittent flow means there are air pockets remaining in the line.
If air continues, open additional faucets sequentially, beginning with those nearest the heater and working outward to expel lines in stages. Small systems purge fast. Larger hierarchical systems can require more time and multiple passes.
Make sure water comes out clear and without splutter at multiple taps. When you have a clear, steady flow, it signifies that the distribution lines are de-aired and primed for typical consumption.
Reactivating Power
Energize the breaker or ignite the gas pilot only once the tank is full. Burning a heating element dry will ruin the unit. Program the boiler to your desired temperature, usually 49 to 60 degrees Celsius, which is safe and energy efficient.
Give it a full heating cycle prior to heavy use and listen for strange noises or leaks as the unit warms. Watch it for a day to make sure no slow leaks show up and the unit is quiet.
The Sediment Story
Sediment develops when minerals, rust, and pieces of debris in the incoming water drop to the bottom as the water cools in the tank. Hard water deposits calcium and magnesium that bind and solidify into scale. Iron in the feed or from corroding components creates flaky rust that settles to the bottom.
These materials build up in layers over time and can vary in quantity and type based on local water hardness, supply quality, and the heater’s age and design.
What It Is
Sediment is regular old mineral deposits and rust that rain to the tank bottom. It varies from powder to hard, crusty scale that adheres to heating elements and the tank bottom. Water hardness measured in milligrams per litre of calcium carbonate determines how rapidly scale develops; the harder the water, the faster the buildup.
Both electric and gas tanks catch sediment, but the way it injures each varies. Electric units have element fouling and gas tanks may have scale insulating the heat transfer surface. Tankless units have no storage basin, but scale can coat the heat exchanger and constrict water paths, diminishing flow and heat transfer.
Why It Matters
Sediment slices thermal contact between the burner or element and water, so the heater works more to reach the set temperature and burns more energy. Energy bills increase, and the unit ages quicker. Heavy buildup causes rumbling or popping noises as trapped water flashes to steam underneath the sediment cover.
Clogged drain valves or pressure relief valves can leak or fail, and sediment can abrade internal parts. If your heater is more than 10 years old, draining and flushing the system can expose corrosion, pinholes, or worn anode rods, so replacement may be a logical choice.
Routine draining and flushing, suggested at least once a year in many areas, keeps output smooth and prevents these issues. Average full drain time is around 20 to 40 minutes. We recommend letting your tank cool overnight before starting to minimize burn risk.
Effects of sediment buildup:
-
Reduced heating efficiency and higher energy use.
-
Noisy operation (rumbling, popping).
-
Shortened tank and component lifespan.
-
Clogged valves and slow or blocked drainage.
-
Increased risk of leaks and sudden failures.
Disposal Methods
Capture loosened sediment in a bucket or kitchen colander positioned beneath the drain hose to catch solids during flushing. Don’t wash sediment down indoor drains because fine grit settles and clogs plumbing.
Put solids in the garbage or according to local guidelines for mineral-imbued waste. Rinse buckets and tools outside or into a utility drain and clean the work area to avoid dragging grit into the house.
Wear gloves and eye protection around sludge, then wash your hands and clothes. If draining the tank uncovers significant corrosion or repair, have professionals inspect or replace the unit, especially if it’s over a decade old.
Professional Assistance
Flushing a water heater can appear simple. Complications in contemporary systems and danger to inner elements make expert aid a popular and wise selection. One quick pro check-up, pre, mid, or post-drain can uncover unseen issues, preserve warranty coverage, and minimize risk of permanent damage.
When To Call
Call a plumber if leaks remain after draining or if you notice rust around fittings or the tank’s exterior. Constant dripping tends to indicate corroded valves or tank walls that need to be repaired or replaced, not more me-flushing.
If you have a gas-fired heater and the problem involves the pilot, burner, gas line or venting, call in a professional right away. Gas systems have combustion and carbon monoxide risks too, so a plumber educated in gas-fired appliances will test seals, thermocouples and that the pilot is working properly.
When valve positions, drain procedures, or pressure-relief steps seem uncertain, call in professional assistance. Improperly positioned valves, backwards steps or partial draining can leave sediment pockets that reduce heater life. A plumber will run model-specific sequences to prevent trapped water or pressure issues.
Schedule annual inspections for older tanks and tankless/hybrid systems that deploy complex sensors and electronics. Older units can conceal sediment, compromised anode rods or tired welds. Tankless units require flow checks and scale mitigation mapped to their control logic.
Plumber Benefits
A pro has brand-specific process knowledge and the proper sequence for your particular model. They know what parts can survive a treatment of isolation and which should be subjected to a complete system drain, ensuring the least possibility of collateral damage.
Deep inspections that come with professional draining minimize the likelihood of leaks going unnoticed and keep small issues from becoming failures. Technicians can swap bad drain valves, trim anode rods, and reseal fittings while the unit is open.
Hiring a pro saves time and reduces the risk of errors that lead to downtime or emergency replacement. The pros show up with hoses, wet-vac tools, pressure gauges, and replacement parts, so the work gets done in a single visit.
|
Benefit |
What it prevents |
Example |
|---|---|---|
|
Model-specific procedure |
Damage from wrong steps |
Proper order for combo boiler-water heater |
|
Leak detection |
Sudden failures |
Replace corroded valve found during drain |
|
Tools and parts on-site |
Delays and repeat calls |
Technician replaces a split drain hose |
|
Safety with gas systems |
Carbon monoxide or gas leaks |
Certified gas appliance check |
Conclusion
By draining your water heater, you keep the unit safe and it runs better. Follow prep steps, open the hot faucet, turn off power or gas, connect the hose, and drain to a safe location. Flush until clear water flows. Look out for leaks, stuck valves, or weak flow. Refill gently and air-bleed prior to re-energizing. Little things you take care of yourself save money and reduce repair hazards. For rust, heavy sediment, weird noises, or gas burner problems, call in a pro. A trained technician can identify concealed damage and evaluate the unit. Attempt a basic drain biannually. If you’re not sure, call a licensed plumber. Do the job right. Schedule a check or book help today.
Frequently Asked Questions
How often should I drain my water heater?
Drain a water heater annually for normal home use. If you have hard water, drain every 6 months. Draining reduces sediment and makes the heater more efficient.
Is it safe to drain a water heater by myself?
Yes, if you follow safety steps: turn off power or gas, shut off the cold water supply, and use a proper hose. Pause and contact a pro if you spot corrosion, witness leaks, or have murky water.
Do I need special tools to drain a water heater?
You only need basic items: a garden hose, a bucket, pliers or a wrench, and a flathead screwdriver. For electric heaters, a non-contact voltage tester provides extra safety.
How long does draining a water heater take?
Generally, draining requires 15 to 45 minutes, depending on the size of your tank and the amount of sediment. Flushing sediment out can be a lengthier process. Plan on additional time if you encounter valve or hose problems.
What if water won’t drain from the tank?
If water won’t drain, open the hot water tap to break the vacuum. Examine the drain valve for clogging. If it is still blocked, sediment or a corroded valve may require professional service.
Can I use the drained water for gardening?
Only if you haven’t doused your water heater in toxic chemicals and the water is tepid. Steer clear if you think it’s contaminated or rusty—toss.
When should I call a professional instead of DIY?
Have a pro for rusted tanks, active leaks, gas line concerns, or if you’re not sure about the electrical or gas shutoff. Experts avoid harm and danger.
Key Takeaways
Understand typical issues such as drain clogs, incorrect installation, and pump or hose malfunctions to target fixes where…
Key Takeaways
We recommend changing your evaporator pad at least once a year, prior to the heating season. Coordinate the change with…