Pipe Insulation Tips for Surviving Colorado Winters
Key Takeaways
-
They’re crucial for any exposed pipes and gaps in your home — things that you’ll want to insulate properly to reduce the risk of pipes freezing this winter.
-
Determine the appropriate insulation, such as foam, fiberglass, or rubber, for your area’s climate and pipe location, as well as the material’s resistance rating.
-
Prep pipes prior to insulating. Clean them, check for leaks, and measure precisely to get the most out of your insulation.
-
Regular check-ups on your insulation and air sealing go a long way in preserving long-term defenses against harsh temperature fluctuations.
-
Steer clear of typical blunders like patchy coverage, poor sealing, or the wrong material, all of which diminish insulation potency.
-
In extreme cold, keep a consistent temperature in your home, let water drip slowly, and be familiar with safe ways to thaw pipes or call a professional if they freeze.
Pipe insulation tips from Colorado winter protect pipes from cold snaps and reduce the potential for freezing or burst pipes.
Pipe insulation, whether in the home, basement, or crawl space, makes a huge difference in heat loss and energy bills. Popular options such as foam and rubber wraps are effective for the majority of locations.
A combination of these fixes could be required in every home. The following section delivers down-to-earth advice and easy equipment for improved winter pipe maintenance.
Insulating Your Pipes
Pipe insulation is an important first step in any area where winters can bring sudden freezes. That prevents your pipes from freezing and bursting, causing you expensive repairs and water damage. Insulating before winter is best, but even a late start can save you trouble. It is a slow process, so get an early start.
Exposed pipes, particularly those outdoors, are the most vulnerable. Maintaining insulation throughout the winter is crucial, as damage or gaps can surface after cold snaps.
Vulnerable areas to watch for exposed pipes:
-
Basements and crawlspaces
-
Attics and unheated storage rooms
-
Exterior walls and outdoor faucets
-
Garages and utility rooms
-
Under kitchen and bathroom sinks
1. Material Selection
Choose insulation appropriate to your climate, pipe location, and budget. Foam sleeves are popular because they’re convenient and easy to trim. Fiberglass is more heat resistant, so it’s good for really chill spots, but it requires a vapor barrier to prevent moisture.
Rubber insulation is good for both hot and cold pipes and tends to last longer outdoors, but it’s pricier. Select a thickness that’s appropriate for your temperature requirements—thicker for outdoor or exposed pipes. Be sure to use material that is rated for indoor or outdoor use, as needed. Check the packaging or ask a supplier for the right recommendations.
2. Pipe Preparation
Begin by wiping each pipe’s surface with a cloth to remove any dust and grease. This allows insulation to adhere and prevents dirt from holding moisture. Check all your pipes for leaks or cracks prior to wrapping.
Repair those first to prevent issues from festering beneath insulation. Once you have the correct length and diameter, you can cut the insulation material to fit. Insulate your pipes by figuring out an efficient order to install. Start at the main and progress to the branches. Keep the disturbance minimal and cover every exposed section.
3. Proper Application
Be sure to heed the instructions that come with your insulation. Work from the pipe ends inward, coating all exposed surfaces. Don’t leave any space between insulation sleeves or strips; overlap them if necessary.
Wrap pipes in a firm, tight manner, but don’t flatten the material, as its insulation value diminishes when compressed. Inspect snug locations on pipes near joints and twists and apply additional tape or insulation where appropriate.
4. Securing Insulation
Secure insulation with zip ties or duct tape at intervals along the pipe. Cover all seams and joints tight to keep out cold air and moisture. Apply waterproof tape in moist or humid locations, such as basements.
Check these fasteners after storms or cold snaps as shifting or damage can occur over time. Swap out any frayed tape or ties immediately.
5. Sealing Gaps
Search for open holes or drafts around pipes, particularly in proximity to exterior walls or on floors or foundations. Fill cracks and gaps with caulk or foam sealant, with special attention to basements and crawlspaces.
Inspect these seals if there is a sudden freeze or following a cold snap as shifting or shrinkage can open new gaps. In hard winters, repeat the check every few weeks.
Choosing Materials
Picking the best pipe insulation for winter is a matter of balancing a few important considerations. To get those pipes protected against freeze damage and to chip away at energy loss, you’ve got to juggle upfront costs and long-term savings. Materials that can withstand severe cold, repel moisture, and provide consistent thermal efficacy season after season are important.
Certain choices, such as foam and fiberglass, work better for certain pipes or in tight spaces. This decision alone can transform the durability of your pipes against freezing and whether or not you are required to repair them later. Just be sure to match the insulation to your area’s winter severity and your plumbing’s requirements.
Foam Sleeves
Tubular polyethylene foam sleeves are an easy choice for most straight pipe runs. They’re lightweight, easy to cut, and snap into place fast, so they’re a solid option for DIYers or areas that don’t require the pros. High R-value foam sleeves provide excellent insulation, preventing heat from escaping and assisting in maintaining the pipes’ temperature above freezing.
When it comes to sleeves, they must fit snugly around the pipe. Loose-fitting insulation creates gaps and gaps lead to cold in and heat out. You can stick foam sleeves on in the house, like basements and crawl spaces, or on outdoor pipes if you put a weather-proof cover on. This makes them versatile, but longevity can be a problem in climates that are very wet or experience large temperature fluctuations.
Fiberglass Wraps
Fiberglass wraps are handy when there’s limited clearance around the pipe. The material flexes and conforms around corners and joints, which is great for tight or congested areas. Gloves and long sleeves are a must with fiberglass because the strands can irritate skin and lungs if handled carelessly.
To enhance pipe protection, fiberglass wraps can combine with foam sleeves or vapor barriers, augmenting both thermal performance and moisture control. Always verify that the fiberglass is rated for the coldest local temperatures. Some is manufactured for milder climes and won’t provide adequate insulation where winters are harsh.
Rubber Insulation
|
Material |
Features |
Best Use Cases |
Key Benefit |
|---|---|---|---|
|
Foam Sleeves |
High R-value, easy fit |
Indoor/outdoor pipes |
Simple installation |
|
Fiberglass Wraps |
Flexible, thin |
Tight spaces, bends |
Space-saving |
|
Rubber Insulation |
Moisture resistant |
Outdoor, damp areas |
Mold prevention |
|
Reflective Wraps |
Reflects heat |
Hot water systems |
Energy efficiency |
Rubber insulation is perfect for pipes subject to frequent temperature fluctuations. It flexes with expansion and contraction without cracking, so it maintains its seal even when the weather shifts quickly. Water resistance is a huge advantage.
Rubber will not absorb water, decreasing the potential for mold and maintaining pipes in better condition. This is why it’s a good bet for any exterior pipes or plumbing close to a building’s outer walls. In wet climates or houses with humid basements, rubber holds up much better than foam.
Heat Tape
Heat tape provides a safety net, particularly for those pipes prone to frosting. It is electric heat cable that coils around the pipe, heating it from the outside in. Heed the safety guidance; poor installations can be a fire hazard.
![]()
Apply heat tape only to pipes that truly require it, such as those along exterior walls or through unheated areas. Once it is installed, check it now and then to be sure it is still working and the thermostat hasn’t gone bad. Heat tape complements other insulation for the most challenging winter locations.
Colorado’s Climate
Colorado has cold, unpredictable winters, frequently with temperatures well below freezing. These realities make it important to know your local climate patterns and modify how you safeguard pipes accordingly. As a result, the state’s building codes require tougher insulation and plumbing than locations with less severe winters.
Due to expansive microclimates, local municipalities and water departments provide their own targeted advice to assist residents in adjusting. The frost line can be as deep as 90 to 150 centimeters, affecting the depth at which water lines need to be buried and the type of insulation to employ.
Altitude Impact
Colorado’s climate with homes at elevation is much colder and there’s a higher risk of pipes freezing. Not all insulation performs equally at every elevation, so it’s crucial to tailor your strategy to your home’s elevation. Cold areas, like unheated basements or crawl spaces, are most at risk and likely require additional insulation such as thick foam or pipe sleeves with high R-values.
For optimal results, seek local plumbing pros who understand the area’s altitude and weather. They can recommend products or installation methods that provide superior pipe protection in your particular microclimate.
Temperature Swings
Colorado winters are famous for their big temperature swings, where it can be warm and then turn freezing within a few hours. These rapid shifts can strain plumbing and cause cracking or bursting. Insulation has to deal with both nighttime lows and milder days.
AMAZINGLY EASY WINTERIZING COLORADO’S CLIMATE Use insulation that fully wraps pipes and retains heat, such as polyethylene foam or fiberglass. In cold snaps, check your indoor temperatures and maintain your thermostat above 18°C even if you’re gone for days.
Heat tape with built-in thermostats can add another line of defense, particularly for pipes in garages or beneath sinks. It’s wise to tour your home and look for any pipes exposed to exterior walls or breezes.
Dry Air Effects
Colorado’s dry winter air can make cold even more difficult on plumbing. Low humidity dries out pipes and dissipates heat from them more rapidly, making them more prone to freezing. We run a humidifier to keep all the air inside moist.
This slows heat loss and protects our pipes. Windows, doors, or vent drafts introduce dry, cold air, so close these seams with weatherstripping or caulk. Dry air can impede water’s smooth flow and potentially dry out, shrink, or crack pipe materials.
All these factors demonstrate why continued focus on indoor air quality and not just insulation is a critical part of winter pipe care.
Common Mistakes
Pipe insulation in Colorado winters needs to be comprehensive and exact. Even minor screw ups can result in frozen pipes and expensive damage. Below are some common mistakes to avoid:
-
Leaving gaps or missing sections of pipe during insulation
-
Choosing the wrong materials that soak up water or do not insulate well.
-
Failing to check and fix insulation after installation
-
Overlooking pipes in unheated spaces like garages or attics
-
Leaving your thermostat at a really low temperature while you’re away (less than 13°C)
-
Forgetting to disconnect and drain outdoor hoses and plumbing
-
Leaving garage doors open, letting cold air reach pipes
-
Not dripping water from exposed faucets during cold snaps.
-
Skipping winter prep for sprinkler systems and pools
Incomplete Coverage
Insulating just the exposed pipes isn’t sufficient. Any exposed pipes, particularly those in crawl spaces, attics, or garages should be wrapped with insulation from end to end. Missed spots, even small ones, will become weak points when the temperature drops quickly.
For instance, one isolated hole near a joint or elbow can let cold air in, causing a freeze and burst pipe. Certain pipes are located behind cabinets or in unreachable corners. They’re hiding pipes, after all, too easy to forget about.
They’re just as susceptible, particularly in unheated areas. A quick sweep with a flashlight or by following pipes can catch these trouble spots. Regular inspections make sure you’re catching any areas that were missed or where the insulation has shifted.
Even after the initial freeze, it’s wise to stroll through the home and inspect once more. Quickly fill any holes or thin areas. Here’s an easy way to keep freeze risks minimal.
Wrong Material
Not all insulations work for plumbing. Others resort to leftover foam or fiberglass intended for walls. These have the tendency to soak up water and become moldy.
Plumbing materials like closed-cell foam tubes keep water out and retain heat more effectively. The wrong product can mean wasted effort and increased risks. It’s worth figuring out what’s best for your area.
For colder areas, heavier subzero-rated insulation is required. If you’re unsure, consult a local hardware store clerk or a professional plumber. They will know what’s best and safest for your specific pipes and weather.
Poor Sealing
Even the best insulation doesn’t protect if seams and joints aren’t sealed tight. Air leaks allow cold in and that can freeze pipes even with good insulation. Use tape or a weatherproof sealant that adheres in wet or freezing conditions.
Check seals after any weather change. Seals break down or peel off over time. Make it a habit to inspect joints every couple of weeks throughout winter and repair any that appear loose.
Don’t delay in plugging these gaps to maintain your insulation’s efficiency.
Beyond Insulation
While insulation holds up the pipe freezing by heat conservation and moisture prevention, it is just a beginning. Other commonsense measures are required to completely safeguard plumbing, particularly in winters when exterior pipes encounter increased exposure to danger. Combined with insulation, the following actions provide a stronger defense against freeze damage and costly leaks:
-
Seal cracks and gaps around windows, doors, and foundations.
-
Maintain water flow with a slow drip of water at critical taps.
-
Adjust thermostats to steady indoor temperatures.
-
Install some fiberglass, foam, or spray foam insulation.
-
Regularly inspect all protective measures for ongoing effectiveness.
-
Educate household members about prevention steps.
Air Sealing
Sealing drafts is essential to ensuring that cold air doesn’t reach your pipes. Heat can slip in around little cracks in the windows or doors or near the foundation, too, so it’s more difficult to keep those spaces warm. Weather stripping or caulk around those gaps is like shutting all the doors and windows to prevent the cold breeze from coming in and the warm air from escaping.
Even a minor draft can cool the vicinity of a pipe and make it more susceptible to freezing. Make sure to check for new drafts every year, as buildings settle and new gaps may form. On the side, a few people flick a lighter or stick of incense to identify where air shifts around a door or window.
If the flame or smoke flickers, you’ve probably got a draft that needs to be sealed. For bigger or more elusive leaks, a professional energy audit can locate trouble spots and recommend fixes.
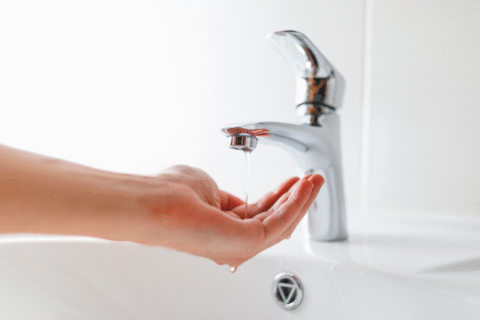
Water Flow
Keeping just a little water moving is a very easy, very effective way to keep pipes from freezing. For pipes other than insulated ones, allowing the tap furthest from the point of entry to drip slowly keeps water moving through the pipes and reduces the risk of freezing. It’s a minor step that’s a big help, particularly in deep freeze.
It’s good to keep an eye on your water pressure during cold snaps. A sudden decrease could indicate ice forming in the pipe. Acting early can help avoid a burst pipe, which, if it cracks even half an inch, can spew out more than 40 liters a minute, causing major water damage.
Be sure taps on exterior walls receive additional attention, as these are most susceptible to the outside cold. All household members should be aware to leave water running in jeopardy, particularly overnight when it gets cold.
Thermostat Settings
Keeping the thermostat at a consistent number is an easy step that makes a big difference. Pipes are vulnerable if the temperature inside falls too low, even for a few hours. Don’t crank down the heat too much at night or while away during cold snaps.
Programmable thermostats keep temperatures consistent without wasting energy. Always make sure the thermostat is working right before winter. Even a minor bug can cause cold spots and increase pipe risk.
Frozen Pipe Protocol
Frozen pipes are a legit concern once it dips below 20°F (-7°C) and in Colorado, cold snaps like these can happen overnight. Pipes in unheated areas like crawl spaces or garages are more vulnerable. Prevention is the best policy. Insulating pipes, keeping the thermostat at no less than 55 degrees, and allowing warm water to drip from faucets overnight on outside walls all assist.
If pipes do freeze, swift and cautious action reduces the likelihood of costly water damage.
|
Step |
Action |
|---|---|
|
Locate the frozen pipe |
Check for frost, bulges, or no water flow. Assess if the pipe is accessible and intact. |
|
Shut off main water supply |
Find the main valve and turn it off to reduce flood risk if the pipe bursts. |
|
Open faucets |
Open the affected faucet to relieve pressure. |
|
Use safe thawing methods |
Apply gentle heat (hairdryer, heat tape), never open flames. |
|
Start thawing from faucet end |
Begin closest to the tap to let melting ice escape. |
|
Monitor for leaks |
Watch for water escaping from cracks or joints as ice melts. |
|
Restore water supply gradually |
Once fully thawed, turn water back on slowly and observe for issues. |
Thawing Safely
Careful heat is essential for thawing frozen pipes. A hairdryer or heat tape does great. Start at the faucet end and move the heat source evenly along the pipe. This allows water and steam to vent without accumulating pressure.
Don’t ever utilize open flames, torches, or high-heat devices as they can crack pipes or cause fires. Test progress by feeling for soft spots or hearing water movement. If thawing is taking too long or the pipe feels strange, pause and reconsider.
Keep an eye out for leaks or drips that could indicate a split pipe. If you notice a leak, keep the water off and request assistance. Watch the pipe while heating to avoid other hazards.
Professional Help
Certain circumstances require professional attention. If pipes remain frozen after an hour of gentle heat, or if you notice swelling, cracks, or hear strange noises, contact a plumber.
Intricate plumbing systems, such as those in historic residences or multi-story structures, typically require professional equipment and expertise. Conduct routine inspections before winter. This can identify vulnerable areas and assist in planning improvements like enhanced insulation or heating cables.
Maintain a list of reliable plumbers and emergency contacts, particularly in colder months, for swift response when things go awry. Active monitoring and assistance on demand keeps minor glitches from ballooning into expensive catastrophes.
Conclusion
Colorado winters are tough, and pipes get it first. Good pipe wraps prevent the majority of freeze-ups. Foam or rubber wraps get the job done for most homes. Look for big gaps or old wraps before the cold hits. Replace old items if they look ratty. Be on the lookout for pipes in chilly pockets such as basements or exterior walls. A missed spot can freeze fast. If a pipe freezes, shut off water and warm it gradually. Call a pro if it cracks or leaks. Get a step ahead and repair the little things before they get big. For additional tips or assistance with hard-to-tackle areas, contact a local plumber or hardware store. Winter prep keeps tap water flowing and stress down.
Frequently Asked Questions
Why is pipe insulation important in Colorado winters?
Pipe insulation is a simple tip that keeps Colorado winter water from freezing and bursting. This prevents expensive damage and ensures your water stays safe and reliable.
What is the best material for insulating pipes in cold climates?
Foam and fiberglass are both popular picks. Both offer great thermal protection. Foam is less complicated to install and is moisture resistant, which is perfect for cold, wet conditions.
How thick should pipe insulation be for freezing temperatures?
For extreme cold, pipe insulation should be at least 25 millimeters thick. The thicker the insulation, the better protected your pipes will be against freezing, particularly in unheated spaces.
What are common mistakes when insulating pipes?
Typical errors are gaps, thin insulation and unsealed joints. These mistakes lessen efficiency and can still allow your pipes to freeze.
Should I insulate both hot and cold water pipes?
Yes, insulate both! Cold pipes can freeze while hot pipes lose heat rapidly to the cold. Insulation is going to help with energy efficiency and protection with either.
What else can I do to prevent frozen pipes during winter?
Open cabinet doors to warm air circulate around pipes, let faucets drip when it’s really cold, and seal openings in walls around pipes to prevent cold drafts.
What should I do if my pipes freeze?
Shut off the water, open the taps, and use warm air from a hair dryer on the pipe. Never use open flames. If in doubt, call a professional plumber.

Key Takeaways
Recognize gurgling as the canary in the coal mine for trapped air, partial blockages, or venting problems and get them fixed…
Key Takeaways
Match your heater size to household needs by comparing tank capacity or tankless flow rate to simultaneous use and upgrade if…