
Why Is My Toilet Not Filling Up Fast? Troubleshooting & Fixes
Key Takeaways
-
Check your water supply valve and shutoff to make sure they are all the way open and not worn or clogged. Replace them if you have old shutoff valves or supply lines restricting flow.
-
Check and clean or swap out the fill valve and refill tube for sediment and mineral buildup. Consider modern fill valves for more reliable operation.
-
Check if the float assembly moves freely and is correctly adjusted or replaced. If it is waterlogged, misaligned, or obstructed, it can slow the tank refill.
-
Look for kinks or clogs in the supply line or loose connections. Do a bucket test or swap corroded lines with braided ones for better flow.
-
Test home water pressure versus fixtures to determine if the system is low pressure. Contact the water provider or install a booster.
-
Stay on top of regular tank cleaning, log troubleshooting steps and outcomes, and contact a professional plumber for stubborn leaks, difficult valve repairs, or serious supply issues.
A slow-filling toilet is generally due to a defective fill valve, clogged fill tube, or low water pressure. Typical symptoms are weak flow into the tank, extended refill times after flushing, and intermittent hissing noises.
A quick check of the shutoff valve, float height, and inlet screen frequently locates the problem. Replacement parts are cheap and DIY-friendly for most homeowners.
The following sections provide step-by-step checks and fixes to bring back normal fill speed.
Common Culprits
Slow tank refill can be caused by a number of mechanical issues. The items below detail what to check, why each part matters, where problems form and how to fix or replace parts to restore normal fill speed.
1. Water Valve
Make sure the shutoff valve at the wall or floor is fully open. A partially closed valve will reduce the flow and extend refill time. Ancient valves can corrode or pin small bits of trash and serve like a bottleneck even when fully opened.
Turn the valve off and on to hear whether the supply opens cleanly. A grinding sound or sluggish response frequently indicates internal wear. Swap out old shutoff valves and inline supply lines with sleek, modern braided lines and new fill valves to boost flow and lower leak chances.
If debris is suspected, briefly disconnect the supply hose and flush into a bucket to free trapped sediment.
2. Fill Valve
Look inside the fill valve assembly for grit, mineral flakes, or broken pieces that clog the valve tube or cap. In-tank drop-in cleaners containing bleach or chlorine accelerate rubber decay and will clog the fill valve. Valve flappers and other rubber parts usually require replacement every three to five years.
Try lifting up the fill valve cap and running water to flush out sediment. Vinegar cleaning dissolves minerals. If cleaning doesn’t restore flow, replace the fill valve with a modern unit like a Fluidmaster 400A for steadier performance and easier servicing.
Misadjusted fill valves keep the water level low or delay the refill. Turn the adjustment screw or shift the shaft to establish the proper level.
3. Float Assembly
A waterlogged or sticking float ball, or a misaligned float cup, stops the valve from opening all the way or closing at the proper moment. Check the float arm and float clip for bends, mineral deposits, or touching other parts of the tank that prevent it from moving.
Tweak the float arm and clip so that the float has free reign to rise and fall. If it’s soaked up water or worn out, swap it out for something more modern, like a nice float cup design for tighter control.
Common culprits are the refill tube and overflow tube being clogged, so trim the refill tube to sit about 1 centimeter above the overflow tube and clear blockages to regain proper refill dynamics.
4. Water Line
Kinks, corrosion or internal blockages in the supply tube reduce inlet pressure and impede refill rate. Keep the line tight at both shutoff and fill valve. Loose fittings leak and waste effective flow.
Replace ancient metal or brittle plastic lines with braided stainless-steel lines to minimize restriction and maximize service life. Do a bucket test at the disconnected supply to estimate volume and pressure. Low output is supply side, not tank parts.
5. Mineral Buildup
Check the tank for hard-water scale on the fill valve, refill tube and overflow tube. Mineral deposits constrict jets and foul rubber gaskets. Soak impacted components in vinegar or a descaler, scrub softly, and swap out impaired seals or valves.
Consider a water-softening solution if scale persists. Regular cleaning and timely replacement of rubber parts keep them from recurring slow-fill culprits.
Diagnostic Steps
Start with a quick overview of the approach: work methodically from the supply to the tank components, use simple tests, and record findings so you can isolate whether the problem is on the supply side or the valve side.
Step-by-step checks for supply valve, fill valve, float assembly, and supply line
Close observations and a brief series of hands-on tests expose the majority of reasons. First, check that the shutoff valve at the wall or floor is completely open. Turn it counterclockwise until it won’t turn anymore and mark that position.
If the valve was partly closed, reopen it and run a timing log. Measure how long the tank takes to refill from flush to full and write the time down. Then check the flexible or rigid supply line for kinks, tight bends, or damage.
Straighten and clear any issues and time the log again. If flow is still slow, shut off the valve, disconnect the supply line at the tank and do a bucket flow test by letting water run into a bucket for 10 seconds. Low flow here indicates a supply problem, not the tank parts.
Visual inspection and manual testing to pinpoint the cause
Open the tank lid and check for mineral scale on the fill valve, the float assembly, and any inlet screens. Manually lift the float and observe the response. If the fill rate jumps when the float is lifted, the float or its adjustment may be limiting flow.
Take out and examine the fill valve cap or the inlet filter screen for dirt. Mineral deposits tend to hang out on these parts and strangle flow. Brush clean screens and use a vinegar solution where relevant, then reassemble and run another timing log.
If cleaning brings the refill speed back to normal, record that cleaning corrected the problem and note how long it may take before it returns.
Documenting results and following instructions for repairs
Keep a concise record: date, symptom, tests done, timing log values, parts cleaned or replaced, and outcome. This keeps you from re-testing things that are already known and gets a plumber up to speed on previous work if you require professional assistance.
For replacement, proceed step by step along the manufacturer’s instructions or a trusted video guide. Replace worn washers, seals, or the entire fill valve if cleaning cannot restore flow. Work with matching replacement parts and turn off the supply prior to any dismantling.
If troubleshooting is unsuccessful after these steps, get outside help to check building supply pressure or unseen blockages.
Water Pressure
Water pressure is the amount of force water pushes against your pipes and fixtures, and it directly impacts how quickly your toilet tank refills after a flush. Test household water pressure using a gauge attached to an outdoor hose bib or to a pressure tap close to the water heater, where it is typically in the range of 300 to 600 kPa (30 to 60 psi). If the reading falls significantly below this, flow into the toilet will be sluggish even with a quality fill valve.
Contrast refill times across fixtures to determine if the problem is localized or system-wide. Water Pressure: Time how long a toilet takes to refill, then run a sink or shower and note flow strength. If several of your fixtures have weak flow, the issue is probably a main supply or pressure-reducing valve. If just one is slow, concentrate on its fill valve, supply line, and shutoff valve.
CHECK THE SHUTOFF VALVE FEEDING THE TOILET. Partially closed or corroded shutoffs choke flow. Turn the valve fully open and cycle it a few times to dislodge light gunk. If the valve is stiff or still restricts flow when open, swap it out. If your measured household pressure is low after verifying the shutoff is open, have the water provider or a plumber check the service line and any pressure regulators.
Checking the fill valve usually fixes slow filling. Age, rubber gaskets, and debris trapped in the valves decrease flow. Take off the valve cap and check for mineral deposits or debris. Flushing debris out can help. Hold a cup upside down over the exposed valve opening and turn the water supply on full force for 10 to 15 seconds to push out sediment. Flush and retest refill speed. If the valve continues to restrict flow, replace it, as many valves flow better when rubber parts are replaced. Rubber parts often require replacement every 3 to 5 years.
Continual low pressure throughout the property can require a pressure-boosting solution. A pressure toilet or a booster pump on the main line can bring sufficient flow to multiple fixtures. Booster pumps need power and must be sized correctly. Get one rated for household demand and install it with a pressure tank or switch to prevent the pump from starting and stopping rapidly.
When low pressure is a red flag for something more. Collapsed service lines, blocked mains or failing pressure-reducing valves require an expert diagnosis. Water pressure while checking and adjusting water pressure can be a DIY task, it occasionally requires tools and expertise.
The Silent Saboteur
The silent saboteur is those small, unseen issues inside the tank that slow refill speed and waste water. These troublemakers lurk below the surface but influence how quickly the bowl and tank return to equilibrium after a flush. More often it is a combination of tiny leaks, debris in the valve, bad seals or clogged vent that shifts pressures and flow.
Determining which of these is at play demands close listening, a quick visual inspection, and some tactile experimentation. Be on the lookout for stealthy leaks near the fill valve, flapper, or tank seals that can quietly slow the refill rate. Check for consistent slow drips, hairline water tracks on the overflow pipe, or standing water beneath the tank.
A leak at the base of the fill valve or a worn tank-to-bowl gasket will cause the water to seep out gradually rather than the tank refilling rapidly. If the flapper doesn’t seat cleanly, water flows into the bowl as the fill valve tries to top off the tank, lengthening refill time.
Listen for constant running water or strange refill behavior after flushing as indicators of internal leaks. A quiet, persistent trickle after the flush usually indicates the flapper or flush valve is leaking. A long, slow filling sound combined with a low final water level indicates either a partial block in the supply line or a defective fill valve that will not allow maximum flow.
If you hear sporadic burps or gurgling, that can indicate pressure or vent problems compared to a direct valve leak. Check for siphon effects or vent stack blockages that could interfere with normal tank filling. Roof vent stacks blocked or clogged system vents can fill slowly or unevenly due to the negative pressure they create that opposes incoming water.
To test, fill a cup and slowly pour water into the overflow tube. If water siphons out or the refill acts strange, you have an air or venting problem. Being the silent saboteur, open the tap at the closest source to test general water pressure. Low home pressure will drag refill regardless of tank parts.
Fix broken seals, gaskets, or flappers. Repairing these stops the tank from filling efficiently and wasting water. Try flushing debris from the valve or water system first by using a cup to direct a quick blast at the valve seat. Debris often clogs its aperture.
If flushing doesn’t help, replace the flapper, fill valve, or tank-to-bowl gasket. Stay away from abrasive bowl cleaners that include bleach or acid, which can harm rubber components and exacerbate leaks. Often, a new valve or seal resets normal refill speed.
Preventative Care
Preventative care minimizes the risk that a slow-filling toilet becomes an emergency fix. Regular checks and small steps keep components functioning, expose wear early, and prevent mineral or debris deposits from restricting flow. Here are actionable tips to maintain refill rate and plumbing expenses down.
Schedule toilet tank cleanings that will clear away sediment, mineral deposits, and debris from all components. Lead your tank every six to twelve months, more frequently in hard-water areas. Flush the toilet to empty the tank, inspect the float, fill valve, flapper, and overflow tube, and brush with a soft brush in combination with a mild descaler to remove scale.
Flush loose grit by turning the water supply on for five to ten seconds while holding a cup over the valve opening to control flow. Repeat until clear. Cleaning prevents mineral deposits that can adhere to valve seats and impede flow, and it keeps small particles from getting stuck in the fill valve inlet.
Periodically test and adjust the float assembly and fill valve for proper alignment and water level. Verify water level against the manufacturer’s fill line or approximately 25 mm below the overflow tube for many contemporary toilets.
Test the float by lifting it manually to ensure the valve shuts off and then releases properly. If the float is too low, the tank fills slowly. If it is too high, you risk overflow. Adjust the float arm or clip according to model instructions and test the refill time by timing the tank from empty to full.
Run a pressure test if the refill is slow despite the correct float position to eliminate low supply pressure. Swap out worn or outdated parts before they lead to slow filling or expensive plumbing emergencies.
Swap out flappers, fill valves and supply lines exhibiting wear, corrosion or constant clogging. Preventative care is important; many professionals suggest changing out supply lines every 10 years to prevent silent leaks and loss of flow. Go with quality parts made for your toilet model.
The newer fill valves typically include improved anti-sediment screens. Replace corroded metal lines with braided stainless steel to lessen the chance of leaks and increase flow over time. Maintain a service record of repairs, replacements, and replacement speed.
Document cleanings, part replacements, noticed refills and any pressure tests. Remember easy flushing measures, such as employing full-power water for 10 to 15 seconds to clear valve junk and results. A log aids in identifying trends, such as slowing refill pace, consistent blockages, or pressure losses that indicate when to make a plumber appointment.
Frequent maintenance checks identify problems in their infancy and prevent big fixes.
Professional Help
Slow filling that remains after the basics have been checked typically indicates the issue requires a professional eye. A quick check up can identify basic components, but consistent slow fill, inconsistent flow, or mysterious pressure loss suggest problems that require professional attention.
A plumber will check supply pressure, examine shutoff and fill valves, and follow elusive leaks. They can pinpoint less visible causes, like partial blockages within the supply line, internal fill-valve wear, or valve seats corroded by mineral buildup.
Recognize when persistent slow filling issues require expert diagnosis and repair
If the tank still fills sluggishly after you clean or replace the flapper and adjust the float, seek professional assistance. Signs to watch for include filling that takes many minutes, water that trickles rather than flows, noises from the wall near the supply, or repeated refills after each flush.
These signs indicate something beyond a minor tweak. A qualified plumber employs pressure gauges, inspection cameras, and valve testers to discover the source. For instance, low incoming water pressure from the municipal line or a partly closed street valve can appear to be a toilet issue but needs different repairs.
Contact a licensed plumber if you encounter complex valve issues, major leaks, or water supply problems
Complicated valve failures and significant leaks require a licensed job for safety and code adherence. Licensed plumbers have the appropriate permits and insurance and adhere to local codes.
They will isolate the source, replace worn or mismatched parts, and fix hidden leaks that can cause water damage. If you think you may have issues beyond the toilet, like low pressure in the whole house or multiple pressure-reducing valves flipping off, call in the pro.
In some locations, work on primary supply or pressure-regulating equipment needs to be conducted by a licensed technician.
Request a full inspection of your toilet system, including the shutoff valve, fill valve, and supply line
Request a full-system inspection of the shutoff valve, flexible supply line, fill valve and quick-connect at the tank. Experts will seek out mineral scaling within the fill valve, partial clogs in braided or rigid supply lines, and defective shutoff valves that fail to open completely.
They check flow rate in liters per minute at the inlet and ensure the float and overflow settings. Ask for photos and a written estimate with parts and anticipated lifespan to help make decisions.
Consider professional installation of advanced fill valves or pressure solutions for long-term reliability
If low pressure or corrosion is persistent, think about replacing it with a modern diaphragm or floatless fill valve, or bolstering it with a booster pump where permissible. Such improvements decrease blow ups down the road and have the potential to increase fill speed and conserve water.
Professionals can suggest models rated for local water quality and install code pressure solutions.
Conclusion
A slow-filling toilet points to a few clear causes: low house water pressure, a weak fill valve, blocked inlet holes, or a clogged supply line. The checks you ran matter. Here’s what you do: listen for tank sounds, watch the float, check the hose and valve, and clear mineral build-up from the fill valve and rim holes. Small fixes often work: clean parts, tighten the supply line, or swap the fill valve. If the repair requires tools or the issue relates to home-wide low pressure, contact a professional. A plumber will test pressure and replace worn parts quickly. Take a shot at one easy solution first. If the tank still fills slowly, schedule a pro visit to prevent leaks or additional damage.
Frequently Asked Questions
Why is my toilet tank filling slowly after a flush?
Slow fill usually indicates a partially blocked fill valve or low water pressure. Make sure that the water supply valve is fully open and inspect the fill valve screen for any debris. Replacing the fill valve typically takes care of it quickly.
Can a clogged refill tube cause slow filling?
Yes. A kinked or clogged refill tube can impede or stop water from entering the bowl and tank. Straighten or replace the tube and clear any debris to return flow to normal.
Could low house water pressure be the problem?
Yes. Low house water pressure slows the toilet fill. Try other taps. If they are slow as well, contact your water provider or a plumber to identify pressure problems.
How does a worn flapper affect tank refill?
A leaky or worn flapper drains the tank so it never reaches full volume quickly. Replace the flapper to prevent leaks and speed up refills.
Is sediment in the fill valve common?
Yes. Mineral deposits or sediment can clog the fill valve screen. Close the water, take off the valve cap, and wash off the screen or replace the valve if deposits are bad.
When should I call a plumber for a slow-filling toilet?
Call a plumber if easy fixes (valve, flapper, tube, cleaning) don’t assist or if several fittings have low pressure. A pro will safely diagnose supply line or valve seat issues.
Will preventive maintenance help avoid slow fills?
Yes. Nothing causes slow fills like a rarely inspected valve screen covered in mineral deposits or crud from your water supply. This conserves water and prevents urgent fixes.

Key Takeaways
Isolate the smell by determining its precise odor, where it is coming from and when it occurs, in order to zero in on causes…
Key Takeaways
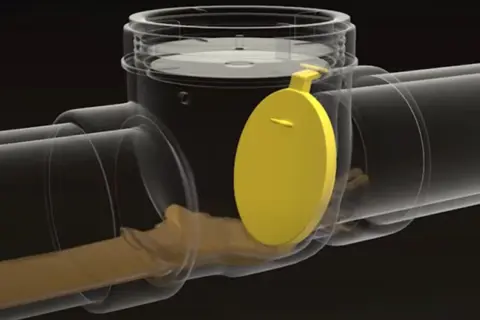
Backwater valve prevents sewage backflow into a home by letting it out as usual but automatically closes when there is reverse…