
Residential Gas Line Installation Experts in Centennial, Colorado
Key Takeaways
-
Check older Centennial home gas lines for corrosion and whether the pipes are still sized adequately prior to any range installation.
-
Use the right materials – black iron or CSST – and exactly sized pipes according to calculated BTUs so you don’t get pressure drop and unreliable appliance performance.
-
Conduct a thorough, professional installation process with steps such as evaluation, route planning, securing fittings, pressure testing, and certification to comply with local codes.
-
Please place shut off valves clearly, do leak detection and ventilation, and have inspections regularly. It is safer and less fire and leak-prone.
-
Trust an experienced residential gas plumber and quality parts for peace of mind from expensive repairs, unseen costs and risks of shoddy work.
-
Keep records of inspections, test results, and permits for your gas line work. If you’re remodeling or replacing appliances, consider upgrades such as dual fuel options.
Gas line installation for range in Centennial homes refers to installing or extending a natural gas pipe to a stove. Local codes and licensed technicians direct pipe size, venting and safety checks. Standard work consists of gas shut off, pressure testing, leak detection and certified fittings. Price depends on distance, materials and permits. The post goes into detail on the steps, permits needed in Centennial, and safety best practices.
Centennial Home Challenges
Centennial homes often feature interior gas systems that reflect their age, which can complicate a contemporary kitchen range installation. Before starting work, it’s essential to test the entire gas path to save time and minimize safety risks. Inspecting the routing through basements or attics, pipe age, material, previous repairs, and alignment with current appliance sizes and clearances is crucial.
Fragile Infrastructure
Check exposed steel and iron piping for rust and pitting, especially in indoor areas like basements or crawl spaces where moisture accelerates corrosion. This can consume threads or joints, leading to slow leaks that present staining or odor long before a complete failure, so it’s essential to verify with a pressure test. Some lines may be too small for today’s high-BTU gas appliances. A line that supported a 60s-era cooktop might be insufficient for a modern unit, so it’s crucial to size by measuring the internal diameter and converting capacity to kilowatts or BTUs for proper alignment. Pipes that feel brittle at fittings or bend oddly indicate metal fatigue or poor past fixes and should be replaced rather than patched.
Plan for material upgrades: Rigid black iron pipe remains a durable choice for concealed runs, while corrugated stainless steel tubing (CSST) provides flexibility for routing through tight attic joists or behind cabinets. Install protective coatings or sleeves where pipes pass through masonry or near HVAC ducts to reduce abrasion. Seal wall and floor penetrations with fire-rated caulk and proper escutcheons. Holes that aren’t properly sealed allow air, pests, and moisture into cavities, speeding up pipe decay. In split-level homes with extended lateral vent runs, provide extra space for safe connections and code-compliant vent termination. A home in The Knolls may need CSST to snake through narrow chaseways, while a Piney Creek house with open basement access can more easily accept black iron.
Historic Codes
Check the original permit records and local code revisions. Some pre-1980 homes have grandfathered conditions, but still need to be updated for safety. City or county inspections might push to replace certain materials, such as cement-asbestos, lead-based solder, and unprotected threads, even if original codes permitted them. Record any exceptions where a variance applies, and retain documentation demonstrating why a pipe run was maintained or altered. When considering a residential gas line installation, it’s crucial to adapt techniques: use modern bonding and grounding for CSST where required, and route lines to allow future access for servicing. Additionally, check electrical and venting requirements pre-install. Antiquated three-prong dryer outlets or shallow refrigerator alcoves indicate that the space was sized for former appliance standards, and plumbing or duct modifications might be required in communities such as Southglenn or Willow Creek. Sometimes pushing an alcove back or re-framing a cabinet is a practical solution for satisfying both code and the homeowner.
Professional Installation Steps
Professional installation of a gas line for a kitchen range begins with a clear plan that covers permitting, quality materials, safety checks, and final certification. These steps detail the entire process employed by experienced residential gas line contractors, including routing and secure connections, the equipment needed, and timing estimates so readers know what to anticipate.
1. Assessment
-
Total up the BTUs of all your kitchen appliances so the gas line can be properly sized. Professional Installation Steps: Range, oven, and any other gas-fired equipment – add nameplate BTUs and add a safety margin.
-
Check capacity of existing gas supply, meter, and main trunk line to take extra load. Check meter pressure, regulator condition, and ensure main can support the new demand without voltage or pressure drop.
-
Search for utility issues, like low pressure or leaks, which may pose safety concerns. Utilize leak detectors and visually inspect joints. Mark previous repairs or corroded areas.
-
Professional Installation Steps Add pipe lengths, fittings, valves, supports, sealant and permit requirements. Underground versus indoor list.
2. Routing
-
Design good pipe runs with as little length of run and penetrations as possible. Shorter runs minimize pressure loss and leak points.
-
Choose pipe material—black iron, CSST, or polyethylene—for each run (inside/outside). Factory-coated black steel and flexible polyethylene are typical for underground lines. CSST can be used indoors with adequate bonding.
-
Plan for branch lines and trunk lines to provide gas flow to each appliance. Make trunk lines a larger size than branch lines to keep velocity down and pressure consistent.
-
Take into consideration things such as concrete slabs, walls, and frost lines when running a gas line. Federal regulations mandate a minimum of 12 centimeters of cover for buried line on private land and deeper beneath driveways to plan trenching.
3. Fitting
-
Threaded fittings, sealant, and proper torque ensure a snug connection that won’t leak. Use certified pipe thread sealant or gas-rated tape.
-
Put in shut off valves where necessary for maintenance and emergencies. Put shutoffs at the appliance, at the branch, and where accessible according to code.
-
Have all joints, elbows, and connectors sized and installed according to code. Fittings need to match pipe type and do not mix and match!
-
Check appliance connection points against your choice of gas piping and fittings. Verify inlet sizes and flexible connector ratings prior to final hookup.
4. Testing
-
Pressurize with air or inert gas and observe with a manometer or other pressure gauge. Whole-house tests can last 15 minutes to a few hours per code.
-
Check all joints and connections for leaks with approved detectors or soapy water. Re-tighten or replace suspect fittings.
-
Note the pressure drops and fix leaks before hooking up appliances. Maintain logs for the inspector.
-
Record test results and verify system integrity prior to acceptance.
5. Certification
-
Secure needed inspections and permits pre-work. Inspection takes on a few days.
-
Give homeowners installation and test results. Label shutoffs and lines.
-
That all components are approved for residential use. Unlicensed spackle-and-doodle is frequently not only illegal but also perilous.
-
Final sign-off from the authority completes the installation.
Improper Work Risks
Improper Work Risks Here’s a quick list of the worst dangers, then an in-depth look at individual failure modes and their impact.
-
Gas leaks leading to poisoning, explosions, or fire.
-
Pressure drops causing poor appliance performance and incomplete combustion.
-
Corrosion and material failure from substandard piping.
-
Unlicensed work voids insurance and building approvals.
-
Accidental ignition from nearby electrical equipment or open flames.
-
Carbon monoxide exposure from incomplete combustion and blocked vents.
-
Expensive repairs and home downtime occur when systems need to be re-engineered or replaced.
Gas Leaks
Identify leaks by the odor of rotten eggs, hissing sounds, or dead vegetation near outdoor piping. Leaks typically result from bad joints, corrosion in aged pipes, or ruptures in the residential gas line. If you suspect a leak, get to a safe distance, call 911 and the gas utility, and avoid operating electrical switches or using phones near the area. Instead of just patching over and over, remove damaged portions and replace them with new rigid black iron pipe of appropriate size and seal. Remember that unlicensed work is often unlawful and more risky, so using a licensed contractor lowers your legal and safety liability. Install carbon monoxide detectors on every level and within 15 feet of each sleeping area to catch combustion problems early.
Pressure Drops
Low gas pressure at the stove can signify undersized pipes, excessive pipe runs, or internal blockages. Pressure drops occur from debris, moisture, or faulty fittings. To identify the weak link, try the system with a pressure gauge at different points. Remedial measures involve upsizing pipes, minimizing runs, or re-routing lines to eliminate unnecessary bends and fittings. Proper sizing must be designed off the appliance BTU rating and home layout, especially for a residential gas line installation. Yearly inspection of your gas appliances by a qualified technician helps catch pressure-related issues before they impact the safety of your indoor gas line.
Fire Hazards
Exposed or poorly routed gas lines increase ignition risk, making the use of heavy-duty materials like rigid black iron pipe or CSST with a protective coating essential in areas prone to impact or heat damage. It’s important to seal all connections securely and avoid running gas lines beside electrical wiring or heat sources. During installation and testing, keep ignition sources, including open flames and spark tools, away from the work area. Additionally, install shut-off valves and caps to ensure portions can be isolated quickly in an accident. Always have older piping inspected by a qualified residential gas plumber to identify hazards and provide necessary upgrades.
Safety Measures
Safety first when installing a gas line for a range in Centennial homes. This project requires permits, licensed plumbers, and thorough pressure testing to comply with local codes and mitigate risk. Key precautions include using quality materials like rigid black iron pipe and ensuring secure connections, which guarantee safe gas delivery and reliable operation over time.
Shutoff Valves
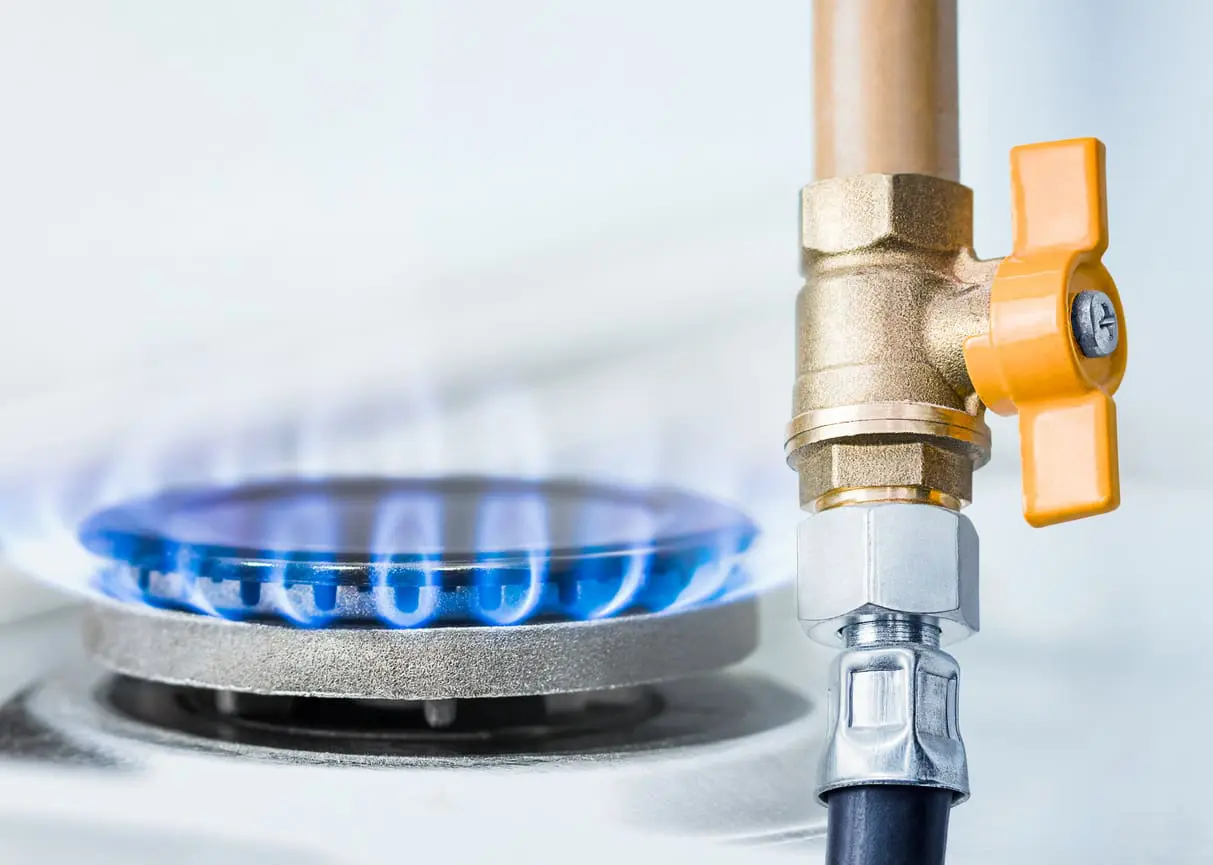
Place manual shutoff valves at the main supply, at branch lines, and each appliance connection, including those for the indoor gas line. Shut-off valves shall be at or near each gas appliance for immediate isolation, ensuring safe gas delivery. Opt for brass or stainless valves to fend off corrosion and extend their lifespan, especially in areas with exterior pipes or buried service runs where soil can be corrosive. Clearly label every shutoff point so any responder, homeowner, or technician can locate the valve quickly in an emergency. Labels should be robust and placed adjacent to the valve, not on flaking paint. Valves should be tested for operation periodically; open and close each valve on a regular schedule and verify each moves freely and closes fully. Intermittent pressure testing after valve work or system changes is necessary. A typical whole-house gas pressure test will hold pressure for 15 minutes to a few hours with a technician keeping an eye on the gauge for drop. Never allow unlicensed individuals to work on valves, as gas line work by homeowners is illegal in many jurisdictions and poses a significant safety hazard.
Ventilation Needs
Make sure kitchens and utility rooms are ventilated enough to prevent accidental gas from accumulating. Even minor leaks can pool in low or closed corners without air circulation. Install vented range hoods and exhaust fans sized to the kitchen volume and cooking load. A properly vented hood moves odors and combustion by-products outdoors and lessens the risk of gas pooling. Do not run gas piping through unventilated spaces like tight closets or sealed crawl spaces. If it must, supply vents or access panels that let air circulate and allow leaks to be found. Adhere to code for venting gas appliances and piping in houses. There are codes for minimum clearances and where you can terminate. Consider local rules on buried service lines. Federal transportation safety guidelines call for at least 300 mm (12 inches) of cover on private property and 450 mm (18 inches) under roads or driveways, which affects routing and ventilation planning for exterior runs.
Regular inspections are important. Check pipe runs and connections for corrosion, rust, loose fittings, dents, or physical damage. Ensure all piping and shutoff points are accessible for inspectors and emergency crews. Pull appropriate permits through the local building department prior to starting work and schedule inspections after installation. An inspector comes out to ensure the work is up to code on safety grounds.
Maintenance Practices
Regular maintenance keeps a residential gas line secure and operational, especially for your kitchen range. By conducting regular checks, cleaning, protecting, and replacing parts, your maintenance practices will minimize leaks, rust, and failures. Most jobs necessitate a licensed technician, as unlicensed work is unlawful in much of the world and poses significant safety concerns. It is crucial to adhere to local building codes, obtain permits, and pass inspections prior to gas hookup. A standard whole-house pressure test remains consistent at anywhere between 15 minutes and a few hours in accordance with local code, and that test step needs to be incorporated into any maintenance schedule.
Build a maintenance checklist to monitor safety work, inspections, and repairs related to your indoor gas system. Include: license verification for any contractor, permit and inspection dates, last pressure test date and duration, visual checks for corrosion, paint flaking, or debris, fittings and flexible connector checks, protective coating condition, pipe burial depth records for service lines, and any component replacement dates and part numbers. Note scheduling cadence: visual check monthly, professional inspection and pressure test yearly, and immediate call-out for any smell of gas or sound of hissing.
Clear debris from around gas piping to avoid corrosion or blockages. Wipe exposed piping with a damp cloth to clear away grease and dust that can obscure leaks. Make sure you have cleared storage and combustibles away from the range cabinet and under-sink areas so that you can visually check and reduce fire load. For exterior pipes or basement lines, clear leaves, dirt build-up, or construction debris that catches moisture against pipes. After you clean, run a visual and soapy-water check at joints and fittings to see bubbles that indicate leaks. Leave quick fixes to licensed technicians.
Coat exposed metal pipes with protective coatings. Apply factory approved rust-resistant paint or wrap systems designed for gas piping, not some random sealant which can conceal defects or code violations. For service lines that go underground, factory-coated black steel pipe or flexible polyethylene tubing are common approved materials; check if your area accepts this. Recoat any chipping paint and re-wrap any worn joints. For buried lines, validate the protective layer and bedding comply with depth rules. A common standard is 300 mm cover on private property and 450 mm under roads or driveways, and record that on the checklist.
Trade any aging or damaged parts immediately. Swap corroded pipe sections, antiquated flex connectors, or failing shutoff valves the moment an inspection reveals wear. Think about the right pipe size and depth when you replace, get permits, and schedule a pressure test after work. DIY might save approximately USD 250 to 350 in upfront expenses but the risk and legal liability typically outweigh savings. Get a reputable contractor to do the work and submit inspection forms.
Critical Viewpoints
Gas line installation for the range in our Centennial homes requires careful consideration of materials like rigid black iron pipe and stainless steel. Understanding the complexities of indoor gas line installation and secure connections is essential for ensuring safety and durability.
Dual Fuel
Dual fuel ranges are gas cooktops paired with electric ovens or vice versa, so indoor gas line installation needs to provide unobstructed access and space for an electrical circuit. Engineer the gas run with room for expansion – think about adding a gas line for a second range or a gas cooktop in another location, which means sizing the main feed and locating shutoffs where lines can fork off in the future with minimal demolition. Proper sizing uses the appliance input ratings (in kW or BTU) to estimate necessary pipe diameter and length. Undersized lines mean bad flame performance and serious safety issues. Sturdy fittings and flexible connectors must comply with local code and be installed by a qualified residential gas plumber; otherwise, they’ll leak. Pros include quicker stovetop reaction, more accurate heat management, and sometimes being cheaper to run for specific types of cooking. They provide energy-use options: use gas for stovetop and electric for baking, improving cooking results and efficiency. An HVAC/plumbing contractor can schedule the electrical and gas work, minimizing site disruption and saving time with permits and inspections.
Hidden Costs
Here’s an in-depth cost breakdown for common phases of a home gas line installation. All are USD figures and samples; they differ by region, materials, and permit fees.
|
Stage |
Typical Cost Range |
|---|---|
|
Initial permit & inspection |
$100–$600 |
|
Trenching / slab routing |
$300–$2,000 |
|
Pipe materials (steel, PE) |
$50–$800 |
|
Labor (licensed installer) |
$200–$1,500 |
|
Pressure test & certification |
$100–$400 |
|
Final hookup & appliance conversion |
$50–$500 |
Anticipate additional expenses for specialty tools, concrete excavation, or pipe protective coatings. Factory-coated black steel and flexible polyethylene tubing are standard for underground mains and have different pricing and code limits. Permit processing and mandated pressure tests, which can retain pressure anywhere from 15 minutes to a few hours, introduce additional time and expense. Unlicensed work appears to be less expensive but can lead to failed inspections, rework, and potential safety issues.
Materials, Maintenance, Renovations, and Safety
Compare by durability, code allowances and maintenance in the table below.
|
Material |
Pros |
Cons |
|---|---|---|
|
Black steel (factory-coated) |
Durable, widely accepted |
Heavier, needs corrosion protection |
|
Flexible polyethylene (PE) |
Corrosion-resistant, easier to install |
Limited use above ground in some codes |
|
CSST (corrugated stainless) |
Flexible, fast to run |
Requires bonding/grounding near electrical systems |
Long term costs are inspections, corrosion repair and replacing flex connectors every few years. Renovations frequently involve relocating or extending lines, cutting into walls or slabs and increasing damage potential while necessitating coordinated permits. Continued education for both homeowners and contractors on leak signs, code, proper use, and updates minimizes risk and promotes proactive maintenance. Gas line work is not DIY; trust licensed pros for secure, code-compliant installs.
Conclusion
Safe, code-ready gas line makes a kitchen range work well and last. For Centennial homes, anticipate older pipes, cramped spaces, and a mix of materials. Hire a licensed pro who tests for leaks, fits the right pipe size, and follows local code. Bad work causes leaks, fire hazards, and expensive repairs. Routine inspections, periodic valve tests, and an annual pro inspection reduce those risks. Easy maintenance, such as cleaning burners, monitoring pilot lights, and maintaining vents, keeps the range operating efficiently.
For immediate action, secure at least two written quotes from local, licensed installers. Request permit verification and a leak test report. Choose the expert who demonstrates knowledge of older Centennial homes and provides a straightforward service quote.
Frequently Asked Questions
What special challenges do Centennial homes present for kitchen range gas line installation?
Centennial homes often feature older piping and non-standard layouts, which necessitate updated materials and a thorough code check for safe residential gas line installation and secure connections.
Do I need a licensed professional to install a gas line in my Centennial home?
Yes. A licensed gas tech or plumber will ensure that the black iron pipe is properly sized, securely connected, pressure tested, and installed to local code standards, minimizing your safety and liability exposure.
How long does a professional gas line installation usually take?
They generally install for two to six hours for a simple run, but complicated retrofits in older homes may take longer due to access issues, repairs, or upgrades needed for the interior gas line installation.
What risks come from improper gas line work?
Shoddy work with black iron pipe can lead to serious issues like leaks, fire, and carbon monoxide, compromising safety and durability.
What safety checks should I expect after installation?
Visual inspections, leak testing using soapy water or electronic detectors, pressure testing, and appliance startup checks are all essential for ensuring safety and durability in residential gas line installation. Get a compliance certificate from the installer.
How should I maintain a gas line and range to ensure long-term safety?
Schedule professional inspections annually for your indoor gas line, test for smells or hissing, keep vents clear, and service the range according to manufacturer recommendations.
Can I upgrade old gas piping in Centennial homes to modern standards?
Yes. A pro can swap out or retrofit black iron pipe with modern materials and fittings to enhance safety and minimize leak potential, ensuring secure connections and compliance with indoor gas line installation codes.
Key Takeaways
Along with following manufacturers guidelines on distance to help reduce false alarms, ensure that you install carbon monoxide…
Key Takeaways
Additional holiday cooking and guests create a high risk for kitchen drain clogs, so establish laundry-list rules about what…