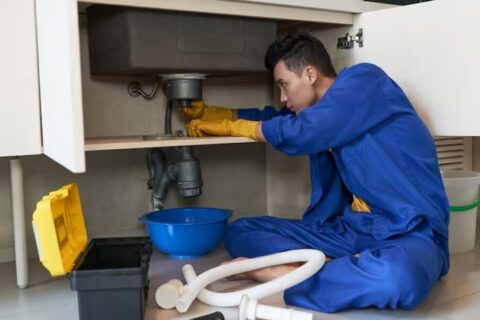
Shower Valve Replacement in Centennial, CO
Shower valve replacement swaps a worn or failed valve for a new pressure-balancing or thermostatic unit, restoring steady water control and safe temperatures. In Centennial and across the south Denver metro, hard water and older-home plumbing make valve wear common, so 1st Choice Pro Services often recommends scale-resistant thermostatic or ceramic-disc valves sized to your existing copper lines.
Cost and timing depend on the valve type, how easily the plumber can reach the valve body, and whether Centennial permits or code upgrades apply. Most replacements take a few hours, though corroded pipes or tile that has to be opened and restored can add to the total. The sections below cover diagnosis, the step-by-step swap, local water and code factors, and how to compare estimates.
Key Takeaways
-
Catch common valve problems early – leaks, temperature swings, weak pressure and even visible corrosion – before they cause larger plumbing damage and greater expense. Check out valve assemblies and listen for dripping to find problems.
-
Use a straightforward step-by-step replacement process with preparation, safe access, removal, installation, and testing for a secure, leak-free shower valve.
-
Plan replacement or repairs with awareness of local Centennial factors like water hardness, building codes, and older home plumbing. Work with plumbers who know local requirements.
-
We hire licensed, insured, and experienced plumbers who provide written estimates, warranties, and clear timelines to minimize risk and guarantee compliant professional workmanship.
-
Factor in valve type, labor rates, and wall access complexity when weighing quotes. Demand clear cost breakdowns so you’re not hit with demolition or hidden repair charges.
-
Embrace preventative care and material innovation. Replace seals, opt for heavy metals, and add water-conserving features to extend valve life, enhance performance, and reduce lifetime costs.
Shower valve replacement Centennial involves replacing a worn out or defective shower valve in Centennial, Colorado with a new one. It renews water control, repairs leaks and can even enhance temperature balance.
We often recommend models with pressure balance or thermostatic control to homeowners to satisfy local codes as well as in hard water areas. Cost and time depend on valve type and wall accessibility.
The meat of the article details the process, tools and local permit advice.
Valve Diagnosis
A targeted examination of the shower valve pinpoints causes and directs repair or replacement decisions. Start with visual and acoustic scanning. Then progress to tactile tests that expose leaks, pressure malfunctions, temperature control failures or corrosion.
Identify the valve type early – cartridge, ball or pressure-balanced – as diagnosis and parts vary by type.
Persistent Leaks
Check for steady dripping from the shower head or around the trim. A leaking shower valve is among the common signs it needs replacement. If it drips for more than 30 days, then consider replacing your valve, not patch repairs.
Check seals and O-rings on the cartridge or ball assembly, as worn rubber parts tend to be the culprits of slow leaks. Examine surrounding grout, drywall, or flooring for water marks and weak areas that indicate hidden leaks.
Corroded nuts or fittings can masquerade as leaks behind trim plates, so when safe, pull the faceplate. Factor in costs. Ongoing leaks raise utility bills and can create mold or rot, so schedule prompt repairs with a skilled plumber to limit damage and expense.
Temperature Fluctuations
Watch out for those hot and cold swings while showering, an obvious indication of a bad mixer or valve. Pressure-balancing valves stabilize the temperature by compensating for supply fluctuations.
When yours is aging or malfunctioning, you’ll experience whipsaw shocks every time another faucet is turned on. Hard water deposits on the valve ports or old parts don’t mix things properly and you can get uncomfortable or scalding hot.
If the valve is more than 15 years old, replacement frequently provides more reliable control than repeated repairs. Testing involves running hot and cold supply individually and noting the reaction. Replacing cartridges or converting to a thermostatic unit returns safer, more stable temperature performance.
Weak Pressure
Test the shower head for low pressure and flow against other fixtures. Low flow indicates blocked ports, mineral deposits, or failing valve passages. Take off the shower head to see if there is sediment.
If flow improves, you know that the fixture is the problem. If not, the valve ports or supply lines are the likely culprit. Check for leaking pipes that reduce system pressure and look for signs of high water pressure or hard water, both associated with repeat valve repairs.
Fixing low pressure early maintains your schedule and helps appliances like dishwashers and washing machines that depend on good flow. Valve cleaning, port replacement, or complete valve replacement are your available solutions.
Visible Corrosion
Check for rust, white mineral crust or greenish deposits on the valve trim and adjacent fittings. Corrosion on the outside of valves can weaken the valve body, contaminate water, or cause leaks or part failure.
Corrosion means moisture or incompatible metals were present in the system for extended periods. Schedule cleaning for light residue, but arrange replacement when corrosion compromises structural components or seals.
Replacement Process
For example, here is the complete replacement workflow for a shower valve in Centennial with staged steps, tools and materials, safe practices, and the necessity of transparent estimates and inspection notes before and after work.
1. Preparation
-
Turn off the main or bathroom water supply and open adjacent taps to relieve water. Leave a bucket around to catch any drips.
-
Gather tools: adjustable wrench, basin wrench, Phillips and flathead screwdrivers, pipe cutter, soldering kit or press-fit tool (if needed), plumber’s tape, thread sealant, tubing brush, and a flashlight. Include valve-specific parts: new cartridge or valve body, O-rings, mounting screws, and trim kit.
-
Protect floors and fixtures with drop cloths or heavy contractors’ paper. Utilize painter’s tape to shield tile edges.
-
Review the replacement valve’s specifications versus your plumbing configuration and manufacturer instructions to verify inlet sizes, which are typically 1/2-inch or 3/4-inch copper, and the depth of installation. Check the service request notes for homeowner preferences.
2. Access
-
Take off trim plates, escutcheons, and any shower doors that obstruct the work area. In tiled systems, take off minimum tile only to access the valve chamber.
-
Utilize a drywall saw, chisel, or rotary tool to reveal the valve box, being careful not to sever electrical lines or adjacent copper tubing.
-
Take pictures of the valve, pipe alignment, and any fittings prior to taking it apart. Mark hot and cold lines if their locations are not apparent.
-
Wear cut-resistant gloves and protect your eyes. Keep a magnet or tray for small screws. Bag scattered debris for convenient disposal.
3. Removal
-
Turn off local feed and open close by spigot to release pressure. Disconnect supply lines with wrenches.
-
Loosen mounting screws and pry old valve free. For corroded fittings, apply penetrating oil and give it a chance to loosen bonds.
-
Check pipe ends for pitting, corrosion, or solder joints that require re-working. Notice any irregularities that will impact the new valve fit.
-
Gather up the old valve and parts, and discard them according to local waste regulations. Maintain a brief record of replaced components and detected faults.
4. Installation
-
Place the new valve into the valve box with ports aligned to the marked hot, cold, and mixed outlets. Make sure the valve sits at the proper wall depth for trim.
-
Secure with manufacturer-appropriate screws or brackets. Solder or press connections where necessary and let joints cool before testing.
-
Put on the trim plate, handles and showerhead. Select trim that fits the valve and homeowner preference.
-
Recheck seals, use thread sealant where indicated and ensure all fasteners are tightened before re-pressurizing the system.
5. Testing
-
Reinstall water and gently open up the valve to pressurize it. Check for leaks at every joint and connection.
-
Measure flow and temperature response. Run hot and cold individually, then blend them to verify equilibrium and shutoff.
-
We adjust stops and cartridge positions to optimize your temperature limits and pressure balance.
-
Give the homeowner a brief inspection report, test readings, and easy care tips for extended valve life.
Centennial Considerations
Centennial homeowners and building managers encounter a combination of local influences that determine shower valve replacement. Here we untangle water quality, code compliance, and older-home challenges that directly impact valve selection, installation, and long-term performance.
Water Hardness
Hard water in Centennial can accelerate wear on valve innards by leaving mineral scale deposits on cartridges and seals, restricting flow and causing temperature control to become erratic. Thermostatic shower valves are even more susceptible to scale, as they incorporate moving parts to retain temperature. Unchecked buildup can dull their capacity to keep water within the usual tight 2 to 3 degrees Fahrenheit range these valves offer.
Most valves last 10 to 15 years, but life shortens if scale is allowed to form. Frequent cleaning of exposed trim and occasional cartridge servicing reduce scale issues. For three- and four-way mechanical or thermostatic valves, daily or weekly inspection of operation and prompt cleaning can avert expensive repairs.
Install a whole-house softener or point-of-entry filtration to reduce hardness and protect showers and appliances. Watch for early signs: white crust near outlets, reduced flow, or fluctuating temperature. These often mean scale or partial blockage. A leaking valve behind the wall could be concealed by tile. If you notice damp spots or escalating water bills, get the wall checked immediately.
Local Codes
Centennial’s plumbing code establishes minimums for safe installations and often mandates certain materials, backflow protection, or certified thermostatic mixing valves in certain occupancies. Investigate local code lingo prior to purchasing components. It almost always requires permits if you are replacing valves and need to open walls or change pipe sizes.
If you don’t have permits, the inspector can enforce fines or mandated rework. Go through final inspection and safety regulations, like pressure testing and proper venting, to receive final approval. Install valves and fittings of accepted standards and save the manufacturer documentation for the inspector.
Work with contractors who know Centennial’s specific permitting process. They can expedite approvals and sidestep typical project-stalling traps.
Older Homes
Centennial’s older homes may have non-standard or fragile pipes, which can complicate valve swaps. New valve assemblies don’t always come in the same diameter or thread type as existing pipes. Conversion to modern fittings often involves adapters, short runs of pipe, or even re-piping in sections.
Brittle copper or lead-lined pipes require gentle care and occasional repair instead of shoving new fixtures on inferior bases. A professional inspection helps expose unseen rust, previous repairs or a bad angle that reduces performance.
For period properties, think about thermostatic valves for safer, more even temperatures, particularly where vulnerable tenants reside. Keep 104°F in mind as a danger point. Schedule potential behind-wall leaks and provide access panels whenever possible.
Choosing Professionals
Choosing professionals for a shower valve replacement in Centennial impacts price, safety, and quality results that last. Licensed, insured, and experienced plumbers minimize the likelihood of errors, comply with legal and building codes, and save time by getting the job done right the first time.
Compare several businesses, verify credentials and ratings, and consider availability and warranties before booking service.
Licensing
Verify that the plumber or company is up to date on state and local licenses and code compliance. Licensing indicates that they passed tests and inspections and have to adhere to safety standards for potable water and pressure systems.
For trickier installs, such as digital valves, thermostatic mixing valves, or three-way diverters, licenses commonly signify experience with proprietary product lines and local permit procedures. Request printed or electronic evidence and log license numbers to check with local authorities prior to work commencement.
Insurance
Demand proof of liability insurance and worker’s compensation. Liability insures random property damage like tile, drywall, or cabinetry damaged during valve removal or pipe work.
Worker’s compensation shields you from liability if a technician gets hurt on-site. Insurance limits, exclusions, and deductible terms vary by company, so ask for the insurance certificate and review the basics.
Selecting insured pros reduces your exposure if something happens and provides more defined avenues to address occurrences.
Experience
When picking pros, value plumbers with experience replacing shower valves and doing bathroom remodels. If you can, request examples of previous work, such as photos and references for comparable projects like yours, such as installing thermostatic or digital valves or systems with layered piping or three-way diverters.
Experience counts when diagnosing camouflaged problems like corroded copper, PEX transitions, or nicked cartridge seats. Professionals have the tools and expertise.
Even when DIY looks tempting, renting a tool or hiring a pro often costs less than redoing mistakes.
Warranty
Ask for labor and parts warranties and have the terms written down. Know the coverage duration, what voids the warranty and if the company manages manufacturer claims.
A good warranty indicates faith in the workmanship and offers some remedy in case there are leaks, pressure issues or electronic valve failures after installation. Hold on to manuals, receipts and warranty cards in case you need to make a service call or claim.
Consider price, experience, and availability. Favor companies that provide flexible scheduling and emergency services.
Check customer reviews and double check that some valves, in particular digital or integrated thermostatic ones, may need to be installed by a licensed professional to be code compliant.
Cost Factors
Cost drivers for shower valve replacement. Here’s a quick table of the key variables and general price ranges to set the context for the deep dive that follows.
|
Cost Factor |
Typical Range (USD) |
Notes |
|---|---|---|
|
Total replacement cost |
$150 – $550 |
Average about $350 |
|
Valve unit |
$20 – $350 |
Depends on type and features |
|
Labor |
$100 – $300 |
Hourly or flat rate; DIY can save this |
|
Permit fees |
$50 – $450 |
Local codes vary |
|
Drywall/tiling repair |
$300 – $1,500+ |
If wall access and restoration needed |
|
Small parts (cores, seals, levers) |
$10 – $50 |
When only parts replaced |
|
Additional plumbing/cleaning |
Variable |
Clogged drains or pipe repair raises cost |
Valve Type
Pressure-balancing valves cost between $20 and $150 for the unit. They are great for maintaining constant water pressure but offer poor temperature control.
Thermostatic valves cost between $80 and $350. They hold temperature and typically feature anti-scald protection.
Diverter valves cost between $30 and $200 and are employed in tub/shower combos or multiple outlets.
Multi-function or digital valves cost between $200 and $350 or more. More control and style features make them more expensive.
Select a valve with regard to safety and functionality. Anti-scald protection is a key feature in homes with kids or seniors. Water-efficiency versions can cut usage and attract green-conscious consumers.
Style counts for visible trim. A high-end trim kit boosts total cost even if the valve is mid-range. Pair the valve to existing plumbing runs. Certain thermostatic valves require separate hot and cold feeds that may increase plumbing work.
Labor Rates
Labor is usually charged by the hour or at a flat rate. Anticipate $100 to $300 for the majority of installs, with overall job times of approximately 1.5 to 3 hours when access is simple.
Emergency or after-hours calls tend to have added premiums. Request from each plumber a detailed estimate displaying hourly rate, projected hours, and any minimum fees.
Locally, compare 3 companies for a fair price. A DIY swap eliminates labor, but weigh the craftsmanship required because errors mean leaks and more expensive repairs down the line.
Wall Access
Access complexity heavily influences cost. Easy access via an access panel or pull out tile equals lower fees.
If the plumber has to bust up tile, open drywall and actually restore finishes later, add $300 to $1,500 or more for repairs and tiling. Hidden problems such as corroded pipes, damaged studs, or mold can push costs up.
Ask for a line item for wall access and restoration fees ahead of time. Of course, add contingency dollars for surprise pipe repairs or clogged drain cleanings uncovered during the work.
Future-Proofing Your Plumbing
Future-proofing your plumbing is preventing expensive repair bills down the road. Swap out parts for ones that won’t wear out, install water-saving features, and ensure the system can stay solid as it ages.
Proactive Maintenance
-
Inspect valves annually for leaks, corrosion, and mineral buildup.
-
Swap out worn seals, gaskets, and O-rings at the earliest sign of wear.
-
In hard-water areas, flush lines periodically to rid them of sediment.
-
Test temperature balance and anti-scald devices every six months.
-
Keep an eye on water pressure and install a pressure regulator if it is above 100 psi.
-
Maintain logs of service dates, parts replaced, and any irregularities.
Got worn seals and gaskets? Even a minor drip can soak the floor or backing behind tile and cause mold or rot. If leaks run for more than 30 days, schedule a valve replacement instead of patch repairs.
Keep an eye on water pressure and flow to detect early signs of plumbing problems. Anything but a steady pressure is an indicator of potential problems. Sudden drops or spikes in pressure indicate blocked pipes, failing cartridges, or a malfunctioning pressure regulator.
If you’re a homeowner with hard water or consistently high pressure, you should plan on valve work much more often, possibly even within a five-year window.
We share simple maintenance advice with every customer so their plumbing keeps running right. That includes easy checklists, showing how to shut off the local supply, and guidance on when to call a pro.
With clear direction, fewer surprises catch homeowners off guard and they can move to address small issues before they balloon.
Material Upgrades
-
Brass, stainless steel, and lead-free alloys resist corrosion and last longer.
-
Ceramic disc cartridges and pressure-balanced valves extend wear and enhance temperature control.
-
Specialized finishes with protective coatings reduce mineral staining in hard-water regions.
-
Backflow-resistant and anti-scald features provide safety and code compliance.
Opt for brass or stainless steel for enhanced longevity. These materials tolerate thermal cycling and mineral burden better than cheaper alloys.
Invest in state-of-the-art valve technology like ceramic disc cartridges and thermostatic mixing valves for future-proofing. This option stabilizes temperature, reduces thermal shock, and reduces the incidence of erratic shower temperatures.
Explore material upgrade benefits, less repairs, better water quality, and more. Long-life metals minimize corrosion particles in the water and extend maintenance intervals.
Fewer service calls lead to lower lifetime costs, even if upfront spending is higher.
Water Efficiency
Low-flow fixtures with pressure-compensating valves maintain the shower experience while conserving water.
Follow utility bills before and after upgrades to quantify efficiency gains. Contrast monthly water and energy usage for hot water to measure savings. Most homeowners experience lower bills and faster payback when hot-water usage decreases.
Promote EPA WaterSense-labeled products to get the most bang for every drop. WaterSense certification provides a convenient performance benchmark and helps consumers in selecting dependable fixtures.
Emphasize the eco and economic advantages of smart bathroom plumbing. Less water means lower utility costs and less energy for heating. The modern valves mean fewer catastrophic failure events as your system ages.
Conclusion
Replacing a shower valve in Centennial doesn’t have to be scary. The guide provides easy-to-follow steps to identify a worn valve, compare parts and labor, and select a plumber that fits your style. Part life is dependent on local climate and water quality. Opting for brass or ceramic cartridges reduces leaks and repeat labor. Anticipate labor of two to four hours for a typical exchange and the price may differ with part selection and wall access. Consider installing mixing valves that match future fixtures and easy shutoffs to reduce time on subsequent jobs.
For next steps, obtain two written estimates, review local testimonials, and request a parts warranty. Book a pro or plan a weekend DIY with the right tools.
Frequently Asked Questions
How do I know if my shower valve needs replacement?
A leaking valve, inconsistent water temperature, low water pressure, or visible corrosion are obvious indicators. If fixes keep coming or components are outdated, replacement is the optimal long-term remedy.
How long does a typical shower valve replacement take?
Typical replacements require two to four hours. Time can be increased by complicated repairs, access challenges, or systems that are integrated. A professional estimate provides the best schedule.
Can I replace a shower valve myself?
DIY if you’re a seasoned homeowner-plumber! For hidden wells, multi-handle or local codes, hire a licensed plumber to prevent leaks and safety issues.
How much does shower valve replacement cost in Centennial?
Depending on the valve type and labor, prices vary. Plan for an average cost and get local estimates. Request itemized estimates from pros to compare parts, labor, permit fees, and warranty.
Should I use a pressure-balancing or thermostatic valve?
Utilize thermostatic valves for accuracy and safety. Pressure-balancing valves are more basic and affordable. Decide based on comfort, budget, and your home’s water system.
Do I need a permit to replace a shower valve in Centennial?
Permits vary based on local requirements and scope of work. Easy cartridge swaps might not need it. For plumbing modifications or concealed work, consult Centennial’s local building codes or inquire with your contractor.
How can I future-proof my shower plumbing during replacement?
Go with durable materials, match today’s water pressure standards, and pick valve cartridges that can be serviced easily and are accessible. Request guarantees and upgrade-ready connectors.
Key Takeaways
Be on the lookout for slow drains, foul odors, gurgling noises, water backups, and pest activity as indicators that drain…
Key Takeaways
Tankless water heaters provide instant hot water. They are energy and space-saving, and they usually have a longer lifespan…