
Signs of Water Damage from Plumbing Leaks: Causes, Key Indicators, and What to Do Next
Key Takeaways
-
Keep an eye on high-risk areas like bathrooms, kitchens, laundry rooms, basements, and outdoor plumbing for obvious signs such as stains, wet spots, or upswings in water usage. React fast if you observe something different.
-
Check surfaces for discoloration and texture changes such as yellow or brown stains, peeling paint, sagging ceilings, warped floors, and soft drywall as these are signs of both new and old leaks.
-
Be alert to musty or sewage odors, the sounds of dripping, running water, or gurgling pipes. Employ acoustic detectors and smart monitors to assist in locating hidden leaks.
-
Inspect building materials for specific responses to moisture such as swollen wood, efflorescence, or cracking in concrete and lifted flooring to determine damage extent and restoration requirements.
-
Act quickly. Turn off the main water valve, photograph the damage, and call a professional plumber to fix the issue while using water sensors to mitigate the loss.
-
Examine your policy, document everything, and report quickly because timing and maintenance matter.
Water damage from plumbing leaks are telltale alterations that indicate water is leaking out of pipes or fixtures. Typical indicators are damp areas on ceilings or walls, paint peeling, floors buckling, or a mildew smell.
Small stains or higher water bills can indicate hidden leaks. Early awareness controls repair costs and mold growth. Below you’ll find key signs, where to look, and easy tests to verify a leak.
Common Leak Sources
Leaks come from a few fairly predictable sources. Once you know where leaks originate, you can catch damage early and keep repair costs down.
Worn pipe joints and corroded pipes are common sources of steady drips and slow leaks. Joints loosen with age, vibration or shoddy installation, and metal pipes corrode from mineral buildup or chemical reaction. Check beneath sinks, behind toilets, and around water heaters where these fittings congregate.
Older homes with iron or galvanized pipes can exhibit rust stains, greenish deposits, or pitting. Small weeps at a joint become bigger over months, leading to damp cabinets, mold or higher water bills.
Sinking or faulty plumbing fixtures cause leaks as well. Taps, shower valves, and cartridge seals fail with use or shoddy parts. A dripping faucet can waste liters a day and lurk in cabinets as constant dampness.
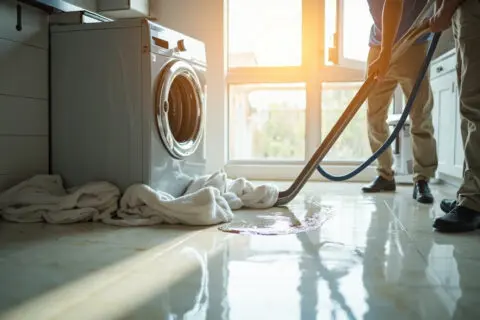
Toilet leaks can appear as run-on tanks or water on the floor around the base. The silent refill cycle pumps up water bills. Appliance hookups, such as dishwashers and washing machines, use flexible hoses that crack, split, or detach.
Change rubber hoses every five years or install steel-braided lines to reduce risk. High-risk zones focus plumbing routes and warrant periodic inspection. Kitchens, bathrooms, laundry rooms, basements, and mechanical spaces house most of the connections and appliances.
Under sink cupboards keep leaks under wraps. Check for soft wood, peeling veneer, or damp insulation. Basements expose wet spots on concrete or musty odors from slow leaks in exposed pipes. Water heaters and boiler rooms can have corrosion at fittings or pools under tanks.
Check these areas every month and mark any fresh leaks or drips. Outdoor and underground plumbing can spring silent leaks that generate huge losses before discovery. Irrigation lines and hose bibs fail from UV, shifting soil, or winter freeze-thaws.
Common leak sources include underground supply lines or slab plumbing that may leak under foundations. Slab leaks are often due to the house settling and manifest with warm patches on floors, unexplained damp spots, or sudden pressure drops.
Heavy rain can exacerbate weak joints and mask active leaks beneath saturated soil. Bursts are caused by the shock and cold of weather extremes or slow fatigue. Freezing temperatures cause trapped water to expand and burst pipes wherever insulation is thin.
Heavy rain contributes to ground pressure and external corrosion, which can cause sudden breaks. These events trigger flash flooding and significant damage, so shutoffs should be available and homeowners need to be aware of their main valve location.
Common leak sources include unaccounted for elevated water bills, sounds of running water with taps closed, and visible moisture or water stains that indicate its presence. Early detection by visual checks, listening, and monitoring bills stops small leaks from turning into big losses.
Visible Damage Signs
Water damage marks are typically the initial tip off that a plumbing leakage is present. They can be subtle and easy to overlook without a specific inspection. Look for visible signs of damage using daylight or a strong flashlight to scan surfaces, joints, and connection points where heat and strain tend to make failures occur first.
1. Discoloration
Check for yellow stains, brownish marks, or dark rings on ceilings, walls, and floors. These occur when water transports minerals or old rust out. Paler patches of paint, bubbling wallpaper, or discoloration adjacent to pipes and outlets indicate slow seepage beneath the surface.
Visible Damage Signs: Streaks after a heavy rain could indicate a roof or wall breach to interior plumbing runs. Mark off affected areas in comparison with nearby unaffected surfaces to map patterns and prioritize repairs. Photograph and date each spot to help follow its spread and timing.
2. Texture Changes
Computer: Touch areas to detect squishiness or warping in drywall, baseboards and wood trim. Moisture compromises structural fiber and promotes deformation. Peeling paint, flaking plaster, and bubbling or loose wallpaper are textural indicators that moisture has permeated the substrate.
Sagging ceilings and buckled floors are signs of advanced exposure and could signal longstanding leakage, which necessitates structural review. Even if you don’t know what you’re looking at, if you document these changes, even in a crude table with location, date and severity, it’s easier to show a tradesperson how damage is evolving.
3. Odors
Detect musty, earthy, or mildew-like odors in bathrooms, kitchens, basements, and around appliances, which are common areas where hidden dampness or early mold can start developing within 24 to 48 hours. A wet-paper or humid-room odor combined with visible dampness is a tell-tale sign of recent leakage.
Odors that smell like sewage indicate a sewer drain or line problem, not fresh water plumbing. Maintain a log of odor locations and intensity to focus on the source prior to opening walls.
4. Sounds
Listen for steady drips or subtle trickles, or the sound of running water when nothing is on – they’re signs of active leaks behind walls or under floors. About: Audible Leak Indications Gurgling, hissing or bubbling from drains and pipes could indicate trapped air, semi-blockages or pressurized leaks.
Acoustic leak detectors or smart water monitors can detect these low-level sounds that humans miss and assist in verifying a suspected area for inspection.
5. Mold Growth
Check for visible mold as black spots, greenish stains or white powdery patches near fixtures, behind appliances and inside cabinets. Mold tends to follow chronic leaks and poor ventilation. Mold can develop within 24 to 48 hours and signals the leak has been present long enough to nourish growth.
Catalog and track impacted locations to evaluate the extent of infiltration. Prompt mitigation controls health hazards and limits additional losses.
Beyond The Surface
Concealed water damage is not noisy. Tiny slow drips can last weeks or months and only leave subtle hints. Use technology and regular inspections to detect what the eye overlooks and catch gradual losses before they develop into structural issues or massive bills.
Moisture meters and professional leak detection services find damp behind walls, under floors and inside ceilings. A moisture meter provides an immediate scan on drywall, timber and subfloor, highlighting areas that appear dry but sequester water. Experts bring infrared and sonic stethoscopes. Thermal scans indicate cool spots where water runs, and listening devices detect the sound of drops or water flowing within voids.
A persistent low leak behind a bathroom wall might show a subtle cool band on a thermal scan and a gentle rushing hiss on an acoustic probe. Minor stains and tiny ceiling spots are frequently the initial visible indicators of hidden leaks. A small brown spot on a ceiling or a crescent stain along a baseboard can denote a persistent drip overhead or in the wall.
Examine joints and connection points in the vicinity of these stains. Heat-induced stress and subtle movement manifest most often at fittings. Examine exposed piping and outdoor plumbing in summer when metal expands and seals relax. Test for moisture surrounding hose bibbs and irrigation attachments that rest in direct sun.
Keep an eye on your water usage and your bills. A consistent increase in the water bill, when routines remain unchanged, can be an indicator of a concealed leak. Persistent drainage, even slow, accumulates into wasted utility cost. Install basic leak detection or water sensors around appliances, under sinks and in basements for early warnings.
A sensor under a laundry tray or by a hot water heater can catch a drip way before mold pops up. Watch replaced areas for continued moisture. If discoloration or moisture returns following a patch, the underlying problem could be a vent malfunction, broken pipe, or outdated joint that requires replacement, not a band-aid.
In flood-prone or saturated-soil areas, such as portions of the southeastern and northwestern coasts, water can intrude into foundation cracks and sewer lines, generating persistent issues that cosmetic patches won’t resolve.
-
Identify any unusual behavior in conversations.
-
Look for changes in body language.
-
Pay attention to inconsistencies in stories.
-
Notice shifts in tone or attitude.
-
Observe reactions to specific topics or questions.
-
If no visible stains or paint bubbling, record the location, size, and rate of growth.
-
Moisture meter reads above baseline — log readings and dates.
-
Increased water bills without usage change — compare monthly consumption.
-
Repeat wet after repair — repair method and follow up.
-
Sensor or alarm events capture time, duration, and sensor type.
-
Outdoor pipe checks in heat test fittings and search for damp earth.
-
Freeze-thaw risk in cold climates. Record insulation condition and any pipe bulging.
Material Reactions
Various construction materials react differently, both physically and chemically, to leak water. Watching those reactions assists in finding leaks, dating them, and scheduling repairs. Heat stress and joint degradation are often early symptoms before a full failure, discoloration on copper tubing, or deposit buildup. Following are material-specific indicators and practical inspections to inform review and record keeping.

Drywall
Soft spots, bubbling and sagging in drywall indicate recent or active water intrusion. Press gently on the area to test for loss of rigidity. Cracking and flaking tend to come soon after as compounded moisture softens paper-faced panels and the gypsum core starts to dissolve.
Stained areas, ranging from pale yellow to deep brown, chart moisture routes and can signal hidden drips in walls or ceilings. Mold and mustiness indicate extended exposure. Employ a moisture meter at suspected areas and mark down every damaged spot so repairs can be triaged and concealed leaks hunted.
Wood
Warping, cupping, and splitting happen to wood floors, trim, and cabinetry when water changes grain and glue bonds. You can often see it near sinks, dishwashers, or below vanities. Stains or discoloration occur where water collected or ran down grain lines.
Inspect near plumbing fixtures and supply lines for corrosion or deposits on adjacent metal, indicating prolonged seepage. Spongy, weakened areas betray rot. Test with a screwdriver at the edge of the paint to see if it sinks in. Record all impacted wood components and indicate if they are surface, structural, or need replacement of members.
Concrete
Cracks, efflorescence (white powdery salt) and persistent damp patches on slabs, foundations or basement walls indicate seepage and capillary action. Uneven settling, heaving or surface spalling can ensue when leaks erode supporting soils or slab leaks erode foundations.
Material Reactions: Mold and mildew on concrete are common at points of poor drainage. Examine where saturated soil is in contact with the foundation and document for underpinning or excavation decisions. Remember, slab leaks can lead to erosion that compromises foundations.
Flooring
Buckling, lifting or separation of tile, laminate and hardwood display where glue bonds broke from moisture. Edges, seams and transitions tend to expose first. Soft spots, discoloration and wet underlayment are pervasive beneath carpets and rugs.
Pick up the corner and check the padding and subfloor. Develop and maintain an inventory of flooring damage categories and specific damage locations to organize cleanup and restoration efforts, with annotations for likely culprits like frozen-pipe bursts, corrosion, or mixed-metal corrosion where copper meets steel.
Your Action Plan
Begin by turning off the main water valve as soon as you confirm a leak. Stopping the flow limits immediate loss and reduces the risk of structural damage and mold. Know the location of your primary valve and practice shutting it off so you can respond immediately.
Once you close the valve, open taps to let the water drain from the lines and put buckets under to catch the drips. For homes with underground or remote valves, maintain accessible shutoff tools and visible labels so any household member can locate them.
Install and utilize smart water leak detectors and sensors to detect leaks in their infancy. Place sensors near common problem spots: under sinks, behind toilets, next to water heaters, in basements, and under washing machines.
Select gadgets that dispatch mobile alerts, track water consumption patterns, and connect to a smart water app that can automatically turn off water if necessary. Leak systems reduce the amount of time it takes you to respond and can catch those slow, persistent drips that fly under the radar.
Pair sensors with humidity monitors in basements and bathrooms. Stubborn humidity in excess of recommended levels is frequently an indicator of lurking leaks.
Record all accessible damage right away with photos, video, and a written inventory of impacted locations. Photograph leaking stains, warped floors, bulging paint, mineral deposits, and any mold growth from a variety of angles using scale references such as a ruler.
Record dates, room locations, suspected cause, and any steps you took, like closing the valve. Maintain digital copies backed up in the cloud and a physical folder for repair receipts and inspection reports. It’s important for insurance purposes and for following up if the repairs didn’t actually fix the problem.
Arrange timely plumbing repairs with expert plumbers to repair leaks and revive your system. Hire licensed plumbers who give written estimates and describe whether to patch, replace sections, or replace fixtures.
Inquire about warranty on work and parts. For major damage, work with restoration pros who do drying, mold remediation, and structural repairs. Follow up with post-repair inspections quarterly and do monthly quick checks under sinks, around toilets, and in basements to snare new problems early.
Weekly, seasonal, and monthly inspections lower long-term risk. Perform a thorough home inspection quarterly, including attics, crawl spaces, and behind appliances.
Add seasonal checks: roof and gutter review in spring, AC condensate lines in summer, and gutter clearing in fall. Take notice of humidity and document inspections and repairs to identify patterns and substantiate reports.
If you act quickly and keep good records, you’re gonna minimize the damage and long-term costs.
Insurance Implications
Homeowners need to verify with their insurance policy what kinds of water damage are or are not covered. Most policies cover sudden and accidental leaks, like a burst pipe or a tree crashing onto your exterior plumbing during a storm. Policies often exclude damage from slow leaks or extended neglect. Coverage differs by insurer and geography, so verify limits, exclusions, and any required deductibles in your own policy.
Check your policy for details on sudden versus gradual damage. Sudden, accidental leaks are typically covered, whereas gradual leaks caused by lack of maintenance generally aren’t. For example, if a pipe bursts and causes damage, check to see if the repair costs are greater than your deductible. A $1,000 deductible requires you to pay the first $1,000. A $750 loss would be out of pocket.
Remember, leaving a tub running and overflowing is generally considered accidental, but intent and negligence can play into a claim.
Insurance ramifications are significant. If you even suspect a leak, take date-stamped photos and video of wet or warped materials, active drips, stains, and more. Turn off water if safe and document your actions. Call a licensed plumber and save appointment notes and written estimates. A fast response minimizes secondary harm and reinforces the argument that the loss was abrupt instead of incremental.
Unpatched leaks, late reporting, or poor maintenance frequently result in claim denials or reductions. Insurers might probe if damage seems more established. Mold, layered staining, or multiple patch jobs can hint at sneaky drips. Routine maintenance logs assist.
For instance, thermostat logs indicating the house was maintained at or over 13 degrees Celsius (55°F) in winter can support frozen-pipe-prevention measures. Receipts for winterizing, pipe insulation, or prompt repairs also assist in making your case.
Prepare a comprehensive inventory to support your claim. List damaged items with purchase dates and approximate values, and attach repair receipts, contractor reports, and plumber invoices. Include communications with professionals and with the insurer, such as emails, call logs, and written estimates.
For partial losses or smaller incidents, itemized lists and before-and-after photos help adjusters evaluate replacement costs and depreciation.
Think about where coverage might differ. Storms that tear down trees and burst pipes are usually covered perils, but multi-month seepage from an upstairs bathroom may not. If the loss is close to your deductible, consider repair now versus later.
Maintain detailed documentation; it enhances your likelihood of complete reimbursement and expedites resolution.
Conclusion
Early spotting of water damage cuts repair costs and stops mold growth. Check for wet spots, paint peeling, warped floors, and musty smells. Inspect under sinks, behind appliances, and near the water heater for slow drips and stains. Follow any increase in your water bill and check for soft spots in ceilings and walls. Take immediate action to minimize damage and protect your home. Hold photos and receipts for claims. Small leaks have obvious telltale symptoms. Big leaks cause quick and extensive damage. Act quickly, document thoroughly, and choose a licensed plumber for permanent repairs. Here’s a quick checklist you can print out or share. I can create one immediately.
Frequently Asked Questions
What are the earliest signs of a plumbing leak I can spot at home?
Check for unexplained moisture, ceiling or wall discoloration, mildew smells and elevated water bills. These usually emerge prior to obvious puddles or mold.
How can I tell if a stain means active water damage?
New stains are slick and damp and can darken. If the area continues to expand, starts to smell musty, or you hear drip sounds, it’s probably still leaking. Test with a dry cloth to ensure the area is wet.
Can small leaks cause structural damage?
Yes. Even slow leaks can soften and wear down wood, drywall, and building joints over months. Fast repair keeps out rot, sagging floors, and expensive structural fixes.
When should I call a professional plumber or water damage specialist?
Call a plumber when you notice signs of water damage from a plumbing leak, invisible moisture, or an increase in water bills. Call a water damage specialist if you experience pervasive moisture, mold growth, or structural damage.
Will my homeowner’s insurance cover plumbing leak damage?
Coverage varies based on your policy and cause. Sudden, accidental leaks are usually covered. Slowly destructive abandoned leaks typically are not. Communicate with your insurer and document the damage.
How quickly does mold grow after a leak?
Mold can begin in 24 to 48 hours in damp conditions. Extract moisture rapidly to control growth and minimize health concerns.
What immediate steps should I take to limit damage before help arrives?
Turn off the water, relocate valuables, open up and dry the air, and blot up surface water. Photograph for insurance and call experts to repair and dry.
Key Takeaways
Understand typical issues such as drain clogs, incorrect installation, and pump or hose malfunctions to target fixes where…
Key Takeaways
We recommend changing your evaporator pad at least once a year, prior to the heating season. Coordinate the change with…