Sump Pump Not Working? How to Troubleshoot and Fix It
A sump pump that won’t turn on is almost always a power, float switch, or clog problem. Start by confirming the breaker, outlet, and cord deliver electricity, then check whether the float moves freely and the impeller and discharge line stay clear. For Parker, CO homeowners, a frozen discharge pipe is a common winter culprit worth ruling out first.
This guide walks through each check in order, from the simplest power test to mechanical failures that may call for a licensed plumber. Many fixes are safe to handle yourself, but recurring breaker trips, electrical damage, or a pump past its 7-to-10-year lifespan are signals to call a pro before a storm turns a small problem into a flooded basement.
Key Takeaways
-
Begin by verifying that the sump pump has power. Test the circuit breaker, outlet, and power cord for any problems or damage.
-
Troubleshoot the pump components, including the float switch, impeller, check valve and discharge pipe, to determine potential mechanical or operational issues.
-
Address environmental factors. Keep the sump pit clean, prevent frozen discharge lines, and make sure the pump can handle the local water volume.
-
You can help extend the sump pump’s life and avoid surprise failures with routine maintenance, which should include cleaning, testing the system, and professional inspections.
-
Since safety and effectiveness are paramount, weigh your options between DIY and professional assistance depending on the severity of the issue and your confidence.
-
Think about taking the sump pump a step further by installing new-age sump pumps, alarms, and budgeting for upkeep to minimize the likelihood of disaster down the road.
A sump pump failure can cause water accumulation and potential damage in basements or crawl spaces. Typical causes are power outage, blocked pipes, seized switches or defective components.
Noticing early warning signs such as odd noise, water pooling, or the sump pump not starting allows you to prevent more serious problems. To assist with simple troubleshooting and repair, this guide outlines what steps anyone can take prior to seeking professional assistance.
Initial Power Check
A sump pump that won’t start is usually a power problem. Before checking for mechanical issues or clogging, your first order of business is to check things from their power source. A good initial power check mitigates the threat of water damage by identifying and addressing easy issues early and aids in localizing where the real trouble is.
The Breaker
Begin by finding the circuit breaker for the sump pump. If the breaker is tripped, reset it and try the pump. Occasionally, a breaker will immediately trip again. If it trips a lot, it could be a short in the wiring or the pump itself, or you may have too many appliances on the same circuit.
Overloaded circuits can lead to tripped circuit breakers on a regular basis and could potentially even cause a fire if not taken care of. If the breaker continues to trip, resist resetting it over and over and contact a licensed electrician to rule out more serious electrical issues and damage.
The Outlet
Plug something else, like a lamp or phone charger, into the outlet to see if it’s working. If that doesn’t power on, the outlet is suspect. Loose wires, burnt marks, or melted plastic around the outlet are all signs of damage that can interfere with the power flow.
Replacing a damaged outlet with a new one can bring it back to life if you’re up for some light electrical work. Verify with a voltage tester that the outlet provides the correct voltage, typically 120 volts for a standard U.S. sump pump outlet. Dependable power at the outlet is critical for the sump pump to operate as intended, particularly when it rains.
The Cord
A damaged power cord is a common and easily missed cause of pump failure. Inspect the entire cord for nicks, abrasions, or bare wires. Save your extension cord for your camping lantern because it cannot carry enough current. Eventually, it breaks or frays and leaks water into your pump.
Never use a damaged power cord and replace it immediately to minimize the risk of electric shock or fire.
-
Check for visible cuts or abrasions
-
Look for bent or loose plug prongs
-
Test the cord by wiggling it at both ends
-
Ensure both ends are firmly plugged in
-
Replace the cord if you spot any damage
If your sump pump has two cords, both need to be plugged in and unfrayed. For single-cord models, dump around 5 gallons into the pit and observe the activation. It’s a handy quarterly maintenance test.
If the pump continues to fail after these checks, it’s possible that the float switch is stuck or the pump is clogged. When in doubt, bring in a pro to play it safe.
Systematic Diagnosis
Systematic diagnosis is your friend when a sump pump fails. Decomposing the diagnosis helps you rapidly home in on what to repair and avert water damage. Seasonal inspections and timely fixes will keep your house dry and your pump going for years!
-
Let’s begin by making sure the sump pump is plugged in and receiving power.
-
Check the pump’s age. Most have a lifespan of 7 to 10 years. The pedestal variety lasts up to 15 years.
-
Attention: If the pump runs nonstop or too often, this indicates issues.
-
Check each component: float switch, impeller, check valve and discharge pipe.
-
Wash each component if required to remove residue or deposits.
-
Use the manufacturer’s troubleshooting guide for model-specific steps.
-
Document what you discover and the steps taken for future reference.
-
Determine if fixes or complete replacement is optimal, particularly if expenses increase.
1. The Float Switch
Float switches get jammed by all manner of debris, so begin by checking if something is blocking it. A stuck float can prevent the pump from activating or deactivating. This is typical with grime or buildup around the switch.
Rinse the float switch with water and a soft brush. Even a thin film of gunk will kill it. Lift the float to run a manual test. The pump should initiate immediately. If not, the switch is bad.
A failed float switch is replaceable and can resolve the problem. Checking and rinsing the float every few months prevents these problems and maintains a reliable sump pump.
2. The Impeller
Clogs or debris are common culprits in impeller issues. Take off the pump cover and look for anything obstructing the impeller. Purge any grime or buildup.
Hearing grinding or weird noises when the pump spins indicates a broken impeller. If cleaning doesn’t help or the impeller appears worn, replace it.
A cracked impeller will prevent the pump from circulating water, endangering a flooded basement.
3. The Check Valve
A functional check valve prevents water from flowing back into the pit. Check the valve for any obstructions or fractures. Just be sure that it’s installed in the right direction.
Arrows on the valve indicate correct flow. Faulty or backward valves are a common reason pumps run too often or too long. If the check valve is defective, replace it immediately to avoid pump overload or flooding.
4. The Discharge Pipe
Inspect the pipe for clogs or icing, internally and externally at the outlet. Clear any debris that might be impeding water flow.
Search for leaks, since leaks will result in water damage. Verify pipe slope away from the sump pit. Those little things like fixing slope issues help prevent backflow and keep the system working efficiently.
Mechanical Issues
Mechanical problems are one of the most frequent causes of sump pumps going out. They could be caused by worn-out parts, debris build-up, or simply wear over time. With regular checks and proper upkeep, you can avoid most of these failures and have your pump chugging along for years.
Overheating
Overheating is a common indicator of problems, particularly if the motor is hot to the touch or the pump cuts out mid-cycle. It frequently occurs when the pump runs dry or without sufficient water, which strains the motor. Be sure to always unplug the pump and let it cool down before attempting to restart it.
Ensure adequate clearance around the pump for air circulation. Blocked vents can trap heat and cause the motor to overheat. If the space is too cramped or cluttered, shift obstructions or sweep up dust to aid heat dissipation.
Motor: Look for signs of wear like burnt smells, melted wires, or warped plastic. These all indicate that they require closer examination or perhaps replacement. A pump that overheats frequently might not have the lifespan you’d anticipate, even with regular maintenance.
Strange Noises
Strange noises from a sump pump can indicate mechanical problems. Grinding, rattling, or banging noises are common warning signs. These could be due to debris stuck in the impeller or loose components inside the pump housing.
If you hear a new noise, turn off the power and check the pump before using it again. Occasionally, small pebbles or dirt can get trapped and jam your impeller. Cleaning out the impeller by disconnecting the power and gently removing debris can solve many noise issues.
Or perhaps it’s worn bearings or a loose shaft.
|
Noise Type |
Possible Cause |
|---|---|
|
Grinding |
Debris in impeller, worn bearings |
|
Rattling |
Loose parts, broken mount |
|
Banging |
Float hitting pump or pit |
|
Humming |
Stuck impeller or blocked pipe |
Taking care of noise promptly can save more expensive damage down the road. If the same noise returns after a repair, this could be an indicator that the pump is reaching the end of its lifespan.
Constant Running
A sump pump that never shuts off is a waste of energy and will wear out quickly. This can happen as a result of a stuck float that occasionally gets snagged on the pit wall or obstructed by debris. Make sure the float rises and falls freely.
If the discharge pipe is clogged or frozen, water cannot exit the pit, causing the pump to continue running. Frozen pipes are a typical winter problem in colder climates. In these cases, employ insulated pipes or heat tape.
Double check that the pit size and inflow correspond to the pump’s capacity. If your pump is undersized, go bigger. Tweak any settings or swap out a bad float or switch to keep it humming.
Environmental Impact
Environmental impact is quite significant for sump pumps. Weather, debris, and water volume impact the effectiveness of the pump and its environmental impact. In case sump pumps give out, the basement may be flooded, thus wasting water and potentially harming soil and groundwater.
Mold and mildew can flourish after water damage, resulting in foul odors and health hazards. Routine inspections and maintenance minimize these hazards and assist in maintaining the system in good condition.
Debris Buildup
Dirt, rocks and other debris enter the sump pit, which can clog the pump, reducing its pumping capacity and increasing the likelihood of breakdown. Clogged filters don’t just cause the system to run slower; they cause it to run harder and use more energy. Over time, this can result in increased energy bills and greater pump wear.
Take a look around the sump for plants, dirt, and other debris sources that could wash into the pit. Install screens or barriers that assist in preventing waste from escaping. Arrange regular cleanings.
Clear any debris accumulation from the pit, float, and intake opening a minimum of twice annually. This keeps the system running optimally and reduces the potential for leaks and water waste.
Frozen Lines
In cold weather, the discharge pipe can freeze. Ice dams block water, which then backs up and can flood and damage soil and groundwater. If you notice frozen pipes, defrost with warm, not hot, water or a mild heat source.
Don’t use open flames, such as candles, which can lead to pipe damage or fires. Insulate pipes with foam sleeves or wraps to maintain them above freezing temperatures.
Apply heat tape to the sections of the discharge line most exposed to cold. Inspect all your connections in winter to catch early stage freezing. These steps keep the sump pump working all year and prevent water from infiltrating back up into living spaces.
Overwhelming Volume
A hard rain or melt may swiftly inundate the sump pit. A little or old pump may not keep up, resulting in backups and basement flooding. This leads to immediate water damage and wastes copious amounts of water.
It can negatively impact the local environment. If flooding occurs frequently, verify the pump’s capacity. If necessary, upgrade to a pump with a higher flow rate.
Think about a backup pump for added protection during storms. Look at your exterior drainage, ensuring gutters and drains direct water away from your structure. All of these transformations help keep water out, alleviate stress on the primary pump and do a good job securing your home as well as the environment.
Proactive Maintenance
Proactive sump pump care maintains reliability and long-term function. A maintenance checklist is key. Check the pump and pit every 3 to 4 months, remove debris, inspect the discharge line, test the float switch, and replace wear parts such as valves or seals.
These measures help minimize the likelihood of unexpected failures and flooding, particularly in wet seasons. Winterize by insulating and sloping discharge lines to prevent freezing or clogs. For older pumps, which are 7 to 10 years or more, watch for recurrent issues or low pressure, which could signal it is time for a change.
Regular Cleaning
Part of your preventative maintenance should include cleaning the sump pit to prevent buildup that can block the pump. Clear the pit of dirt, sand, and debris as these can jam the float or damage the impeller.
Flush the outflow pipe to keep water flowing, which relieves stress on the pump and decreases clog risk. Seasonal cleanings, particularly prior to heavy rains, prepare the system for its most demanding stretch. A wet/dry vac is used to clean a pristine interior. This expedites the process and removes fine grit from tricky corners.
System Testing
Test the sump pump each quarter by pouring 3 to 4 gallons of water into the pit until the float pops up. When the pump turns on, it should respond immediately and discharge the water.
Be on the lookout for sluggish response or weak flow, as this could indicate a clogged intake or a dying motor. If you have a backup pump, either battery or water-powered, test it by shutting down the main power and repeating the water test.
Record test dates and notes on performance. This log can aid in identifying trends and tracking repairs over time.
Professional Inspection
A once-a-year check by a qualified plumber or technician exposes hidden issues. They inspect electrical connections, seals, the float system, and the pump in general.
If they discover worn or obsolete components, they could recommend switching out switches or upgrading to a more efficient model. For intricate rewiring, putting in a new motor, or repairing deep pipe clogs, the pros deliver peace of mind and long-term solutions.
Making sure all the pieces work in concert is key, especially for aging units or ones in flood-prone locations.
My Professional Take
Navigating the best path for sump pump repair, upgrades, and maintenance requires a combination of system clarity, comfort, and budget. Sump pump issues can vary from minor blockages to major electrical issues, so understanding when to act and when to call a professional is crucial.
DIY vs. Pro
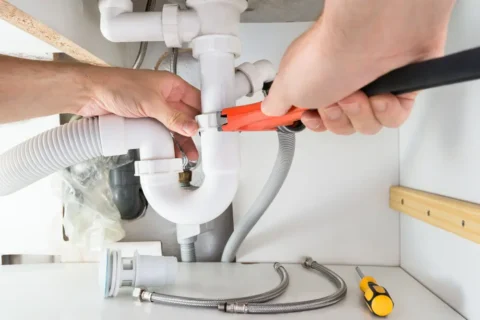
DIY repairs are seductive for small fixes, like unclogging a discharge pipe or ‘gut-check’ testing the pump by emptying a pail of water in the pit. These require simple implements and a bit of persistence.
Replacing a switch, inspecting the check valve, or debugging recurring failures could require additional expertise. If you’re uncertain about electrical safety or if the pump continues to not work after easy fixes, it’s best to contact a licensed plumber.
![]()
A sump pump’s life expectancy is typically 7 to 10 years. Regular breakdowns or diminished performance can signify that it’s time for a replacement, not another fix. Safety first as water and electricity can be a dangerous cocktail. Other fixes, such as repairing wiring or resizing a pump, are best left to pros with the proper training and tools.
-
DIY Repairs:
-
Pros: Save money, handle minor issues fast, learn basic upkeep.
-
Cons: Risk of mistakes, no warranty on work, limited to simple fixes.
-
-
Professional Services:
-
Pros: Expert diagnosis, warranty and insurance, safe for complex issues.
-
Cons: Higher upfront cost, may take more time to schedule.
-
Essential Upgrades
|
Upgrade |
Features |
Benefits |
|---|---|---|
|
Backup Battery System |
Runs pump during power outage |
Prevents flooding, adds safety |
|
Water Level Alarm |
Alerts if water rises too high |
Early warning, quick response |
|
High-Quality Check Valve |
Stops backflow to sump pit |
Extends pump life, prevents issues |
|
Modern Sump Pump |
Efficient, durable, auto-switch |
Reliable, less upkeep needed |
High-end sump pumps include automatic switches, alarms, and superior build quality. A water level alarm provides an immediate alert should the pump fail or water creeps up too quickly.
If you upgrade to a good check valve, it will prevent back flow and pump overwork. It’s worth investing in a trustworthy pump. They don’t cost that much more and you’ll avoid the hassle of frequent repairs and rest easy during storms or heavy rain.
The Real Cost
Repair and replacement costs differ. Easy repairs, such as swapping out a valve or cleaning a pipe, are typically cost effective. A new sump pump, particularly one with backup power or alarms, can be a bigger investment.
Routine upkeep, such as annual inspections and swapping out minor components before they break, prevents expensive water damage down the road. Homeowners’ insurance might cover a few sump pump failures, but policies vary.
Know your coverage so you know what to expect if your pump breaks. Budget for emergency repairs because a failed pump in a storm can lead to rapid and expensive basement flooding. Flushing the pump every few months and checking pipes for blocks keeps you ahead of most issues.
Conclusion
If your sump pump ceases to function, begin by checking the fundamentals. First, ensure it has power. Check for a clogged switch or blocked drain. Clean out any dirt or sticks that you discover. Listen for loud noises or leaks, as those indicate worn components. Try the pump after rain or storms to see if it works right. A quick glance every few months catches small issues before they become serious. A lot of people call in a pro for major repairs or if water continues to accumulate. Be proactive with easy checks and you reduce repair expenses. For peace of mind, have a backup handy. Be aware, be sanitary and ask for assistance if you have to.
Frequently Asked Questions
What should I check first if my sump pump is not working?
First, verify the power. Check that the pump is plugged in and the breaker is turned on. The most common cause is a lack of power.
How do I know if my sump pump has a mechanical problem?
Hear any odd noises or vibrations? Check the float switch and impeller for clogging. If these are stuck or damaged, the pump may not function correctly.
Can environmental factors affect sump pump performance?
Indeed, dirt, junk, or a rising tide may be clogging or overpowering your sump pump. Remove any debris from the vicinity of the pump frequently to avoid these problems.
Is it safe to repair my sump pump myself?
Easy stuff like cleaning or resetting the pump can be done safely. If it’s an electrical or major mechanical issue, reach out to a pro to prevent injury or damage.
How often should I maintain my sump pump?
Test your sump pump every few months by dumping water into the pit. Clean the pump and pit at least twice a year to maintain dependable operation.
What are the signs that I need to replace my sump pump?
If it’s cycling frequently, making odd noises, or failing to turn on, it might be time for a new one. The lifespan of most sump pumps is around five to ten years.
Can a failed sump pump cause property damage?
Indeed, a malfunctioning sump pump can be the cause of basement flooding and water damage. Fix problems quickly to save your home.
Key Takeaways
Brown water typically results from rust, sediment, or minerals added by corroded pipes, disrupted mains, or alterations in…
Key Takeaways
Pinpoint the leak and joint type prior to selecting a repair method so you apply matching materials and tools.
Match…