
How to Fix a Weak Flushing Toilet in 6 Easy Steps
Key Takeaways
-
Try to determine if the weak flush is due to low tank water, mechanical parts, or a partial clog and note if any waste remains to decide your next step.
-
To fix a weak flushing toilet, check that the tank water reaches the fill line and adjust or replace the fill valve or float if levels are low.
-
Check for a worn flapper and fix the lift chain so the flapper opens fully and reseals after each flush.
-
Clean the rim and siphon jets and clear mineral buildup with vinegar or a brush to enhance water flow and the siphon effect.
-
Use a plunger or plumbing snake for partial drain clogs and keep an ear out for gurgling or slow drains as symptoms of vent stack or main-line obstruction requiring a pro.
-
Balance repair versus replacement for aging or inefficient toilets. Explore contemporary low-flow options to conserve water. Keep up with regular maintenance and appropriate usage to avoid subsequent weak flushes.
===
HOW TO FIX A WEAK FLUSHING TOILET is a series of easy instructions to return your flush to normal strength. A weak flush can be caused by low water level, a clogged rim, a worn flapper, or mineral buildup in the jets.
Simple tools and generic parts typically have them fixed in an hour. The below sections provide clean checks and fixes with low-cost solutions and when to call a plumber.
Diagnose the Flush
Begin by observing the overall behavior of the toilet to narrow the problem: low tank water, mechanical faults inside the tank, or a partial clog in the drain each give different signs and need different fixes. Observe if the bowl flushes waste with a single flush or leaves residue and if the flush strength changed abruptly or diminished gradually.
Sudden loss of power tends to indicate a fresh fault, such as a valve, supply, or something in the trap, while gradual loss usually represents mineral buildup or wear.
1. Check Water Level
If the tank water sits more than 25 mm (1 inch) below the top of the overflow tube, then the flush may be volume deficient. Lift the tank lid and see the fill line or marked level on the tank wall. Adjust the float or fill valve to raise the level.
On cup-style floats, slide the clip. On float balls, bend the arm or replace the valve with a new fill valve. Check for leaks or hairline cracks that siphon water between uses. Check that the overflow tube isn’t too low. If water spills into it, the tank never fills to full charge and flush power drops.
2. Inspect the Flapper
A leaky flapper or one that closes too soon decreases the amount and power of the flush. Check for warping, soft spots, or mineral crust; it might not flush properly. Swap out any flapper for a new rubber or silicone unit.
Lots of toilets benefit from a high-performance adjustable flapper that allows you to tune the open time. Observe the flapper when you flush. It should remain open long enough for a complete tank dump and then seal closed. Tweak the flapper, if necessary. Little adjustments go a long way toward bringing back full flush power.
3. Test the Lift Chain
Chain length impacts lift and timing. Shoot for about 12 mm (½ inch) of slack so the flapper opens fully but still closes on its own. Short chains keep the flapper raised and create constant flow, while long or tangled chains do not allow the flapper to fully lift.
Test the handle a few times to ensure consistent, smooth operation and full flapper travel.
4. Examine the Jets
Rim jets and the siphon jet aim water to form the bowl sweep. Obstructions here sever flush force. Clean rim holes and main jet with a brush, and use white vinegar to dissolve mineral scale if there are deposits.
Monthly cleaning with mild cleaners keeps jets free in hard-water areas. Make sure all jets flow evenly. If one flows less, then part of the bowl gets little force and waste may remain.
5. Rule Out Clogs
Plunge first for soft blockages and use a snake for deeper trapway clogs. Persistent weak flushes sometimes hide partial obstructions or objects. Stay clear of paper and flushable wipes – they’re notorious for causing repeat blockages.
Inspect the supply valve – if partially closed or clogged, the tank refills too slowly and the flush will lose strength.
Advanced Obstructions
Advanced obstructions are blockages or system faults that are more than just a clog in one bowl. These issues can include a clogged main drain or sewer line, backup from a roof vent (vent stack), or broken toilet parts. These usually involve multiple fixtures and require more than simple DIY measures to identify and repair.
Partial Drain Clogs
If the toilet drains slow from the bowl, it often indicates a partial clog in the toilet trap or further downstream in the main drain. Try a flange plunger first. Place it so it seals the outlet and push with short, firm thrusts to create a pressure wave and dislodge material.
A closet auger, or toilet snake, can reach deeper obstructions without removing the toilet. Feed gently, rotate, and pull debris back out. If several toilets or sinks are slow, consider a main sewer restriction or shared drain line problem as opposed to one toilet.
Don’t flush wipes, tampons, cotton balls or too much paper. These accumulations are what keep clogging your pipes. Keep a record of how regularly clogs recur, as frequent repeats may indicate a more systemic issue like tree roots in the sewer or a sagging pipe or partial collapse that requires professional investigation.
In houses, a clogged main sewer or compromised water line can lead to weak flushes across multiple toilets, not just the one you observe. Symptoms of advanced drain clogs include:
-
Slow bowl refill and weak flush power
-
Multiple fixtures slow or backing up
-
Recurrent need for plunging or snaking
-
Foul odors from drains or slow sink drains
Advanced partial clogs might require motorized drain augers, hydro-jetting, or a camera inspection to identify and remove safely.
Vent Stack Blockage
Weak flush and bubbling or gurgling in the bowl may indicate a clogged vent stack. Check the roof vent for debris, bird nests, leaves, or snow that can seal the stack and alter system pressure, resulting in low water levels and weak flushes in toilets throughout a building.
Try to carefully clear the vent with a garden hose from the roof or a plumber’s snake. Run water down the vent to hear if flow is restored to normal and to hear trap siphon action resumed.
Remember, vent blockages can occasionally masquerade as main-line clogs, so look for slow drains as well. Routine cleaning of rim feed holes, jet orifices, and the vent avoids accumulation of hard water and mineral scale that reduce component life and intensify obstructions.
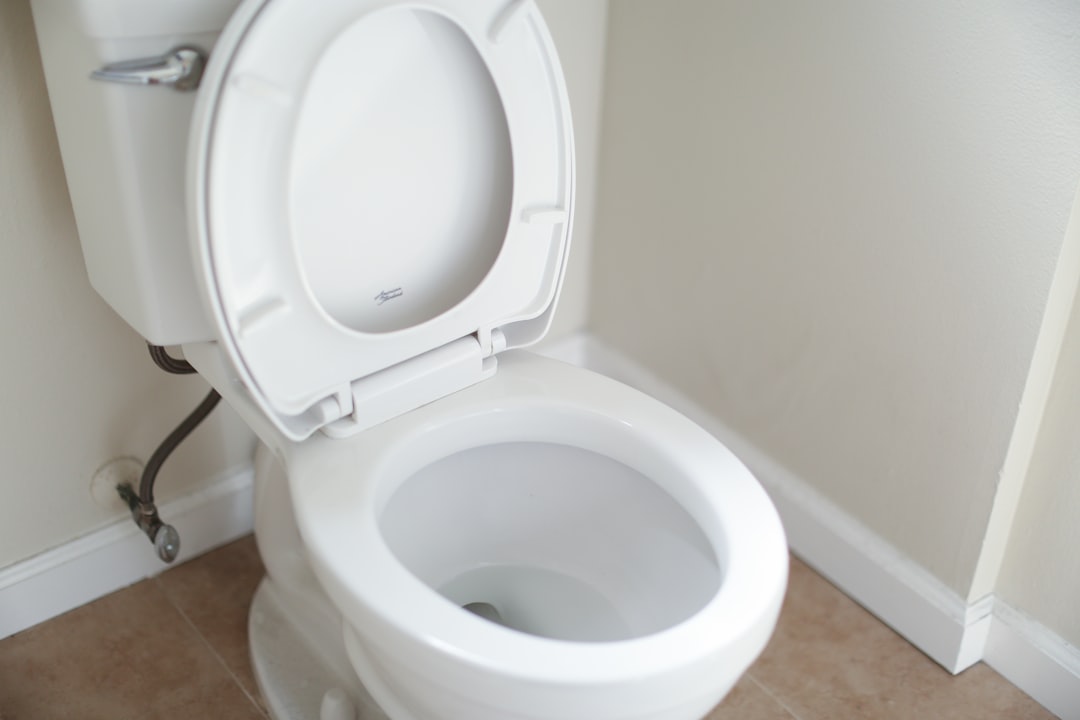
If fixing the flapper or water level provides a stop gap repair, still look for advanced problems. Bad installation or old fill valves and flappers usually hide the true issue. For sophisticated sewer or main-water malfunctions, employ custom solutions or call in a professional plumber.
Internal Mechanics
Knowing your tank and bowl parts sheds light on why a toilet flush feels feeble. The tank has to hold and flush that water effectively. The bowl and trapway have to move it fast. Examine the fill valve, flush valve, flapper, rim jets, siphon jet, and trapway. Check that seals and gaskets on the tank-to-bowl and valve bases are firm.
After every test flush, observe for fluid motion and adequate seal. Swap tired components for a Fluidmaster all-in-one kit or similar to revive dependable, silent flushing.
The Fill Valve
Set your fill valve such that the water level is within 1 inch of the top of the overflow pipe. If it is too low, your flush power decreases. If the tank won’t get that high, the valve might be failing or the supply valve at the wall may be partially shut or clogged.
Clean fill jets and inlet screens as scale and grit will slow refill and reduce water available for the rim jets and siphon. Consider a 400H fill valve upgrade for steadier flow and quieter noise. A leak at the base causes a slow leak that reduces tank volume silently and reduces flush power.
The Flush Valve
Check the flush valve opening and ring for mineral deposits, debris, or corrosion that diminish flow area. The flapper has to seat fully and hold a seal. If it closes too soon or the chain is too slack, more than about ½ inch, water dumps inefficiently and the bowl clears poorly.
Swap hard or warped flappers and maybe even go for a performance flapper or a full everything kit to improve lift and sealing. Corroded or cracked valve assemblies must be replaced to return the tank to a full, fast release of water and prevent continuous water wastage between flushes.
The Siphon Effect
The siphon jet and trapway form the suction that clears the bowl. If those passageways become partially clogged, the suction diminishes and flushes become incomplete. Clean rim feed holes, siphon jet hole, and the trapway with a brush and mild cleaner bi-monthly to prevent lime and mineral buildup that slows flow.
Check that the rim jets are actually squirting into the bowl because blocked rim jets diminish bowl wash and hinder siphon start. Older toilets or first-generation low-flow models may still have trouble even when clean. In these cases, component upgrades or replacing the bowl may be required to restore confidence in flush.
The Upgrade Debate
The decision to repair or replace a weak flushing toilet begins with a rapid inventory of symptoms, costs, and long term goals. Measure how often the problem returns, note any visible wear in the tank, and check basic items first: water level in the tank, rim feed holes, jet holes, flapper condition, and fill valve operation. Easy fixes can bring function back. Stubborn problems can merit an upgrade.
Repair vs. Replace
Consider quick fixes prior to splurging on a new unit. With wear, just replace a worn flapper, try an adjustable flapper to tune flush strength, clean rim feed holes, and set the tank water level to the manufacturer’s recommended mark. These steps often restore a strong flush.
If the toilet requires fixing every couple of months, actual maintenance costs can add up to more than replacement within a couple of years.
|
Item |
Typical cost (USD) |
|---|---|
|
Flapper replacement |
5–20 |
|
Fill valve |
15–40 |
|
Professional service call |
80–200 |
|
New standard toilet (basic) |
120–300 |
|
New high-efficiency toilet |
200–600 |
That’s the upgrade debate and age and model do matter. Older 6 gpf or worn gravity-feed toilets just may not perform, even after parts changes. If the bowl design is bad or the trapway is skinny, replacement provides a larger, more dependable upgrade.
Factor in local water rates and sustainability ambitions when evaluating lifetime costs.
Modern Toilet Tech
There are a number of features on modern toilets that enhance both functionality and the user experience. Just be sure to match features to need and budget. Search for 1.28 gallons per flush or lower for quantifiable water savings.
Dual-flush toilet options provide an option of water for liquid and solid flushes. Pressure-assisted ones deliver more forceful flushes but are louder. Rimless bowls or self-cleaning rims minimize buildup that clogs rim feed holes.
|
Feature |
Advantage |
|---|---|
|
1.28 gpf or lower |
Lower water use, cost savings |
|
Dual-flush |
More options, more savings |
|
Pressure-assist |
More powerful, less clogs |
|
Rimless/self-clean |
Simplifies cleaning, reduces blockages |
|
Wide trapway |
Reduced clog potential |
Suggest models that have great reviews and a track record of reliability. Verify local availability and water efficiency certification.
The “Flushable” Myth
Don’t trust labels that say wipes or hygiene products are flushable. Most of these products do not dissolve rapidly and can accumulate in trapways and sewer lines. That results in frequent clogs, sluggish drains, and increased service calls.
Only toilet paper; everything else in a bin. Common problems from non-dissolving materials include blocked rim feed holes, partial bowl drains, damaged septic systems, and more frequent need for professional snaking or hydro jetting.
Prevention is less expensive and easier than upgrading parts unnecessarily.
Deep Cleaning
Deep cleaning is an involved, meticulous process that extends past regular swiping. For a toilet with a weak flush, this work breaks up mineral build-up, rust, and grime that impede the flow and pressure of the water. It requires more time and elbow grease than a normal clean and occasionally needs specialized tools and cleaners.
It prevents trouble, extends the life of parts, and keeps the bowl and tank working as designed.
Rim and Siphon Jets
Rim feed and siphon jets are tiny holes that direct water during a flush, and when they plug up, flush power plummets. Take a small brush, flexible tube brush, or even a piece of stiff wire and clear out each jet hole. Work from the underside of the rim and from inside the bowl to reach various jet patterns.
Let the jets soak in hot (not boiling) water and white vinegar for around 30 minutes to break down some of the mineral deposits. For stubborn calcium or limescale, sprinkle on some citric acid powder or apply a commercial toilet descaler. Soak, then scrub again and run a few test flushes to check flow.
Ensure all jet holes are wide open. Take a flashlight and check the rim and siphon jet openings. If a hole is partially blocked, repeat the soak and brush steps. Clogged holes may need two to three cycles.
Maintain a log of your jet cleanings. Every few months is a good rule of thumb in hard-water zones. Repeat to stay sharp. If you’re a seasonal cleaner at home, make sure to add jet care to your spring and fall deep cleans.
If the jets remain blocked after cleaning, get a plumber to check inside the passages.
Tank Maintenance
Deep clean. Scrape sediment and debris off the bottom of the tank to prevent mechanical malfunction and weak flushes from poor fill or faulty valves. Turn off the water, flush to drain the tank, then scoop out sediment with a cup or use a water-compatible wet vacuum.
Check the overflow tube, fill valve, flapper, and other flush components. Clean parts with a mild detergent or tank-safe cleaner. Don’t use bleach or harsh acids, which can erode rubber seals and gaskets.
Swap out a worn flapper, corroded bolt, or deteriorated seal right away to restore the right timing and volume of the flush. Certain cleaners are actually tank safe and will have that stated on the label.
Using the right one prevents damage and keeps your parts humming. Tank maintenance is meditative for some and daunting for others, but a steady schedule every three to six months keeps problems small and manageable.
Long-Term Prevention
Long-term prevention keeps a toilet flushing strong and reduces the number of repairs. Regular maintenance and small habits prevent the majority of weak flush inducing causes from ever becoming desperate. Adopt a consistent regimen for water level, flapper, jets, and user habits.
Establish a regular maintenance schedule to check water level, flapper, and jets.
Establish a monthly inspection of the tank water level, flapper seal and rim jets. Compare your tank water to the manufacturer’s mark or set it approximately 5 to 7 cm below the overflow tube to begin with. That frequently provides sufficient power for a complete flush.
Identify a warped or hardened flapper and replace it if it won’t seat. Long-term prevention includes clearing rim jets with a small brush or thin wire to remove mineral buildup. Long-term prevention also involves descaling the bowl and jets with a descaling cleaner and leaving it to sit for several hours before scrubbing to dissolve stubborn deposits.
Just maintain a basic record of dates and activities so you can detect patterns or common lapses.
Avoid flushing anything except toilet paper to prevent clogs and plumbing issues.
Just toilet paper is made to break down rapidly. Wipes, sanitary products, cotton pads, and paper towels clog traps and reduce toilet lifespan. Educate the whole household on what goes in a bin, not the bowl.
If sewer lines are older or shared with other units, be stricter. Even “flushable” wipes can cause buildup. One slow, partial flush after non-paper can lead to mineral and organic deposits in jets and trapways, so choose prevention over repeated plunging.
Install high performance or adjustable flappers for long-lasting flush strength.
Opt for a flapper designed for your toilet’s flush volume. For toilets consuming 19 liters (5.0 gallons) or more, an unoptimized flapper will usually deliver consistent results. For low-flow or dual-flush systems, choose an adjustable flapper and configure it so the valve opens completely to deliver a robust flush but shuts at just the right time to conserve water.
Try different places and log the optimal one. About long-term prevention, replace flappers every few years or when you see surface wear. Couple a quality flapper with a pristine fill valve to maintain refill cycle timing.
Educate household members on proper toilet use to ensure a reliable bathroom experience.
Advise users to wait a few hours or overnight if a flush feels feeble. Letting the toilet sit can reset and clear small airlocks. Show simple checks: lift the tank lid, watch the flush cycle, and note if water reaches the proper level.
Well-defined directions prevent abuse that causes clogs and damage. A little preventative maintenance goes a long way!
Conclusion
A weak flush usually has obvious, repairable sources. Start by inspecting the flapper, fill level, and lift chain. Search for obstructions in the trap and the rim jets next. Use a plunger, toilet auger, or wire coat hanger to break through obstructions. Replace worn parts such as the flapper or fill valve if water flow remains low. Consider a new toilet or a pressurized-assist kit for stubborn issues or older models. Keep jets clean and don’t flush wipes or heavy paper to minimize future problems.
Once again, attempt one repair at a time. Test the bowl after every step. If the flush remains weak, contact a local plumber for a quick look.
Want a parts list or a step by step repair guide? I can forward you one.
Frequently Asked Questions
What’s the first thing I should check when my toilet has a weak flush?
Start with the easy checks: ensure the water level in the tank is correct and the flapper opens fully. These two problems make up the bulk of weak flushes and are easy to address with no tools.
How can I tell if there’s a partial clog in the trap or drain?
Flush while watching the bowl. Slow draining or bubbling suggests a partial obstruction. Plunge it or use a toilet auger. If problems continue, you may have a sewer-line concern.
When should I inspect or replace internal tank parts?
If neither the chain, flapper, nor fill valve adjustments bring back pressure, check for mineral buildup or worn components. Replace flappers and fill valves every few years or whenever you see a leak or poor function.
Will a low-flow or dual-flush toilet cause weak flushing?
Older low-flow models can suck. New high-efficiency toilets are engineered to make that balance between water and flush power. An upgrade comes to the rescue if repair efforts don’t return sufficient flush power to your toilet.
Can mineral deposits reduce flushing power, and how do I remove them?
Yes. Hard-water deposits can clog jets under the rim and the siphon. Try a descaling cleaner or vinegar soak and brush. For heavy scale, remove and soak the bowl’s rim or call a pro.
How do I prevent weak flushes long-term?
Maintain a clean tank, soften your water if it’s hard, don’t flush junk, and replace the internal parts as they wear out. Checking regularly catches problems early.
When should I call a plumber instead of DIYing?
Call a plumber if more than one fixture is slow, you have sewage backup, your main sewer line is blocked, or if the do-it-yourself steps don’t resolve the weak flush. Experts identify subtle or tricky problems with safety.
Key Takeaways
Hot water tank efficiency, insulation and heat loss. Standby heat loss from your hot water tank is the equivalent of the…

Key Takeaways
Isolate the smell by determining its precise odor, where it is coming from and when it occurs, in order to zero in on causes…