
Instructions for Repairing a Dripping Bathroom Faucet Handle
Key Takeaways
-
Know what you’re fixing before you fix it by inspecting O-ring wear, cartridge failure, packing nut looseness or valve seat corrosion and referencing your faucet model for precise parts.
-
Prepare by pulling together tools, ordering model-specific replacements, shutting off water, and studying the installation diagram to avoid surprises.
-
Follow a step-by-step repair process: remove the handle, expose and inspect the cartridge, replace damaged components, clean the housing, and reassemble in reverse order.
-
After reassembling, restore water slowly. Test hot and cold water, check handle movement, and examine carefully for residual leaking under varying pressures.
-
I’m talking advanced diagnostics for nagging issues. This includes testing the water pressure, testing for hard water damage, and considering a pressure regulator, descaling, or even a complete faucet replacement.
-
Keep your faucet in tip-top shape with regular seal and cartridge inspections, cleaning to prevent buildup, and a maintenance log complete with model numbers for repairs or warranty support.
Fix a leaky bathroom faucet handle – Step by step instructions to stop drips and save water. A loose handle, worn O-ring, or damaged cartridge may cause the leak.
Some simple tools and a replacement part usually do the trick in less than an hour! The guide below provides step-by-step instructions, parts needed, and basic diagnosis.
This will help readers determine the issue and decide if they want to attempt to fix the faucet or call a plumber.
Identify the Cause
Begin by examining the faucet handle and adjacent faucet body to locate where water peeks out. Look for drips, wetness, mineral streaks or shiny spots that indicate repeated exposure to water. Notice if the leak is permanent or occurs only when the faucet is in use.
A leak that shows up only sometimes, such as at night, could indicate fluctuating water pressure instead of a single broken component. Leaky faucets are capable of wasting gallons of water on a daily basis and cause hidden damage to adjacent cabinetry and finishes, so accurate identification matters.
Worn O-Rings
Examine the stem and handle area for crushed, cracked, or brittle O-rings. These little rubber things seal the stem and prevent water from leaking out of the handle base. Unscrew the handle using a screwdriver or Allen wrench.
Some designs conceal the screw under a decorative cap. Check for shiny metal spots, rubber shreds, or black crumbs, which are indications the O-ring has deteriorated. Worn O-rings often lead to leaks right around the handle base and can be a pretty easy repair.
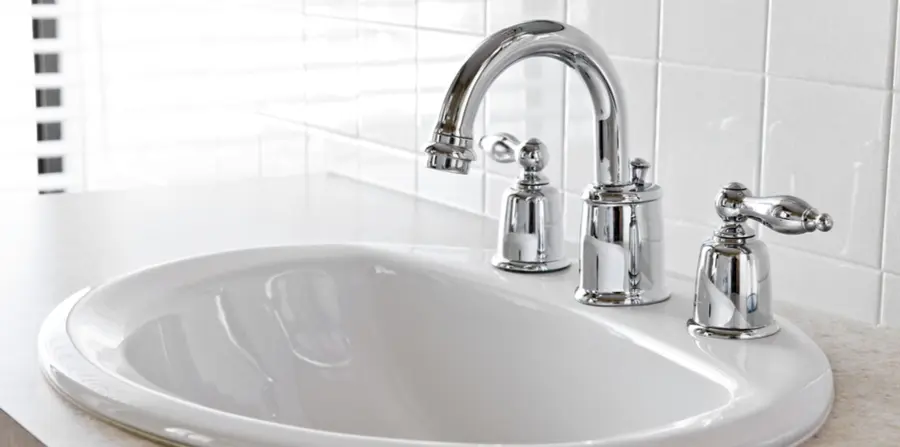
Select replacements that specifically fit your faucet model to guarantee a proper seal.
Faulty Cartridge
Hard handle turning, a handle that sticks, or uneven water flow usually indicate a dying cartridge. Take the handle off, then pull out the cartridge and check it carefully for cracks, scored surfaces or mineral deposits.
Hard water can cause a buildup that can appear like a cartridge failure. Clean lightly to test. If the cartridge is cracked or worn, replace it with a compatible part. Use your faucet’s model number to look up the exact cartridge part number on the manufacturer’s site.
Not every dripping faucet is an easy fix, and some types need those precise-match cartridges to bring back dependable performance.
Loose Packing Nut
Find the packing nut under any decorative button or cap on the stem. A loose packing nut lets water sneak past seals and collect at the handle. Tighten the nut carefully with an adjustable wrench.
Short, measured turns do the job. Overtightening can deform packing or strip threads and make leaks worse! If tightening halts the leak, watch the faucet for return. If leaks continue, change out the packing nut or packing.
Remember that changes in water pressure can make a previously stable packing nut start to leak.
Valve Seat Corrosion
Check the valve seat within the faucet body for pitting or white/green corrosion. Corroded valve seats won’t allow the cartridge or valve to seat evenly, leaking even if you replace all the other parts.
For light corrosion, gently scrape deposits with a flathead screwdriver and sand the surface. Severe pitting means a seat replacement is needed. Consult the faucet’s parts diagram to locate the valve seat and determine the part number prior to ordering replacements.
A leaky faucet can indicate a more serious issue that requires professional help.
Essential Preparation
About: Crucial Preparation) Before you bust it apart, be sure you know the faucet’s general anatomy and what purpose each part serves. Understanding the location of the stem, packing nut, cartridge, O-rings, and handles will save you time and potential errors.
Check your manufacturer’s diagram or online resources for your specific model so you can align parts and instructions to the appropriate layout.
Required Tools
Gather the tools below if you have them before you begin; it prevents pause. A crescent adjustable wrench lets you fit different nuts and bolts without changing tools.
Of course, both flathead and Phillips screwdrivers are needed. Pliers assist with tough clips and tiny pieces. Have a roll of 1/2″ Teflon tape and a roll of 3/4″ masking tape handy for sealing and labeling.
Petroleum jelly is convenient to grease threads on the bottom stem or facilitate O-ring installation. A hand towel or small bucket will catch drips, so stick it under the sink before you start.
A hand towel comes in handy too for wrapping metal pieces so you don’t scratch them when you grab them with pliers or a wrench.
Replacement Parts
Know and source your specific replacement parts before you open your lid. Take the faucet model number to order a new valve, cartridge, O-rings, and seals and washers.
Matching the model prevents any fit problems. Check new parts for defects prior to introducing them to the sink. Warped cartridges or damaged O-rings will wreck the repair.
Common parts to have on hand:
-
cartridge or valve assembly
-
rubber O-rings (varied sizes)
-
flat washers and seat washers
-
replacement screws and retaining clips
-
spare packing nut
-
Mini tube of Vaseline.
Hold onto packaging and part numbers until the job is complete. Snap a photo of the old parts next to the replacements to ensure fit.
Water Shutdown
Find the shutoff valves under the sink or at the wall and turn them off completely, clockwise until tight. Turn a faucet on to let the pressure out and drain the lines.
Keep the handle open to let out any water left. Verify that the water is completely off by momentarily turning on the faucet and observing that no flow comes out.
Lay down a towel or bucket under the work area to catch the final drips. Even with valves off, a tiny bit of water can leak out when lines are disconnected.
If you can’t locate local shutoffs, turn off the master supply for the property and let others know ahead of time prior to starting.
Numbered preparation steps:
-
Review the installation diagram for your model and mark part locations.
-
Gather tools: crescent wrench, pliers, flat and Phillips screwdrivers, Teflon tape, masking tape, petroleum jelly, hand towel.
-
Use the faucet model number to order and check replacement parts.
-
Close shutoff valves. Open faucet and drain lines. Position towel or bucket under sink.
-
Put masking tape labels on parts as you disassemble to make reassembly easier.
The Repair Guide
Start by gathering tools: flathead and Phillips screwdrivers, adjustable wrench, pliers, masking tape, Teflon tape, petroleum jelly, replacement O-rings or cartridge, small container for parts, and clean cloths.
Consult your faucet’s installation diagram for part locations and assembly order. Keep parts organized as you take them off and label with masking tape if necessary. Conquer each problem you uncover in troubleshooting before proceeding.
1. Remove Handle
-
Pry off the decorative plastic button or cap to reveal the screw securing the handle. Pry with a flat blade or your fingernail, and be careful not to scratch the finish.
-
From here, use a screwdriver to remove the handle screw and lift the handle off the stem. If the handle sticks, rock it gently while pulling up.
-
Put the handle and screw aside somewhere safe so you don’t lose them. A tiny box or a taped index card is great.
-
Check the exposed top stem and area for dirt or debris. Keep an eye out for worn threads, exposed O-rings or mineral deposits that might leak.
2. Expose Cartridge
-
Take off any retaining clips or nuts holding the cartridge in place. Check the installation diagram to verify the clip direction.
-
Carefully remove the cartridge from the faucet body with your fingers or pliers. If necessary, hold the faucet body in place with an adjustable wrench.
-
Inspect the cartridge for damage, buildup, or worn seals. Search for cracked plastic, squashed O-rings, or corrosion.
-
Wipe down the cartridge hole and edge before you insert the new part. Wipe clean with a damp cloth and knock off any grit that might inhibit a good seal.
3. Replace Components
-
Place the new cartridge, O-rings, or seals depending on your particular faucet. Use parts matched to the model. Universal parts often fit poorly.
-
Make sure all replacement parts are seated properly and aligned with the faucet body. Use diagram markings and orient tabs properly.
-
Firmly tighten any packing nuts or retaining clips, but don’t be heavy handed. Cover threads under packing nuts with Teflon tape and snug up lightly to stop handle leaks.
-
-
Handle unit 2. O-ring
-
Cartridge
-
Washer
4. Clean Housing
-
Clean out the inside of the faucet body and handle area to remove dirt, debris, or mineral deposits.
-
Use a flathead screwdriver to carefully scrape any persistent buildup off the valve seat or housing.
-
Wash out the cleaned surface with water and dry it well before reassembling.
-
Check for leftover debris that might lead to leaks.
5. Reassemble Faucet
-
Reverse these steps to reattach the handle and replace the screws. Coat the threads of the bottom stem in petroleum jelly if directed by the diagram.
-
Make sure the handle is faced properly against the top stem and moves freely.
-
Put the plastic decorative button or cap back on the cover of the handle.
-
After carefully double-checking all connections for tightness and correct placement, test for leaks with normal water pressure.
Post-Repair Checks
Post-Repair Checks: Once you’ve completed the repair, double check your fix before you declare the job done. This aids in catching trapped air, loose fittings, or residual drips that can cause water damage or a repeat visit. These post-repair checks include restoring water, testing operation, and a targeted leak inspection.
Record everything and any parts replaced so that next time you troubleshoot, it will be quicker.
Restore Water
Gently crack open the shutoff valves under the sink or in the wall to reintroduce water to the lines. Slowly open them to prevent a pressure surge that could knock loose the seals or push debris into the valve. Run water through the faucet for a minute or two. This will purge any trapped air and flush out tiny particles from the cartridge or spout.
Be on the lookout around the faucet, sink basin and drain as pressure returns. Inspect exposed connections at the risers and faucet connectors for prompt seepage. If any leak shows, close the shutoff valves and recheck fittings or seals before restoring water again.
Turn on the flow to normal operating pressure and make sure the faucet doesn’t sputter or hesitate.
Test Functionality
Open and close the handle a few times to ensure ease of operation. Cycle between hot and cold to confirm the mixing valve or cartridge actually routes temperature appropriately and that there is no lag or imbalance. Listen for unusual noises. Knocking, hissing, or grinding can mean a loose part or trapped debris.
Turn handles in various positions and different flow rates to test for resistance or sticky spots. BEFORE YOU LEAVE: CHECK IT TWICE! Post-Repair Checks feel for a temperature difference when switching sides. Uneven temperature may indicate a potential installation problem.
Below is a concise checklist for testing faucet functionality:
-
Cycle handle on/off repeatedly and note any stiffness.
-
Confirm hot and cold settings deliver expected temperature.
-
Run low and high flow to check for smooth adjustment.
-
Listen for abnormal sounds while operating the faucet.
Inspect for Leaks
Inspect the handle area, the faucet body, and under-sink connections for any moisture. Take a dry towel and wipe around fittings and recheck for wetness. This is where slow drips often shine. Let water run at different pressures, even full flow, to catch any seals that might fracture under load.
Inspect for water damage near the sink: check cabinet interiors for soft or rotted wood, discolored surfaces, or damp insulation that indicates past or ongoing leaks. Re-tighten loose nuts at the faucet connectors and risers if any weeping occurs.
Document your work, what you repaired, what parts you used, and any follow-up notes so future service is easy and informed.
Advanced Diagnostics
Advanced diagnostics help you get past quick fixes and discover the underlying cause of a recurring faucet-handle leak. Begin with a brief overall check: look for leak patterns, note when the drip occurs, and confirm whether other fixtures show similar symptoms.
This background directs what tests to run and what components to check first.
Water Pressure Impact
Elevated or fluctuating water pressure can drive leaks through compromised seals and loosened fittings. Test with a pressure gauge at the closest hose bib or faucet. Safe residential pressure is around 300 to 500 kPa.
If readings are higher than this, then install a pressure regulator near the main shutoff. Intermittent spikes can be from a failing regulator or from municipal supply changes. Monitor pressure throughout the day to identify patterns.
Additional pressure reduces the seal life and can cause cartridges or ceramic discs to leak under load. Inspect the faucet internals post pressure tests. If seals appear flatted or scored, replace them and test pressure again.
After installing a regulator, turn on the water to verify the leak stops under normal pressure. Ongoing oversight keeps issues from returning. Keep track of pre- and post-fix pressure readings and tie them to laundry cycles. Small, outdated gauges are cheap and great for spot checks.
Hard Water Effects
Hard water mineral deposits gunk up the seals and valves. Indications are white chalky deposits, roughness on moving parts, or a changed handle feel. Take the handle off and check the cartridge, aerator, and bonnet for scale.
Scrub light deposits with white vinegar left to soak for 20 to 30 minutes, using a soft brush to prevent damage. Severe corrosion or pitting necessitates part replacement instead of cleaning. Replace cartridges and rubber seats evidencing deep deposits.
For long-term prevention, consider having a water softener or point-of-use softening installed for the bathroom. Softened with a salt-based softener minimizes scaling but adds upkeep. A pattern of expenses and replacement periods aids in determining.
Save photos and part numbers when you remove parts. That aids in matching replacements and confirms whether wear is the result of hard water or mechanical stress.
Professional Help Cues
Quick fixes that don’t stop a leak signal deeper problems. Call in a pro when leaks come back soon after part replacement, when multiple fixtures leak, or when metal parts are so corroded it verges on being dangerous, indicating widespread water-chemistry issues.
Seek assistance if concealed corrosion is impacting supply lines or valves lurking behind walls. Some of the more complicated repairs might require soldering or pipe replacement or press-fit tools that you may not have.
A professional plumber will decide to fix or advise a complete faucet replacement if multiple components are damaged. Document every repair step, parts, and observations to provide to the technician. This saves diagnostic time and cost.
Diagnostic Table
|
Issue to test |
How to test |
Likely causes |
Next step |
|---|---|---|---|
|
Fluctuating pressure |
Gauge at faucet, multiple times |
Regulator failure, supply spikes |
Install/regulate pressure, monitor |
|
Mineral buildup |
Visual inspection, vinegar test |
Hard water scaling |
Clean, replace corroded parts, consider softener |
|
Recurring leak after repair |
Run faucet long period, note timing |
Hidden corrosion, worn valves |
Call pro, provide repair log |
Preventative Care
Preventative care, when it comes to plumbing, is about routine inspections and minor interventions to prevent drips before they begin, just as health screenings identify conditions early and prevent major complications. Rinse the ‘faucet handle’ section and drain to keep dirt, soap scum, and mineral scale from accumulating. Wipe handles and escutcheons with a gentle cleaner weekly and scrub the aerator and overflow holes with a soft brush monthly.
Do a vinegar soak of approximately 100ml per small component on metal components to remove mineral buildup. For drains, a quick monthly flush with hot water and a biodegradable enzyme cleaner keeps debris from backing up and stressing seals.
Examine seals, O-rings, and cartridges every few months for initial signs of deterioration. Turn the handle to sense for roughness or sticking, pull off the handle, and check for flattened or cracked O-rings, brittle rubber, or mineral encrustation. Change worn seals immediately to avoid constant drips that waste water and cause corrosion.
Carry basic spares: a set of O-rings, an appropriately sized cartridge, and plumber’s grease. So every time you replace a piece, test the water pressure and temperature to make sure the new part fits well and you don’t have some secret leak.
Maintain a maintenance log, with model numbers and part replacements on hand for easy reference. Tip: Keep track of brand, model, purchase date, and the sizes or part numbers of cartridges and seals. Log cleaning dates, part swaps, and any performance shifts.
This record accelerates subsequent fixes, assists with warranty support, and minimizes time spent wondering what size part to buy. Take pictures of the bottom and of each part prior to removal. Photos assist in matching parts online or by a local supplier.
Take advantage of manufacturer warranties and services like the Kohler faucet lifetime limited warranty or comparable programs for qualifying product assistance. Look at warranty conditions before purchasing parts. Certain brands will cover defective or specific parts for years.
Reach out to customer service with your maintenance log and photos to expedite claims. Consult online resources — installation guides, parts diagrams and step-by-step videos — from highly regarded manufacturers to help guide your repairs.
Preventative care ties to personal and public health: like vaccinations, dental cleanings, and diet, small routine actions prevent larger risks, lower long-term costs, and improve outcomes. Periodic plumbing inspections minimize the occurrence of chronic problems, decrease costly repairs, and optimize system efficiency.
Smart habits — cleaning, inspecting, logging and using warranties — save water, money and time and keep your bathroom fixtures working smoothly for years.
Conclusion
Patching a leaky bathroom faucet handle saves water and stress. The guide showed clear steps: find the leak type, shut off water, gather parts, swap worn washers or cartridges, and test for drips. Use a taped wrench to avoid marking. Tighten just enough. Once fixed, monitor the handle and connections for several days. For persistent leaks, check water pressure and examine valve seats or supply lines. A few checks every few months reduce repair bills down the line.
If you want me to give you a shortcut parts list or a short video link for your faucet model, just tell me your faucet brand and model and I’ll pull out the best steps and parts list for you.
Frequently Asked Questions
What causes a bathroom faucet handle to leak?
A dripping handle typically originates from worn O-rings, a damaged cartridge, or loose components. Mineral buildup and worn seals are typical. Knowing what is causing it allows you to select the proper repair or replacement.
Can I fix a leaky handle without shutting off water?
Be sure to close the water at the shutoff valves or main before taking apart the faucet. This saves you from flooding and guards you while you fix the handle.
How long does a typical handle repair take?
Typically, handle repairs require 15 to 45 minutes, such as replacing an O-ring or cartridge. Complicated repairs or corrosion could take longer or need a pro.
What tools and parts do I need for a handle leak?
You’ll typically require an adjustable wrench, a screwdriver, replacement O-rings or a cartridge, plumber’s grease, and cleaning cloths. Verify your faucet model to purchase the appropriate replacement parts.
When should I replace the entire faucet instead of repairing it?
Replace the faucet if the body is corroded, parts are discontinued, or multiple leaks and poor performance persist. Replacement is a bargain when you wear out repair after repair.
How do I prevent future faucet handle leaks?
Clean mineral buildup. Don’t overtighten. Use gentle handles. Replace seals every few years. Periodic maintenance adds years to faucet life and minimizes drips.
Is it safe to use WD-40 or similar sprays on faucet parts?
Don’t use penetrating oils on rubber seals for long. Use silicone-based plumber’s grease for O-rings and metal parts. Oils will eat through seals and cause additional leaks.

Key Takeaways
Understand typical issues such as drain clogs, incorrect installation, and pump or hose malfunctions to target fixes where…
Key Takeaways
We recommend changing your evaporator pad at least once a year, prior to the heating season. Coordinate the change with…